Advertisement
At some stage, most boats will develop a leak. Here we look at leaks below the waterline and how to find and fix them.
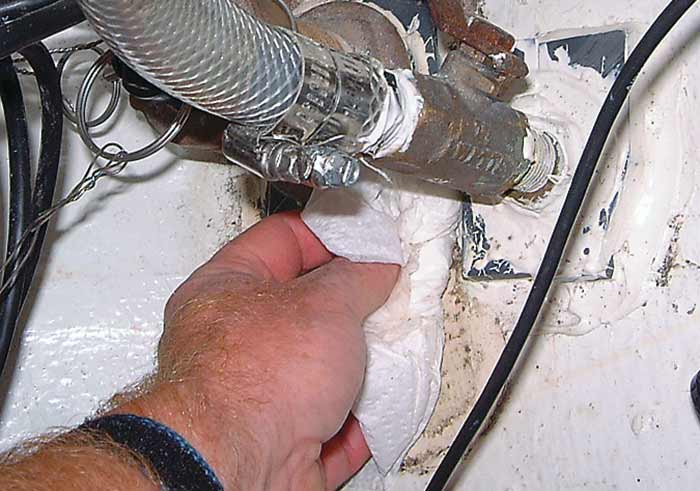
Use a paper towel to thoroughly dry the fitting and surroundings.
Although there are rare examples of the coveted dusty bilge, most owners expect to do a little dewatering on their boat occasionally. However, leaks from above and leaks from below are not created equal. Discounting rainwater leaks, some boats are tighter than others and it's important to know what the normal bilge water accumulation is for your boat. Mental calculations may be required to assess the "normal" state.
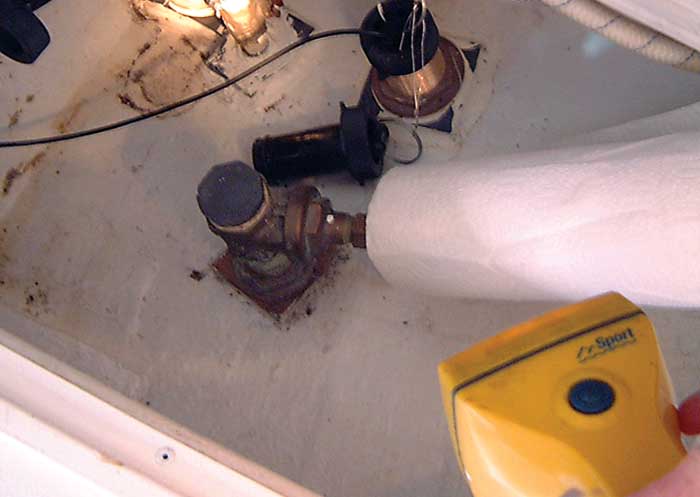
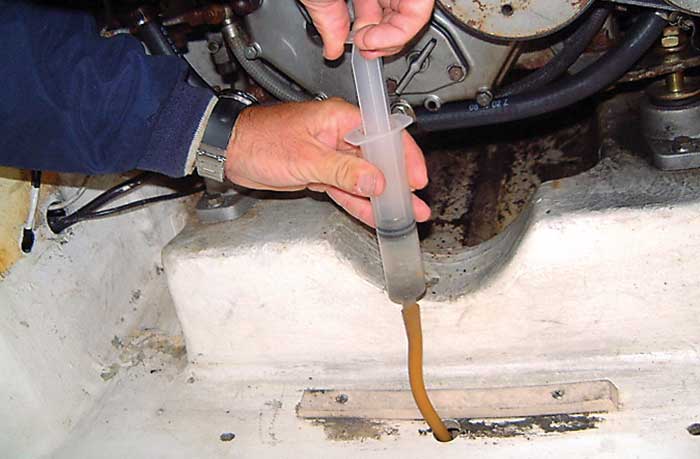
Here's a good example. The stuffing box drips every 15 seconds, yielding .12 fluid ounces in 15 minutes and translating to about one quart every three days or so. Not a big deal. If you know what's normal for your boat, you should be able to judge when a leak is getting worse. A bilge pump counter (available at West Marine) is an excellent investment that can be wired into the bilge pump circuit to alert you to potential leaks that might otherwise go unnoticed. Just beware of the faulty logic that a leak ignored will eventually stop.
Unexpected water below the floorboards can be a scary surprise and a mystery leak should make you nervous. After all, you don't know if it's a minor issue, such as that pesky tapered plug on a worn seacock, or the harbinger of doom, a critical component somewhere that is hanging by a thread and just waiting for the right Murphy's Law moment to let go. There can be no peace of mind until the leak is identified and fixed.
Finding The Leak To Nowhere
Often, finding the leak is more time consuming and difficult than fixing it. This is why many repair facilities often suggest: "You find it, we'll fix it." That can be money-saving advice.
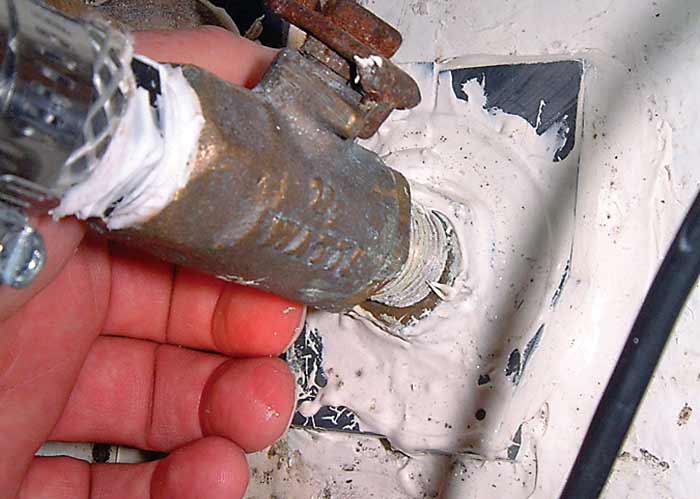
Easy-to-find leaks occur at hull fittings. Tools required to find these leaks are simple: a roll of paper towels, flashlight, and small mirror. Check the inside skin of the hull by hand for wetness trickling down from any thru-hull, rudder port (often visually inaccessible), the shaft log, stuffing box, and strut fasteners. Other culprits are trim tab and swim-platform mountings. If it feels wet, move in for a closer inspection. Use the paper towel to dry off the hull and the fitting, and inspect closely using the flashlight. Look for the first appearance of a trickle or drip. Dry it again and verify you are seeing the first point of emergence. Use the mirror to check the backside of the fitting. On a thru-hull, for example, it's important to determine if the bedding compound sealing the thru-hull is leaking, or if it's an attached valve or hose.
Tools of the trade: flashlight, paper towel, and fingertips.

Leaks at skin fittings are comparatively easy to find.
Fingertips are a superb wetness sensor, often finding a leak that is impossible to see.
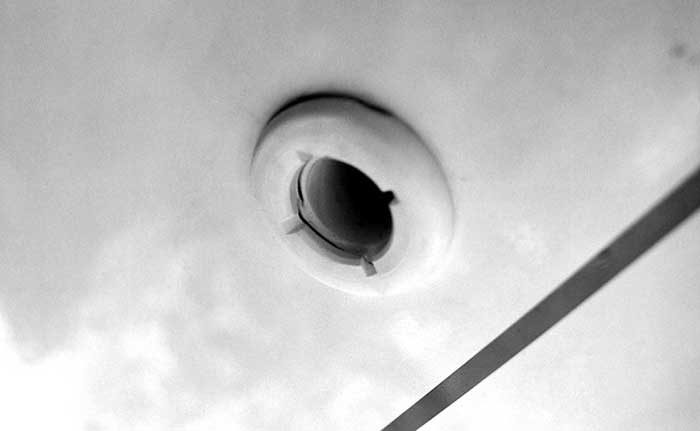
Pay attention to fittings above the waterline. The crack in this plastic fitting means the boat need only sink about an inch or two before it floods.
On a stuffing box or rudder port, you must differentiate between a routine drip at the packing gland, which can be controlled by an adjustment of the stuffing box nuts, and a more sinister leak from a cracked shaft log tube or from under the backing plate of a rudder port assembly.
Finding a leaking keel bolt on sailboats requires that the bilge or keel sump be mopped perfectly dry so that the very first drop of water welling up from under a backing plate or, worse, from a crack can be positively identified. Powerboats with stern drives most commonly suffer from leaks originating at the U-joint or the bellows. These can be hard to see but look for a slight trickle of water on the inside of the transom below the transom assembly. Many of the sources of the leaks described only become apparent when the boat is underway, "working," so to speak. Seeing them when the boat is quietly afloat in its berth may be impossible. What happens if all the below-the-waterline fittings on the hull check out as dry but the bilge keeps filling up with water? At this point, detective work is required, employing a logical methodology to follow the clues.
First Clue: When Does The Leak Occur?
If, for example, water in the bilge stops rising at the same time the water tank is found empty, it's logical to conclude the two are related. That's an easy one. Is the leak constant whether underway or at the dock? If it only occurs underway, does it happen at every outing, only in big sea conditions, or only at certain speeds? Any intermittent leak needs to be caught "in the act," requiring you to carry out testing underway to duplicate the circumstances under which the leak occurs. The waterline of any boat moving at displacement speeds peaks at the bow wave and the stern quarter-wave. This can submerge thru-hulls that are well above the waterline at rest. Other intermittent leaks can originate at the engine cooling system or running gear and will only show up when the engine is running. If a sailboat only leaks when it's heeling over, a keel bolt or keel sump crack leaking under load or a fitting on the leeward hull side siphoning into the bilge might be implicated. In this case, change tacks and observe what happens.
Second Clue: Where Does The Leak Originate?
If the leak is constant, dry the bilge and identify the direction from which the first trickle arrives. This will at least narrow the search for the point of entry to port, starboard, forward, or aft. However, leaks are devious and boats are built with hidden conduits and inaccessible compartments. The location at which the leak exits into the bilge may be a long way from its entry point into the hull.
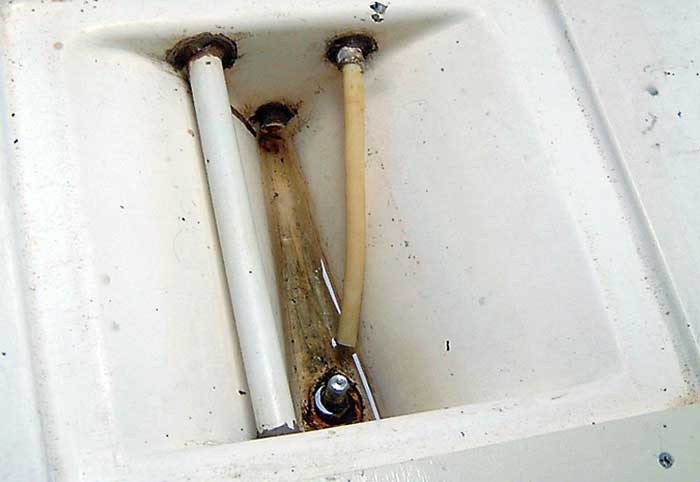
Inner liner mystery leaks: Water arrives via the limber holes and collects in the bilge sump, but where does it originate?

Adding an inspection port in the liner or double bottom can open inaccessible locations.
Inaccessible spaces below the floor may hold water, requiring you to cut an access hole to get a pump in there.
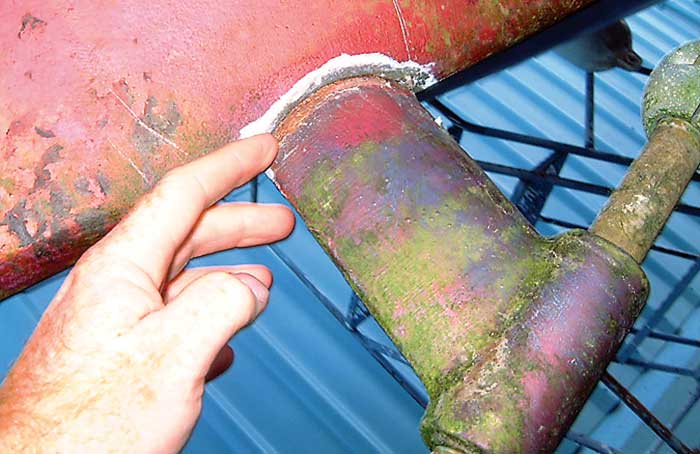
This embedded prop shaft strut is suspected of causing a hidden leak. Whether the repair was successfully will be known after launch.
If the leak appears to originate from inside a closed compartment or from under the edge of a hull liner, it may be necessary to cut an access hole and install an inspection port to close the hole later.
Leaks on sailboats with full keels and encapsulated internal ballast can be tricky to diagnose. These boats usually have two lines of defense. The hull skin itself is the first defense and is usually a very thick layup at the leading edge and keel bottom. Given that boats with deep keels do occasionally run aground, the builder will usually cap the ballast with a secondary glass layer across the top of the keel. This secondary defense forms the floor of the bilge and will keep the boat dry in the event the hull skin is holed. It's safe to assume that if there is a leak at the inner skin, there must also be a leak at the outer skin.
Powerboat hulls, too, can often hide problems. Many have a double bottom filled with flotation foam or arranged with liners so that the inner skin of the hull cannot be seen without destructive measures. If the leak's origins are truly hidden, the best option is to haul the boat and search the outside of the hull for damage. It helps to leave the bilge full of water and look for the telltale trickle of water leaking out.
Fixing Leaks
Leaks at hull fittings, such as seacocks, valves, hoses, instrument senders, and running gear, are common and usually straightforward to fix. Generally, any leak at the bedding compound sealing a thru-hull or hardware bolted through the hull requires hauling the boat and complete removal and reinstallation of the fitting. Attempts to add "goop" to the outside perimeter of the fitting, or the inside, rarely succeed. Unfasten and remove any hoses or valves and then unscrew the clamp nut or individual fastening bolts securing the fitting. After cutting away as much old sealant as possible, a thru-hull can usually be pushed or knocked out from inside the boat. The old sealant will probably have a strong grip (even though it's leaking) and it may be necessary to "gently" break the fitting loose with a dead-blow hammer. This can be a wood mallet or even a small sledge, provided you use a softwood block between a steel hammer and the fitting.
Through-bolted hardware with an external flange such as a rudder port or prop shaft strut will probably need to be wedged and carefully pried loose. A two-inch or wider chisel works well for this. After removal, clean all the old sealant off the hull and fitting. Check the fitting carefully for cracks or corrosion. Proper reinstallation requires lots of polyurethane sealant under the outside flange, on the edges of the hull opening, and on the inside of the hull under the backing block. Replace any old wood backing blocks with new wood or, even better, a piece of UHMW polyethylene or some StarBoard scraps. Replace any corroded fasteners with new ones.
While you're at it, inspect the hose connected to the thru-hull. Replace any cracked, weathered, or substandard hoses and inspect hose clamps, too. If there is a garden-variety gate valve on a thru-hull, replace it with a quarter-turn ball valve or seacock that meets the material and testing requirements of ANSI/UL 1121, as specified by American Boat and Yacht Council (ABYC) standard H-27.5.2.