Advertisement
If you’re sick and tired of that ice chest sliding across your deck every time you hit a wave, There’s a simple solution

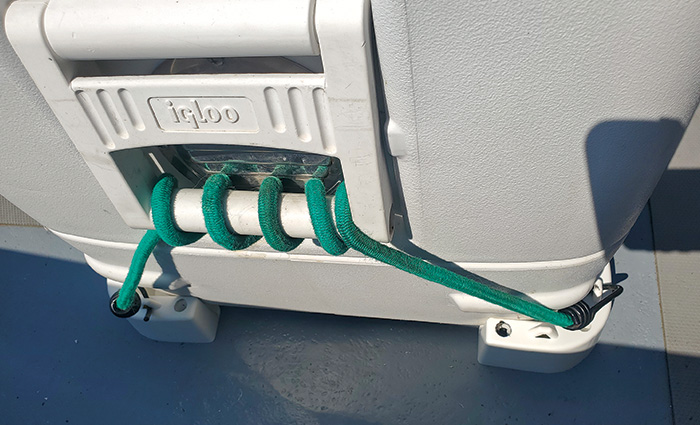
Anchor the cooler using a bungee cord wrapped around the handle a few times with each end hooked onto the holes in a chock (inset).
Difficulty
- Easy
Tools
- Grease pencil
- Power drill and bits
- Screwdriver Materials
- Chocks
- 3M 5200 adhesive/ sealant
- Screws
Time
- About an hour
Cost
- $30 to $50
Some coolers will slide on a fiberglass nonskid deck like the proverbial egg on a well-greased griddle. When a beam sea has you rocking and rolling, that cooler can become the also-proverbial wrecking ball. Even in seas, boat coolers can present something of a hazard if they aren’t properly secured in place because they often become de facto seats that can easily spill resting passengers onto the deck. The solution? Cooler chocks will keep that big box nailed down in place. And, fortunately, adding them to a boat is fast, easy, and inexpensive.
1. Identify the chock locations.
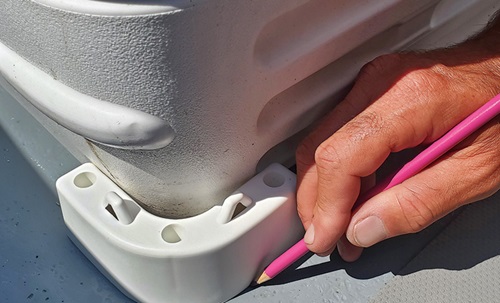
Place the cooler where you’d like it secured on a semi-permanent basis, then slide the chocks in around the four corners. Mark their positions with the grease pencil, then remove the cooler.
2. Drill pilot holes.
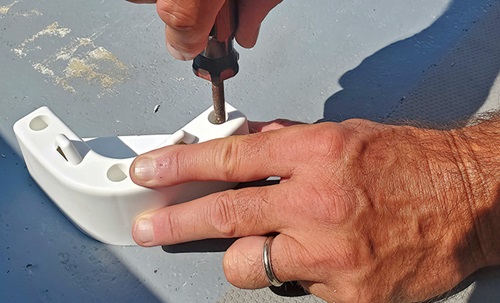
Because the screw recesses in most cooler chocks are too narrow to fit the grease pencil for marking holes, you’ll need to hold each chock firmly in its marked position and use it as a template. Insert the drill bit into one recess, drill a pilot hole for the first screw, then drive a screw partially in to temporarily keep the chock in place. Ensure the chock is still in its proper position, then drill the remaining pilot holes.
Tip

With the cooler and chocks in place, mark the chocks’ positions with a grease pencil.

After drilling all the pilot holes and adding a dab of adhesive/sealant, drive in the screws.
3. Mount the chocks.
Remove the temporary screws and chock and add a healthy dab of 3M 5200 adhesive/sealant at each screw hole. Remember that the chocks will be subjected to multidirectional stresses, and you don’t want moisture creeping into your boat’s deck, so don’t be tempted to use a weaker sealant – you need to be sure water won’t creep into those holes.
Place a chock in its marked position, drop a screw into each recess, and use your screwdriver to tighten them down. Then move on to each of the other chocks one by one, until all are firmly screwed in place. Allow the 3M 5200 to fully cure before moving on to Step 4.
4. Place the cooler in the chocks and use a bungee cord to secure it in place on either side.
If the cooler sits in direct sunlight, you’ll only get a season or two before the bungee cords need to be replaced. You should, however, enjoy many years of nonsliding cooler enjoyment from the chocks.
Plastic protection
While you can’t do much to prevent UV deterioration when it comes to the bungee cords, you can extend the lifespan of the chocks themselves. Chocks exposed to direct sunlight may last three to five years before yellowing and weakening. To slow the deterioration, coat them with a product like Star brite Xtreme Protectant, Plexus, or 303 Protectant. Do so every few months, and you can double the plastic’s lifespan. — L.R.
