Advertisement
Avoid crooked screws, a leaking deck, and a busted butt by following these simple steps.
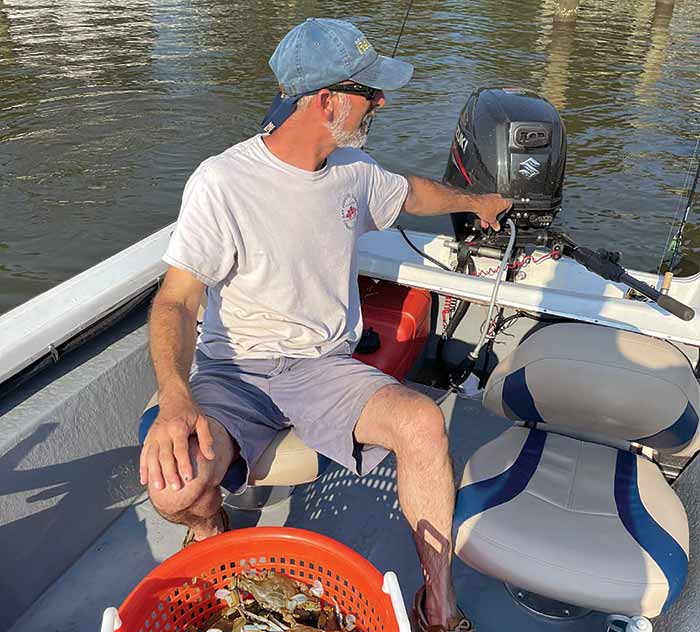
Installing a seat base pedestal is a job that many DIY boaters will tackle at some point. It seems like it should be a very straightforward task — just hold the base down and run your drill through the holes. But often the toughest part of this job is getting the screws in perfect alignment. Not only do crooked screws look ugly, the uneven stress they're under can lead to caulk pulling free and, eventually, a leaking deck.
In addition, there are a few things you need to consider before you start drilling. Among them, you'll need to decide where to position the seat base so it isn't too far back or too close to the wheel or tiller. Remember, not only do you want to be able to reach your steering while sitting, but probably also while standing in front of the seat if you have a center-console arrangement.
It's also important to determine the type and solidity of the decking under the seat and the structures (if any) under the deck. Some fiberglass boats have thin decking, which may or may not be cored. If possible, check under the deck to determine supporting structures such as beams or ridges. (For more on this, see "Getting Inside The Issue" on below.) On a boat like this 16-foot skiff with a plywood deck and no under-deck access, we aren't able to do that. However, plywood offers better screw retention than fiberglass. Just be sure that the fasteners you use are of the right size and type for the purpose.
Getting Inside The Issue
If it's practical and safe, try to peek under the deck before you install your seat base. Screwing or bolting the seat into a supporting structure may be better than just using the thin deck. Often bolts are far better than screws because you can add substantial backing washers and nuts. Screws can, over time, weaken the decking around their threads, gradually working loose. When your boat pounds with you in the seat, the stress on the fasteners can be severe. Access allows you to get a wrench to the nuts to tighten them and may also allow you to use a backing plate to offer additional security. Also, you don't want the end of your screw or bolt to be too close to the hull.
If you don't already have access, you may consider installing an inspection port (available at West Marine and other chandleries) near the area where you want to mount the pedestal. Don't make this too close to where you want to install your seat base, as doing so could weaken the deck in that area. (Sound the deck first for underlying structures that could interfere with installation.) Then you can use an inspection mirror to see what you're working with.
Once you've completed the install, be sure to wait for the caulk or adhesive/sealant to completely cure as per the manufacturer's instructions before using your boat. Then get ready to hit the water and enjoy some fishing, crabbing, watersports, or whatever strikes your fancy.
You say you want your seat pedestal base to look and perform like it was installed by a true pro? We tagged along with Riley Digennaro, senior marine tech at Pasadena Boat Works in Pasadena, Maryland, to learn his trick for getting the job done right.
Technical Support
Difficulty: Easy to medium
Tools and Materials:- Drill with bits
- Screw or bolt driver
- Seat base pedestal
- Appropriate fasteners
- Marine caulk or adhesive/sealant
Time: About half an hour
Cost: Around $150
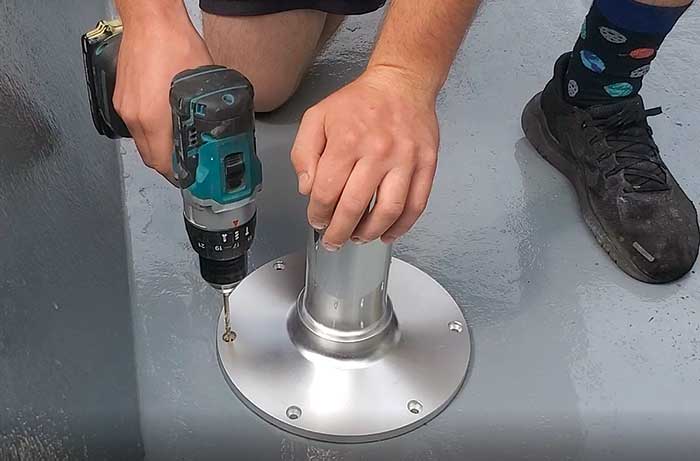
1. With the base and pedestal lined up to where you want it, drill a single hole through one of the base's mounting holes.
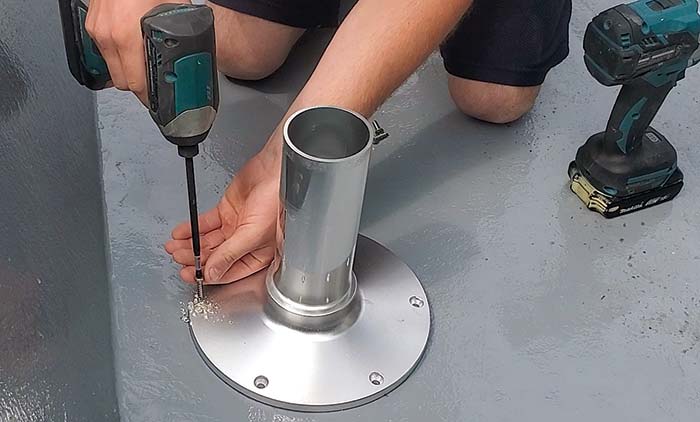
2. Without caulking it, run a bolt or screw into the hole.
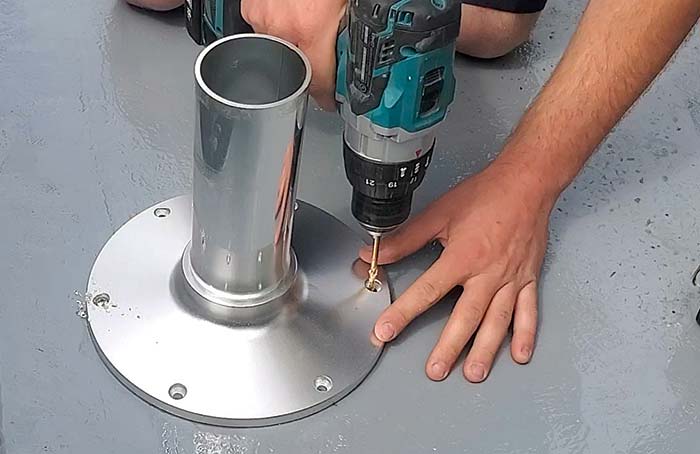
3. On the opposite side of the base drill a second hole.
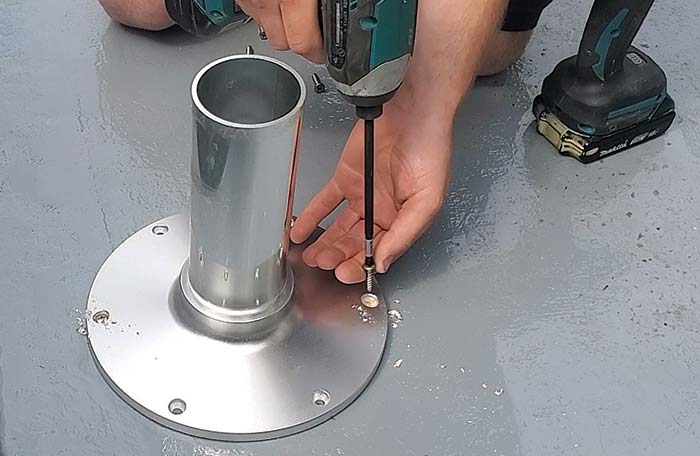
4. Again, drive in a bolt or screw without caulking it.
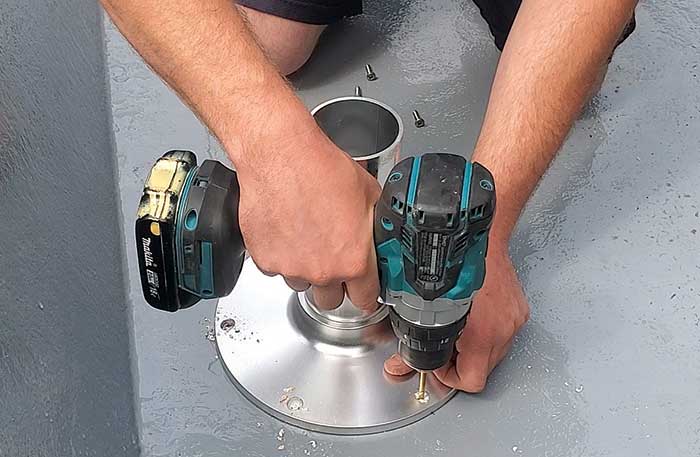
5. With the two screws or bolts on opposite sides of the pedestal securing it in place, you can now drill all of the remaining holes without worrying that the base may get jostled out of position — which commonly happens at some point, if you try to drill all six holes without securing it in place.
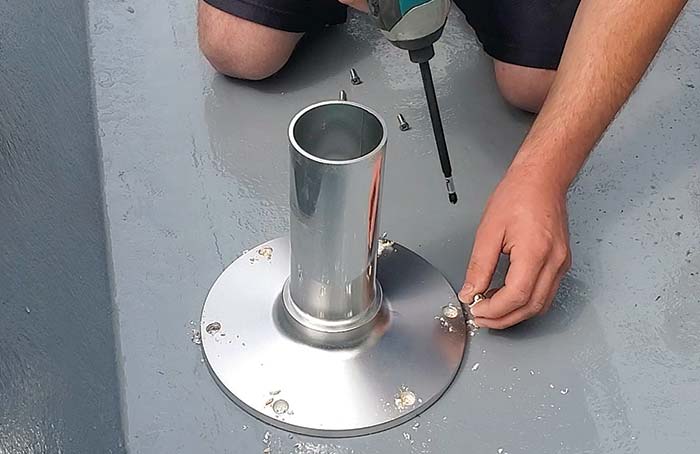
6. Next reverse your drill, back out the two fasteners you had put in, and remove them.
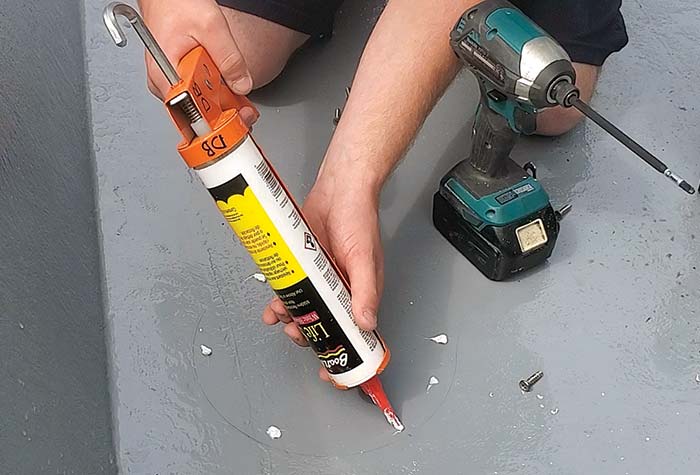
7. Remove the pedestal and clean off all the shavings and fiberglass dust created by drilling the holes. Then apply a healthy dab of marine caulk or adhesive/sealant on each screw hole and preferably into the holes to seal any coring.
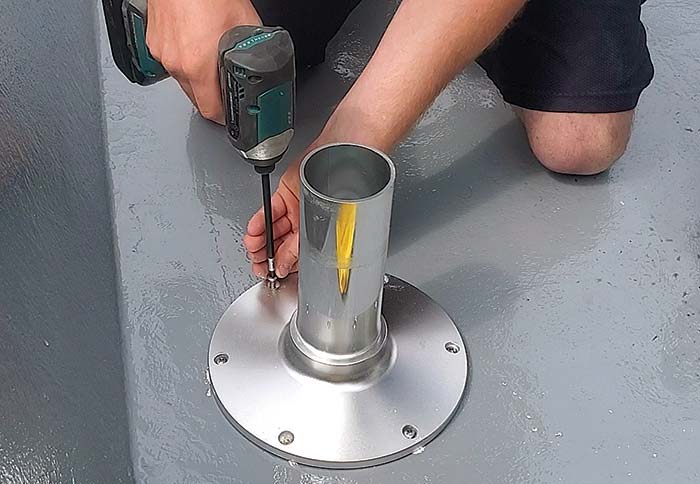
8. Replace the seat pedestal base, lining up the holes with the caulk dabs. It helps sometimes to push one fastener through one of the holes in the base and use it to line up the base over the holes as you set it down. Then drive in all of the fasteners.
