Advertisement
Here’s your Spring Fitting Out Safety Checklist. Complete safety inspection of the engine, hull, and other systems should take, at most, an hour or two.
Out of the Water
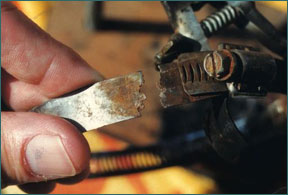
- Inspect and lubricate seacocks. Hoses and hose clamps (two at each fitting below or near the waterline) should be inspected and replaced as necessary. This is also the best time to replace gate valves, if any, with seacocks. Gate valves are prone to failure and not as reliable as seacocks. You also can’t glance at a gate valve to see that it’s been closed.
- Replace deteriorated zincs. They disintegrate and give a good indication of what would happen to vital underwater machinery if the zincs were not there. Note: If the zinc has vanished or has been reduced to powder, check the other metal surfaces, especially underwater, to ensure they didn’t also suffer from electrolysis. Zincs that disappear after less than a season indicate a serious problem with the boat’s bonding and/or electrical system. (Look first for chafed wires or battery cables, which also can cause a fire.)
- Inspect prop(s) for dings, pitting, and distortion that can create excessive vibration and can loosen everything from screws and bulkheads to dental fillings. Make sure cotter pins are secure. “Tired” props, incidentally, can be rejuvenated by a machine shop. Finally, grip the prop and try moving the shaft. Looseness indicates the cutlass bearing probably needs to be replaced.
- Check to make sure the rudder stock hasn’t been bent. Also try moving the rudder: Any looseness must be corrected (the remedy depends on the type of installation).
- Inspect the hull for blisters, distortion, and stress cracks. Small “pinhead” blisters can be dried, sanded, and filled. Large blisters may require professional attention. Distortion and/or stress cracks are two other hull problems that should be addressed by a marine surveyor or repairer.
- Make sure the engine intake sea strainer is free of corrosion and is properly secured. Strainers that weren’t drained properly in the fall could’ve been bent by ice over the winter. Replace questionable parts.
Outdrives and Outboards
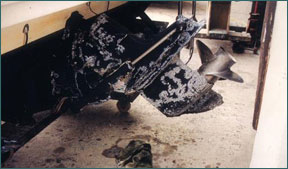
- Inspect rubber outdrive bellows for cracked, dried, and/or deteriorated spots (look in the folds). Replace suspect bellows.
- Replace deteriorated outdrive zincs.
- Check power steering and power trim oil levels. Follow the manufacturer’s maintenance schedule or use a factory-authorized mechanic.
Control Cables
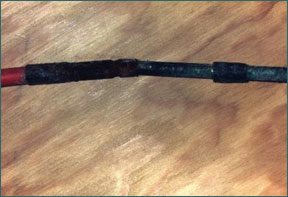
Inspect Outer Jacket. Cracks or swelling indicate corrosion and mean the cable must be replaced. (Note: Don’t try to remedy the problem by squirting lubricant into the cracks or wrapping duct tape around the outer jacket; most lubricants are incompatible and will only make things worse.)
In the Water
- Check the engine shaft and rudder stuffing boxes for steady leaks and looseness. Some weeping or even an occasional drip should be evident at the engine-shaft stuffing box (not the rudder). If leaking can’t be stopped by tightening the nut, repack the gland. (Caution: Over-tightening the nut prevents leaking underway, which will burn out the packing material.)
- Use a hose to check for deck leaks at ports and hatches. Renew caulk or gaskets as needed. Don’t rely on a bilge pump to overcome a multitude of deck leaks.
Advertisement
Engines and Fuel Systems
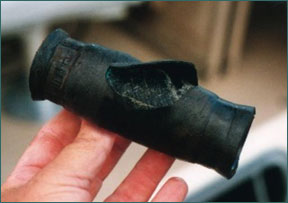
- Inspect fuel lines, including fill and vent hoses, for indications of softness, brittleness, or cracking. Any that are suspect should be replaced with Coast Guard-approved J1527 hose. Check joints for leaks (or use your finger and look for stains under or around the fitting) and make sure all lines are well supported with non-combustible clips or straps without rough edges.
- Inspect outer jacket. Cracks or swelling indicate corrosion and mean the cable must be replaced. (Note: Don’t try to remedy the problem by squirting lubricant into the cracks or wrapping duct tape around the outer jacket; most lubricants are incompatible and will only make things worse.
- Inspect all fuel-system components for leaks -- fuel tanks, fuel pumps, filters. A dry rag can be used at connections or trust your nose. Clamps should be snug and free of heavy rust.
- Clean fuel filters.
- Exhaust manifolds should be removed and inspected every few years for corrosion, which could be restricting water flow.
- Clean and tighten electrical connections, especially both ends of battery cables. Loose connections can “arc,” which creates an enormous amount of heat and is a fire hazard. Studs, nuts, and washers should be copper -- not aluminum or steel. Dissimilar metals have the potential to cause galvanic corrosion. Problems ranging from a weak contact to arcing could be the result of poor washer choice. Wire brush batter terminals and fill cells with distilled water.
- Cooling hoses and fittings should fit snugly and be double-clamped. Hoses showing signs of age -- rot, stiffness, bulges, leaks, and/or cracking -- should be replaced.
- Inspect bilge blower hose for leaks.
Sailboat Rigging
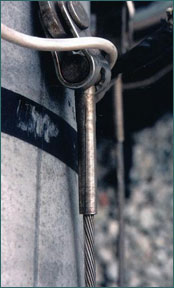
- Fittings, especially swage fittings, should be inspected for cracks and rust. Wire halyards and running backstays also should be inspected for “fishhooks” and rust, which snag fingers and indicate that the standing rigging is nearing the end of its useful life. Ensure spreaders bisect the shrouds at equal angles.
- Remove tape on turnbuckles and lubricate threads (preferably with Teflon). Give the turnbuckle a twist or two to prevent mechanical freezing. Replace with fresh tape.
- Chainplates mounted through the deck should be caulked as necessary, preferably every two or three years. Leaks can cause problems, ranging from delaminated cores to rotted bulkheads. Hint: Remove ALL old caulking.
A Few Other Chores
- Refill or replace fire extinguishers as necessary. (Mount extinguishers where they’ll be clearly visible.)
- Stoves and remote tanks should be examined for loose fittings and leaking hoses.
- Throw out or take ashore all propane canisters, solvents, and rusted cans. They’re a fire hazard and shouldn’t be stored aboard.
- Clean bilge. Inspect bilge pump and float switch to ensure they’re working properly.
- Replace outdated flares. Keep old flares aboard as spares.
Trailers
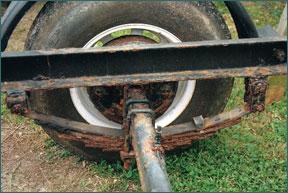
- Inspect tire treads and sidewalls. Cracks on sidewalls, or lack of tread, indicates the tire may be replaced. Use a gauge to check pressure. Don’t forget the trailer’s spare tire.
- Sand and paint rusted areas.
- Inspect bearings. Repack as necessary.
- Test tail and back-up lights. Replace burned-out bulbs and chafed wires. Corroded terminals should be cleaned. Make sure the white ground wire is securely attached to the trailer’s frame.
- Test the winch, manual or electric to ensure it’s working properly.
