Advertisement
A removable trailer-light board halts corrosion before it can happen.
Dunking your trailer lights in the water can lead to corrosion and premature failure. Prolong their life by mounting them on a board that you can easily remove before backing down the ramp.
You ran down your preflight checklist before leaving home this morning, your boat and trailer in tow, so you know the brake lights and turn signals on your trailer were working fine. You got to the ramp, launched your boat, had a great day on the water, and loaded up with some great memories. As per your routine, you check the lights one more time before heading out. Why aren't they working?
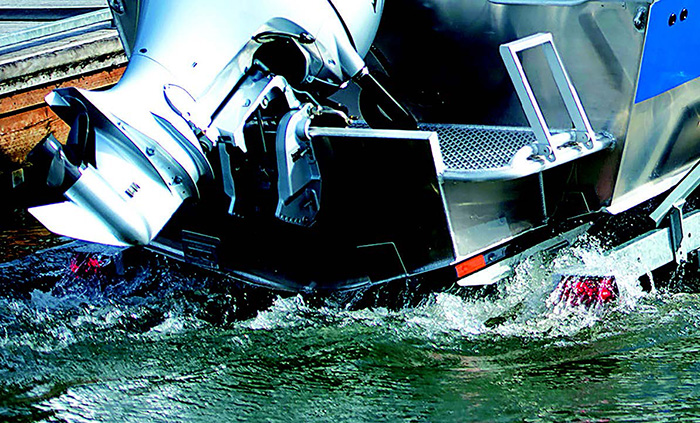
Lights for boat trailers are a tricky business — particularly on trailers dipped regularly in seawater. While a quick freshwater rinse and a generous dose of corrosion inhibitor after each dunking may chase corrosion away from electrical connections for a while, it's only a matter of time before corrosion wins. What's more, the waterproof seals around trailer lights fight a losing battle against basic physics: Light bulbs, especially incandescent ones, create heat as they create light. When you dip those warmed housings into colder water, the pressure difference stresses plastic lenses and rubber seals. They soon fail.
One solution for dinghies and very small boats is to build a light board that never gets dunked. For less than $40 you can buy a trailer-light kit that includes left and right taillights, two sidelights, and an ample length of wiring harness, including the connectors for both the vehicle side and the trailer side. Together, with simple tools and a few odds and ends, plus an hour or two of your time, you can create your own lasting solution to this perennial problem.
It's worth mentioning that many modern trailer lights use LEDs instead of incandescent bulbs — it's what we used for our project. They cost a bit more upfront, but their life is far longer, making the additional outlay a better bet.
Tip
Regulations for trailer lights come under both federal and state jurisdictions. These stipulate color, placement, height, and width of any lights or reflectors. For example, some jurisdictions mandate that trailer lights be installed no lower than 15 inches off the road and no higher than 60 inches, and that they extend to the trailer's widest dimension. Be sure your lights comply with the laws of any jurisdiction in which you'll be driving, including those regarding illumination of the license plate. (Search online for "trailer light requirements by state" for a variety of good resources.)
To create a removable board for your trailer lights, mount them on a rigid structure of wood, metal, or composite material, and make sure the height and width dimensions in the final installation meet the regulations for the roads on which you'll be driving. It's very important to securely attach your light board to the boat or trailer, so spend some time thinking through this aspect. We've seen G clamps, boards that attach to a rudder pintle on the transoms of sailing dinghies, ratchet straps, and even strategically placed nuts and bolts used. What works for you depends on your particular rig. Just make sure it's secure.
Marine Insurance Trailer Safety Tips
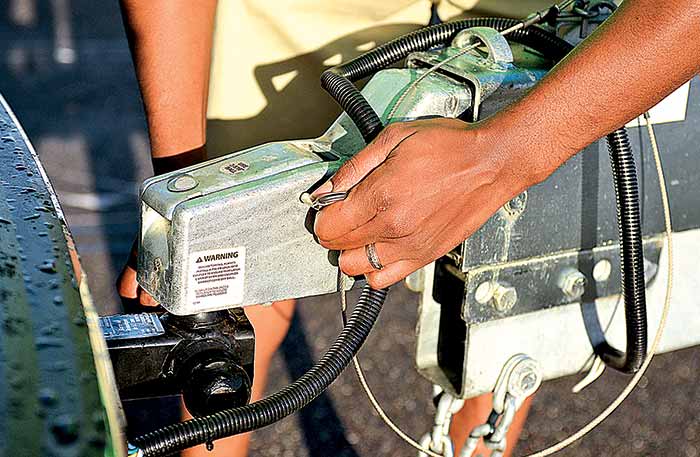
Photo: Jason Arnold
Weight Distribution
Five to 10% of the total weight of the boat, motor, trailer, and gear should be on the trailer ball when the coupler is parallel to the ground. Too much weight on the ball, and the vehicle will be difficult to steer. Too little weight on the ball, and the trailer is prone to fishtailing — excessive swaying from side to side.
Positioning The Boat
To reduce the chances of sagging or oil-canning (flexing) that could permanently disfigure or even weaken the boat's hull, the boat should always be level and supported evenly, with rollers or padded bunks concentrated in critical areas such as the engine and chine. On boats with outboards or I/Os, transoms must be well supported.
Securing The Boat
Keep in mind that when you're barreling down the highway at speeds of 65 mph or more, the boat will be buffeted by near hurricane-force winds. Anything loose on the deck or in the cockpit, including things like biminis, will probably be blown away. Either stow them below or make sure they are secured. Heavy straps should always be used to anchor the boat's stern to the trailer. Don't rely solely on the winch cable to tie down the bow. Use a separate line from the bow eye down to the trailer. When you're traveling, check the straps and the bow eye itself whenever you stop.
Safety Chains
Use safety chains, crisscrossed between the car and the trailer coupling. Should the hitch fail, the chains will keep the trailer from flying off the road. Leave enough slack to allow for proper turning, but not so much that it drags. Using a shackle/ pin is far more secure than relying on the standard S-hooks, which have been known to jiggle loose.
— Charles Fort
Putting It All Together
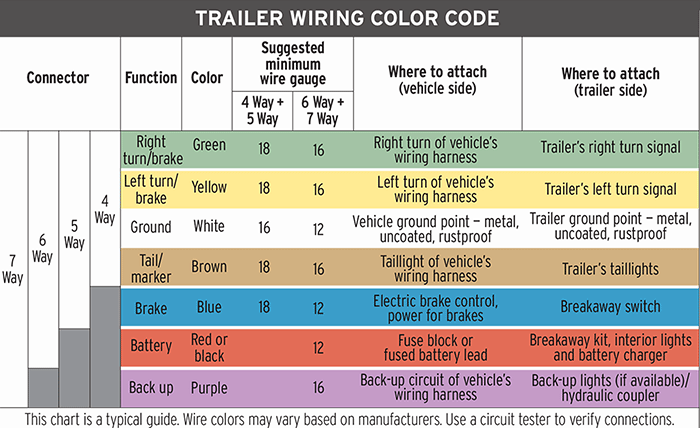
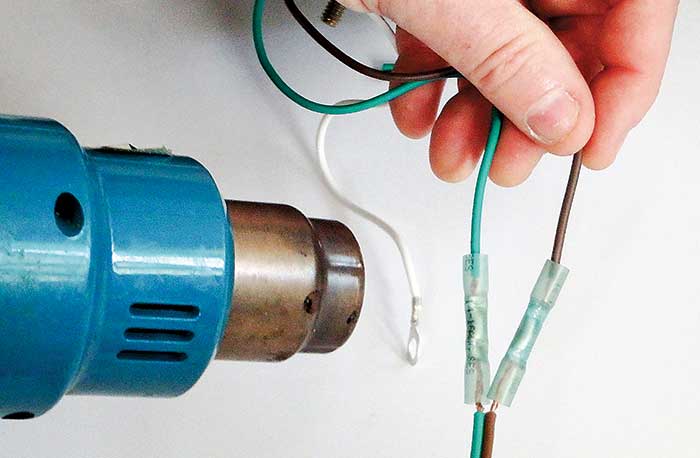
Let's assemble the lights and wiring. A typical wiring harness for trailer lights is based on four conductors. The connector for this harness is called a "flat-four." Each of the four conductors has a unique function, and the insulation of each follows a standard color code. (See "Trailer Wiring Color Codes" below.) Briefly, the brown conductor supplies power to the taillights; yellow supplies the right turn signal; green supplies the left turn signal, and white is the electrical ground. Each of these feeds should be at least #18-gauge AWG wire; the white ground should be at least #16 gauge.
Because our lights came with a cable harness and molded-on plug, all we had to do was trim the cables to length and make the connections to the trailer light pigtails — the short wires attached to each of the light fittings. Because your connections will be subjected to weather and vibration, I recommend using crimped heat-shrink self-sealing terminals. Make sure to use terminals sized for the wire gauge you're using. How tightly should you crimp your terminals? In simple terms, give it a solid tug and hold. If the wire pulls out, or if any strands break, start again with a new terminal. Typical kits provide lights with the properly colored conductor tails already installed. Match each conductor to its corresponding color on the trailer-side harness, and join the conductors using self-sealing butt terminals as described above. Once you've crimped the terminals, carefully apply heat until the terminal cover shrinks and the sealant adheres to the insulation all the way around the wire.
Tip
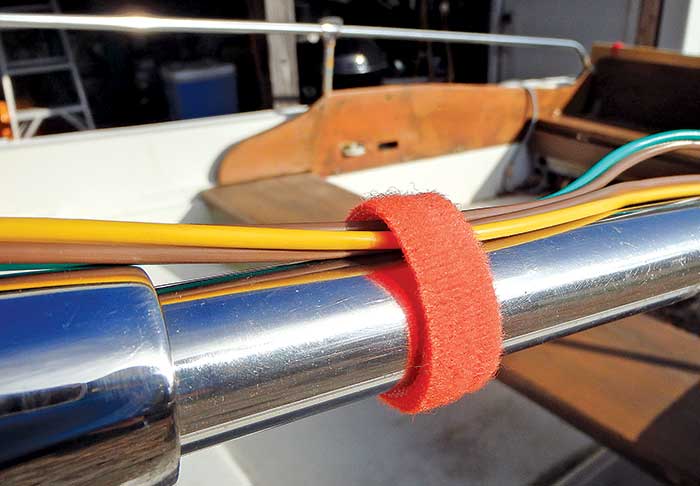
Mount the board securely, and run the wire neatly to the vehicle connector. Secure the wire at intervals of no more than 18 inches. Quality hook-and-loop straps are a neat quick-release material for securing your wire run.
Now when you arrive at the launch ramp, simply remove the light board, roll up the wire, and stow it in your dry vehicle — then splash your hull.
Technical Support
Difficulty: Easy
Tools & Materials:- Wire strippers
- Heat gun
- Crimper
- Screwdriver
- Drill
- Two-by-four board cut to width of trailer
- Cable
- Heat-shrink
- Lights
- Screws
Time: 2 hours
Cost: $40
How To Install A Removable Trailer Light
Step-By-Step Instructions
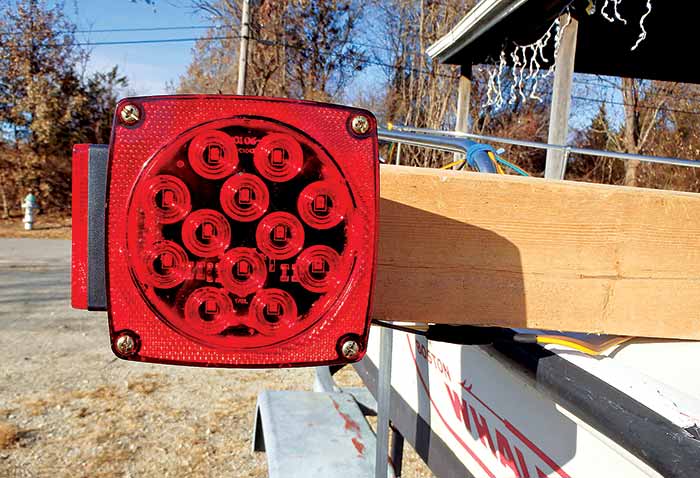
1. Begin by screwing the lights to each end of a suitable board. I used a two-by-four that I cut to the same overall width as the trailer.
2. The harness that came with my lights was 25 feet long, far longer than I needed for my 12-foot boat. After cutting down to a suitable length, I stripped the wire ends and joined these to the pigtails coming out of the light fittings with heat-sealed crimped connectors.
3. Hook-and-loop straps are ideal for attaching the wiring harness to the boat or trailer. They can be easily removed at the ramp before launching the boat.
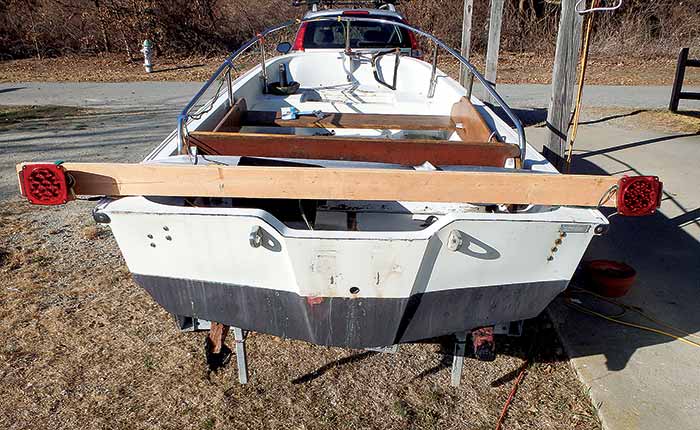
4. With the light board strapped across the boat at gunwale height, lights are easier for following motorists to spot than those mounted lower on the trailer.
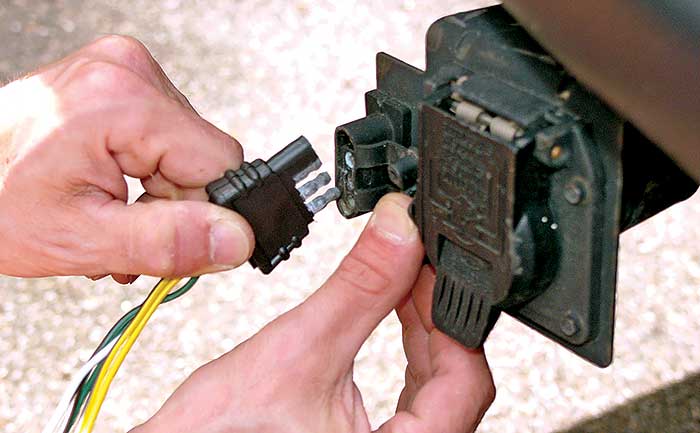
Photo: Mark Corke
5. You may need an adapter (commonly called a flat-four plug) to plug into the back of the tow vehicle if you don't have a built-in socket as this truck does.
4 Important Points To Remember
- Any light bar should be easily visible to following drivers.
- Your light bar must be easy to attach and remove and should fit in your vehicle while you're off boating.
- Use suitable straps or clamps. Use only marine-grade wiring with secure, waterproof connections. You don't want wires getting snagged or shorting out.
- A light bar is best for small boats. If your craft is more than 80 inches wide (6 feet, 6 inches), federal regulations require side marker lights. You also need a white light over your trailer's license plate at night if you tow after dark or if otherwise required by law. Check and comply with all local and federal laws. These may change.
— Mark Corke