Advertisement
This is the best way to finish the end of a line that's going to be subjected to wear. Here's how to do it.
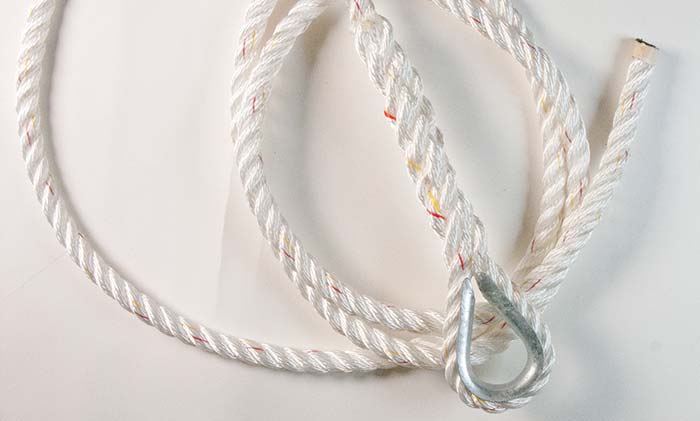
This is what a tidy thimble splice should look like when you're finished.
Spliced eyes in the ends of lines are useful for a variety of purposes around the boat. Ideal for making a permanent loop in the end of a line, they're both neater and stronger than a knot and look far more seamanlike. Adding in a "thimble," a plastic or metal reinforcement, to the loop, reduces chafe and spreads the load on the line. A thimble will often be used for mooring pennants and anchor rode where a length of nylon line attaches to a chain with a shackle.
Tip
The opening size of the thimble is dictated by the line diameter. Thimbles are sized according to the diameter of the line with which they'll be used. A thimble that is incorrectly sized will work its way loose.
Jargon Buster
Line: The correct name for any rope used on a boat. By tradition, one of the only "ropes" on a boat is bell rope. Everything else is more properly referred to as "line." Even so, the terms "line" and "rope" are often used interchangeably.
Fid: A specialty tool that holds braided line open to assist the creation of a splice.
Working end: The part of the line that is worked with to form any knot or splice.
Standing part: Part of the line onto which the working end is attached to form any knot or splice.
Lay: The direction that the individual strands are twisted to make up the line.
Tech Support
Degree Of Difficulty: Moderate
Tools and Materials:
- Knife
- Scissors
- Lighter
- Fid
- Whipping twine
- Masking tape
Time: 15 minutes.
Cost: Nothing, if you already have the line, thimble, materials, and tools.
Step-By-Step
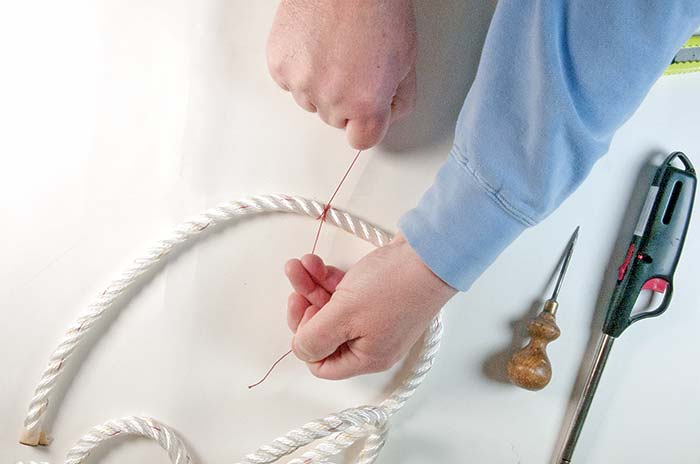
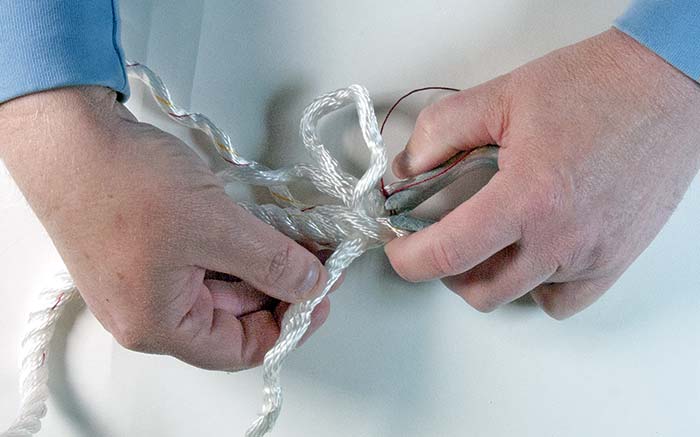
1. Use some whipping twine to tightly tie around the line a distance at least five times the diameter of the thimble from the end of the line. The twine will prevent the line from becoming unraveled as you work the splice. (Note: The line I'm using has a red thread in it. Don't confuse this with the red whipping twine.)
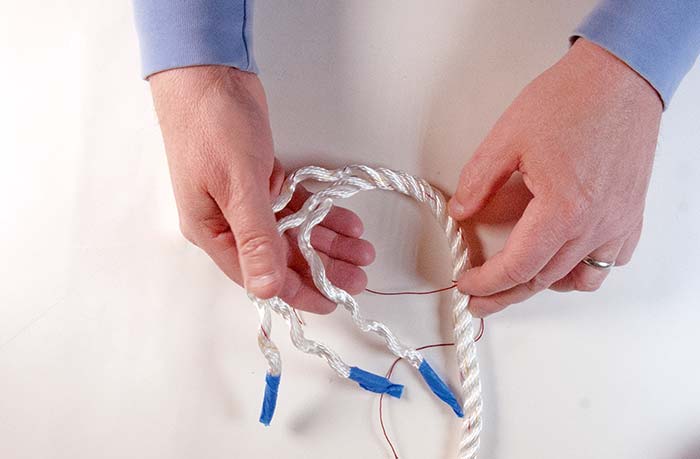
2. Unlay the three separate strands of the line back to the whipping. Tape the ends of each of the three strands with masking tape to keep them together and to make the line easier to splice. Some folks burn the ends of the strands to stop them coming unraveled; I prefer not to do this because it creates a hard spot that makes forming the tucks difficult.
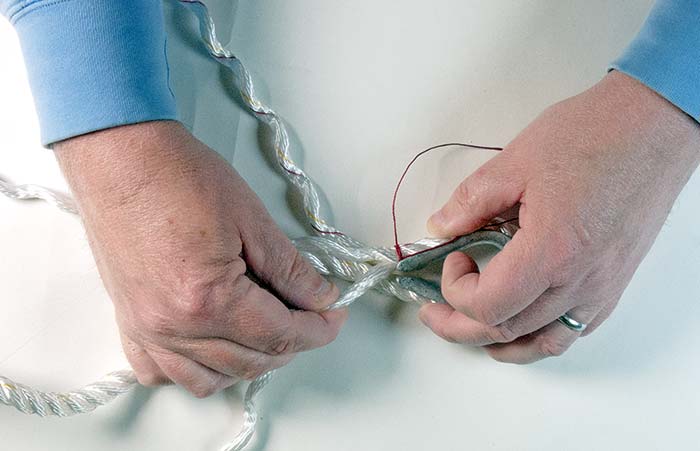
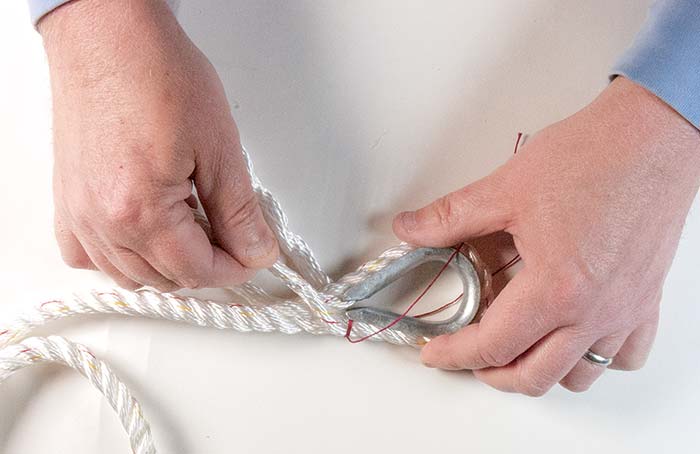
3. Getting started is the hardest part. Line up the whipping twine with the closed end of the thimble, as shown.
4. Holding the line snug and tight between thumb and finger, grab the strand closest to the top and work this under the strand immediately opposing it on the other side of the thimble.
5. Turn over the line and thimble, being careful to hold the line in place. Using the strand closest to the thimble, thread this second strand under its immediately adjacent neighbor on the standing part, remembering that the tucks go against the direction of the lay.
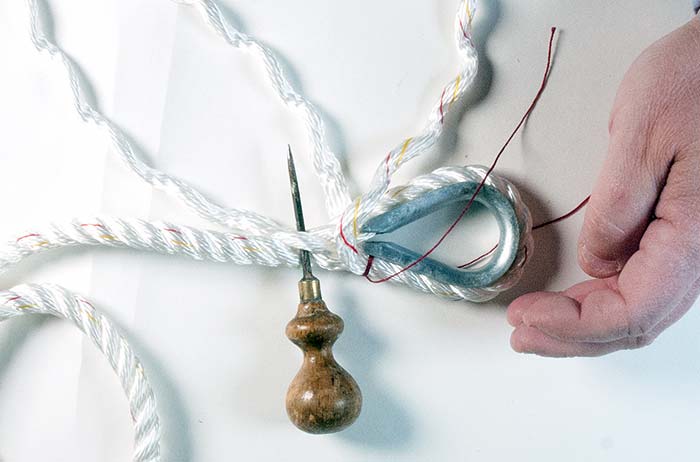
6. Tuck in the third strand between the two you just completed in the previous steps. A fid sometimes helps to open up the line if it's tight.
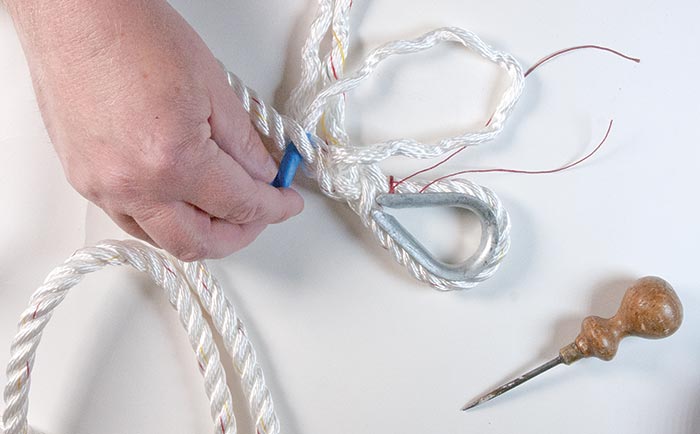
7. Making sure that the thimble is tight within the eye you just formed, continue making alternate under-and-over tucks in all three strands, pulling each one tight as you go.
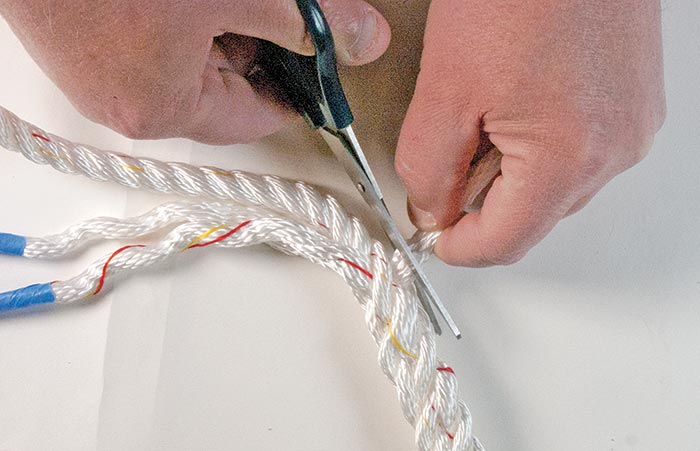
8. Keep going until you have at least five tucks, then trim back the ends with a pair of scissors or sharp knife. Carefully trim off the temporary whipping you installed earlier, but be careful not to cut the underlying line. Although not essential, a final step is to seal the ends of the cuts with a lighter.