Advertisement
Here's how to go over your rig with a fine tooth comb.
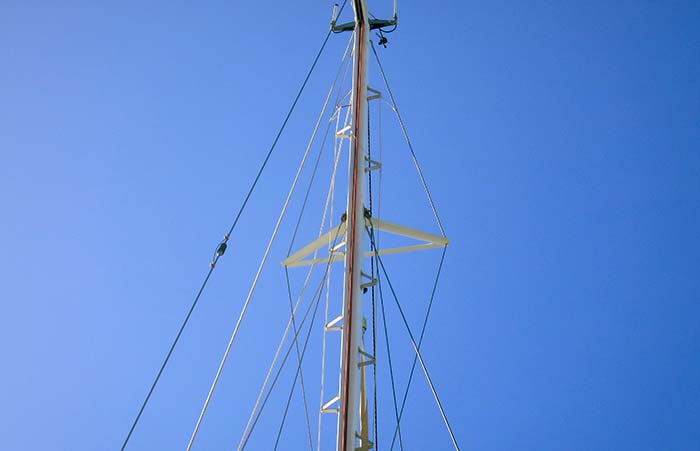
Sight up the mast. Is it straight?
If there's one thing production sailboats have in common, it's that nearly all of them use stainless-steel standing rigging, whether wire or rod. There are likely also stainless steel fittings, chainplates and turnbuckles. Stainless steel is a great material for rigging but has its Achilles heel: corrosion. Stainless steel in a saltwater environment will eventually suffer from some form of corrosion, whether it's stress-crack corrosion, fatigue cracking or crevice corrosion. Sailboat rigging in freshwater may also suffer from stress and fatigue cracking (see below). What might appear to be a small crack or area of pitting will degrade the fitting by eating away at the metal. Any cracks or corrosion will weaken the fitting, and the failure of a single fitting can bring down a rig.
Stainless Steel Failures
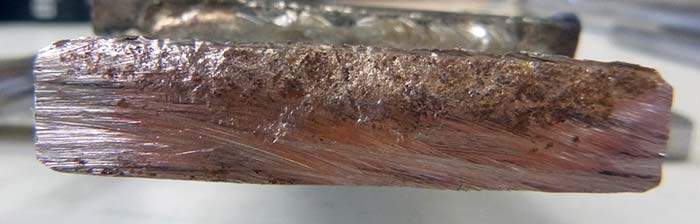
Stainless-steel rigging under heavy stress can have stress cracking or fractures that will often be identified by hairline cracks. These cracks will lead to stress-crack corrosion and crevice corrosion in the saltwater environment.
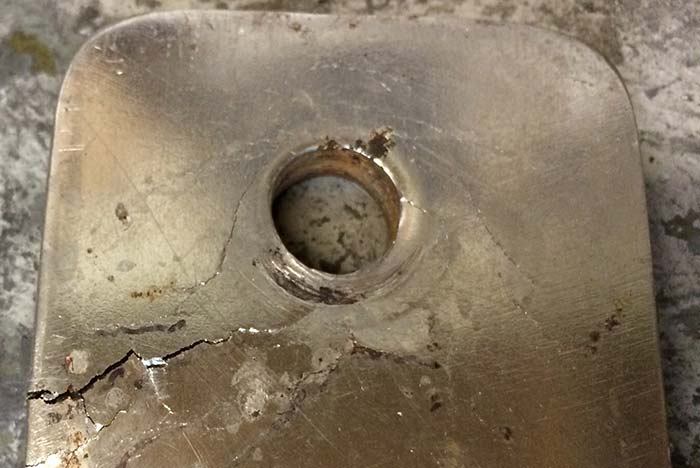
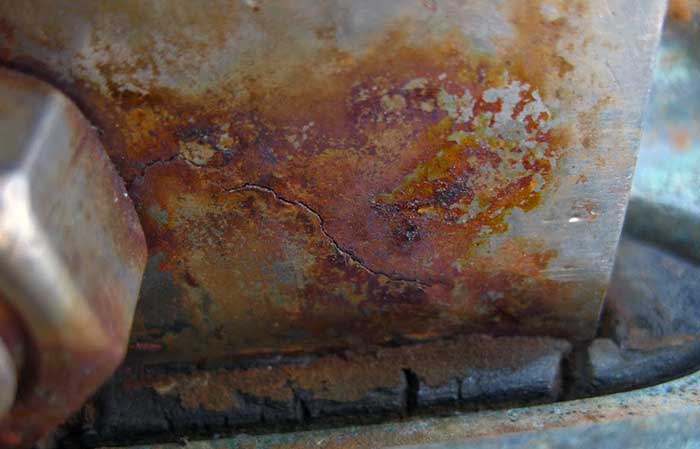
Crevice corrosion can also develop in areas of pitting when the stainless steel is devoid of oxygen. This is the most common form of corrosion on a stainless-steel chainplate. This chainplate was cut in half to demonstrate how far the pitting went into the metal.
1. Take a look at the overall rig
Sight up the rig from deck level. How is the geometry? All stays and shrouds should be run without any bends and at even angles. Are there hard spots or kinks where a stay has an awkward bend? Standing in front of the mast, sight up from the base. Is the mast in column (straight)? There should be no bends in the mast side-to-side or facing forward. Walk around to all of the shrouds and stays and give them a pull. They all should feel roughly at the same tension. To be accurate, you would want to use a tension gauge. But when I first start inspecting a rig, I'm mostly trying to get a feel if anything appears to be dramatically out of tune.
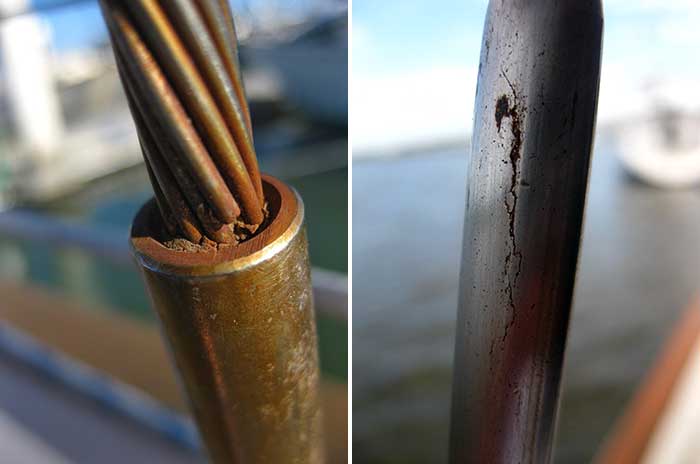
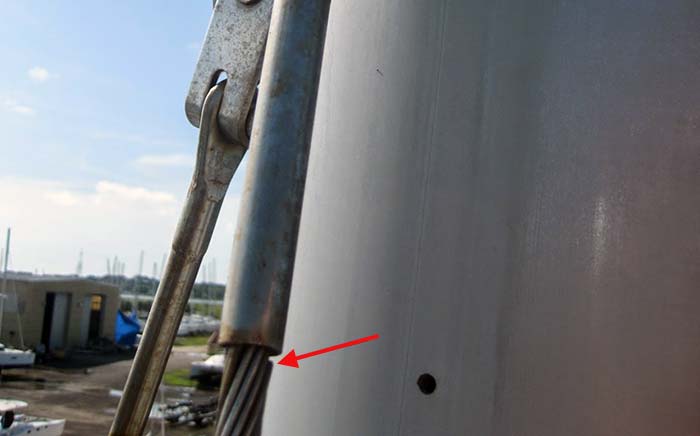
Left: Inspect swages carefully for corrosion; this swage has broken strands. Right: This crack was only visible after cleaning off the surface rust.
2. Inspect all the deck fittings and wire.
If the mast is deck-stepped, start at the base, looking for corrosion on the step and cracks in the base of the mast. Then working clockwise to make sure you don't miss anything, inspect all fittings from eye level to deck level including swages/mechanical fittings, turnbuckles, chainplates, and toggles. Start with the wire at eye level, and scan downward, checking for rust and broken strands. For rod rigging, we're looking for cracks or corrosion. Take a good look for corrosion where the wire enters the swage or mechanical fitting. Next check the t-bolts, tangs, turnbuckles, and pins. Clean any rust off with the Scotch-Brite pad. This is important: anything more than light rust staining could be an indication of crevice corrosion, which weakens the metal. You may not be able to remove all of the rust, but you do need to see the underlying metal. Use your magnifying glass to look for cracks and pitting on the fitting. The turnbuckles should be straight without any bend to them. Inspect the condition of the threads of the stud. Ensure the turnbuckles have locking pins. Photograph the fittings, especially where you think you have sighted a crack or pitting. Get up close with the camera on the macro setting and make sure that the area of concern is in focus; this is important when you enlarge the photo later.
This chainplate has a crack just above where it passes through the deck.
3. Pay attention to the chainplates.
Inspect the caulking where it enters the deck; it should not be cracked or peeling. Look for cracks in the chainplates on the edges and especially around the pinholes. For external chainplates, inspect along the edges for cracks and rust blooms. A small amount of rust may be OK; it might just be staining, though it should still be investigated. But significant rust is a sign that there may be crevice corrosion, which is a reason to pull and inspect the chainplates. Unfortunately, the area that is probably affected the most is buried and not visible unless the chainplate is removed. Stainless-steel corrosion happens much faster when there is no oxygen present — like where the chainplates pass through the deck, which is why we'll inspect them belowdecks as well.
Look for peeling paint, which may be a sign of corrosion, and cracks at the gooseneck and other boom fittings.
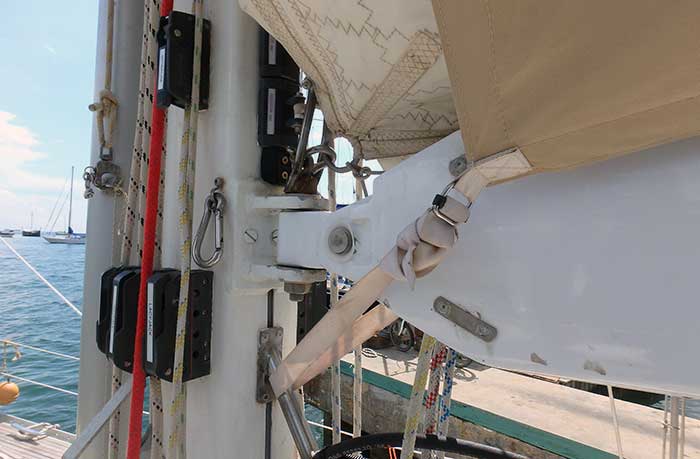
4. Inspect all attachments to the mast and boom on deck and at eye level.
Inspect the gooseneck fitting for the mast and the vang attachment for corrosion or cracks. Any attachment points on the boom for running rigging also need to be inspected. Again, take close-up photos if you find any problems. Check all blocks to make sure they turn freely. All shackles should be secured with seizing wire. The winches need to turn freely and stop when the direction is reversed. Do the line stoppers stop the line? Give the line a good tug with the line stopper closed. There should be no movement. Inspect each piece of the running rigging for wear. What is the condition of the halyard and the safety line (a second halyard) you will use for going aloft? Don't take chances here.
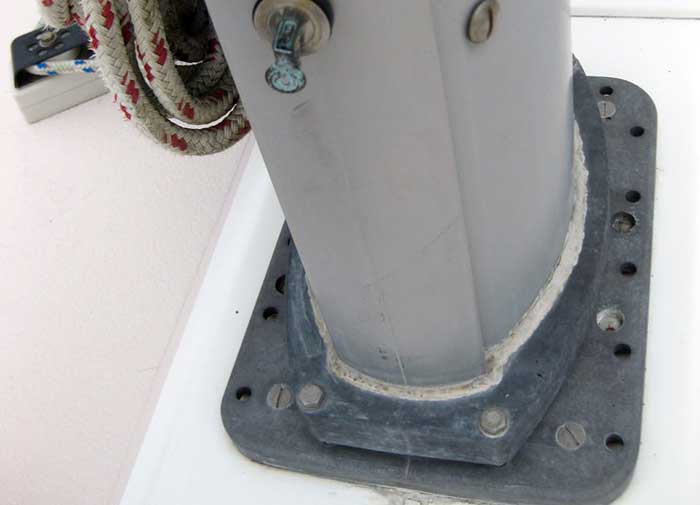
Check for white powder and pitting on aluminum mast steps and at the base of the mast.
5. Inspect the condition of the mast step.
Mast steps here are often in a damp environment, and a lot of mast steps are made from non-stainless steel on older boats, which can rust. Some boats have an aluminum mast step. If the step or base of the mast is corroding, it will have white powder on it. Remove the powder and look for pitting underneath. If you find pitting here, or on any other aluminum fitting, such as the mast or boom, have a rigger follow up with a professional inspection.
Painting chainplates is a bad idea because it hides corrosion. Once rust is visible through the paint, the corrosion is severe, and the chainplate will need to be replaced.
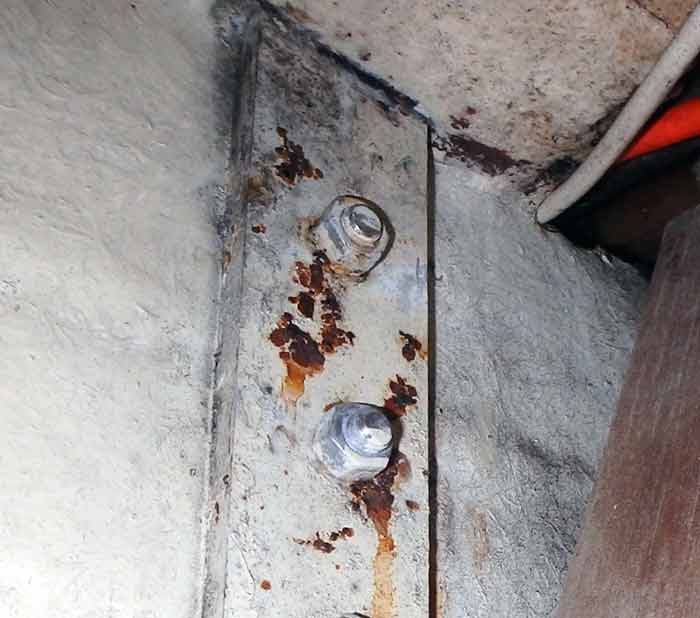
6. Go below to take a look at the chainplates.
Are there signs of water intrusion on the bulkheads? You might have to remove some cover panels to gain access to the chainplates. Are there signs of rust? Clean any rust with your nylon pad. Use a flashlight and your magnifying glass to inspect the chainplate carefully. Pay close attention to the edges of the chainplate for rust and cracks. Cracks and corrosion can develop behind the chainplate and where it passes through the deck. Again, these are areas that are deprived of oxygen where crevice corrosion will develop. Chainplates don't last forever, and if you want to be absolutely sure you can count on them, I'd recommend replacing them after 20 years of service or if there are any signs of crevice corrosion, which can happen in less than 15 years in harsh environments.
Broken wire at swage fitting on a catamaran mast head.
7. If you found no deficiencies then it is time to go up the mast.
If you are not comfortable, then I recommend having a professional rigger conduct the aloft part of the inspection. Never do this by yourself, even if you have a hoist that allows you to do so. Have someone there to assist you and to manage your safety line. For the aloft portion of the inspection, work your way up from the bottom, rather than starting at the top. This way, if you are at the spreaders and find a cracked swage fitting, you can make the decision to stop. This part of the inspection will be conducted in the same manner as the lower fittings and chainplates, this time also paying close attention to where fasteners are installed into the mast. On an unpainted aluminum mast, we are looking for the white powder and pitting which are signs of corrosion and can lead to hairline cracks. Again, if you clean the powder away and find pitting, you'll need to have a professional rigger take a look. On a wooden mast, you're looking for soft wood and discoloration where the fastener goes into the wood. For carbon fiber you're looking for cracks. Inspect the spreader ends and tips for wear and the condition of the boots.
8. Thought you were finished?
Not yet. Now go find somewhere comfortable and view all of your photos on a tablet or computer. Enlarge them to help find any cracks or pitting. This is why you took your photos in order and made notes about what was what. Discuss any of your findings that concern you with a professional rigger. Save all of your photos in a file so you can compare them the next time you do the inspection.
Now that you've done a bottom-to-top rig inspection, you can feel more comfortable the next time the wind pipes up. At the beginning of each season, take an hour or so to re-inspect the rig, focusing on the areas you might have noted to keep an eye on.