Advertisement
Want to be the envy of the marina? Here's how to add a breathtaking finish to your brightwork.
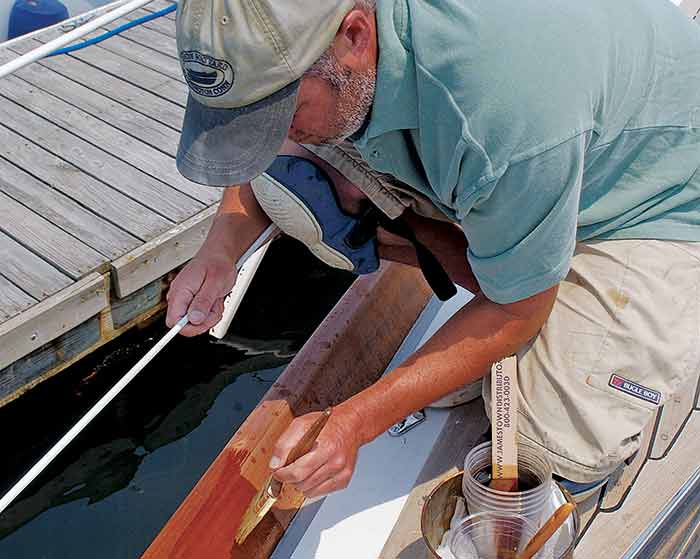
Varnish on a warm day — early in the morning, if you can — and the varnish will have a chance to dry before the evening dew can damage the finish.
Walk along the docks at any marina and there's sure to be several boats that catch the eye, standing resplendent above their neighbors. Glistening in the sun, the perfect brightwork draws your eye to the gracious sheer. You wish you could get your own varnish work to look that good. Well, you can — with a little effort and know-how.
What Is Varnish?
Varnish, simply put, is paint without the pigment, and it protects wood from sun, sea, wear, and tear. If it makes the wood look good in the process, that's a bonus. My first attempts at varnishing were poor to the point of embarrassment, but they did the job of protecting the underlying wood. With each application comes an opportunity to do better than last time; practice really does make perfect.
Varnish is a mix of resins, oils, and solvents (see "Choosing The Right Varnish"), although newer varnishes often have synthetic materials blended in to improve flow characteristics. Choose one type of varnish and stick with it. Don't dismiss a varnish too quickly just because you're not getting the finish you desire; it could be your technique or such other outside factors as temperature, high humidity, and dust.
Tools For The Job
The one essential tool is a decent brush. While modern varnishes are somewhat forgiving in terms of technique, they're very unforgiving of the wrong brush. Never use an inexpensive synthetic brush to apply varnish — the bristles will come out, and it's unlikely to have sufficient body to hold enough varnish. Many pro varnishers like to use high-quality badger-hair brushes; these have excellent flow characteristics and can produce spectacular results. However, I've become a big fan of foam brushes, and I know some pros who use them almost exclusively. They don't shed hairs to mar the finish, and they seem to hold just the right amount of varnish. Most beginners lay on varnish too thickly, and in warm weather, this leads to a condition known as "alligatoring," when wrinkles appear in the varnish and make the results look like alligator hide. Foam brushes tend to prevent this. Avoid inexpensive foam brushes because the shanks that fits into the dowel handles have a tendency to break. The biggest advantage of foam brushes is that you can just toss them at the end of the job. Pure bristle brushes, on the other hand, require meticulous care and should be cleaned before and after use, then wrapped in some aluminum foil to keep the bristles straight.
Tip
You'll also need plenty of clean, lint-free rags for wiping down the woodwork and performing other cleanup tasks. A vacuum cleaner is a great asset, and a lightweight model with a brush attachment is perfect for sucking up sanding dust.
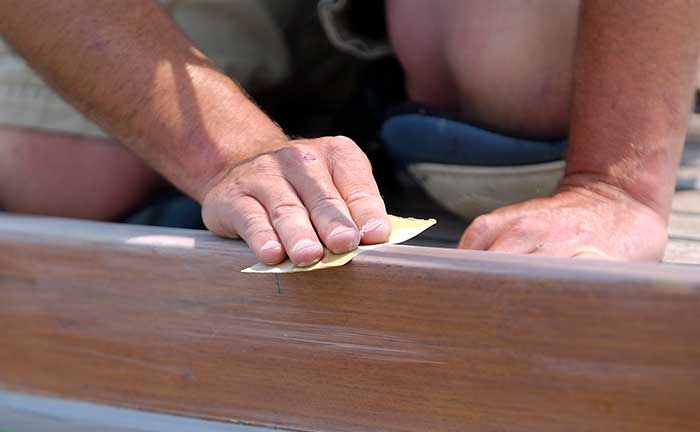
Use 320-grit abrasive paper for light inter-coat sanding. Make sure the surface is dust free before applying the next coat.
You'll also need lots of abrasive paper. Cheap sandpaper is a waste of money because the grit falls off almost as soon as you look at it, and it wears out very quickly. I favor the gold, open-coat paper made by 3M. It's an aluminum oxide paper that cuts fast, lasts a long time, and comes in all grits. Buy 80 grit for sanding bare wood, 120 for sanding the initial thinned coats, and 320 grit for sanding between full-strength coats.
Tack rags are very valuable for picking up all those last bits that get missed by the vacuum cleaner and solvent wipe. Keep tack rags in a resealable bag when not in use to prevent them from drying out and getting dirty.
Preparation
One of the prerequisites for a perfect job is the correct attitude. It's easy to get overwhelmed by the amount of work that lies ahead of you. If you break the job into manageable pieces, it starts to seem less daunting. You might varnish the toerails one day, then move on to the handrails the next.
Tip
Working outdoors in the boatyard is often not the best place to do brightwork, especially if the guy next door is pressure washing his hull. If you can, remove parts from the boat that you can varnish under cover in a controlled environment, such as a garage or workshop. Hatch covers, washboards, and cockpit tables can all be removed and worked on indoors when the weather is less than stellar. Try to varnish on a warm day with little wind, and plan so you'll have few interruptions.
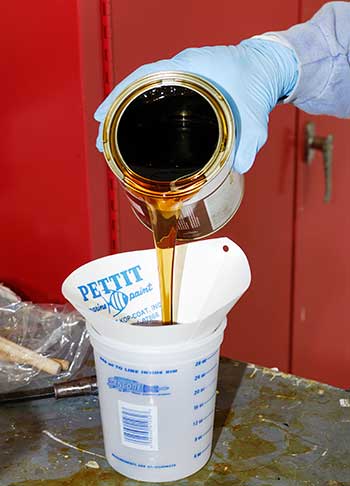
Always filter varnish through a fine-mesh paint strainer, even
varnish from new cans. This step will have more impact on the
varnish finish than almost anything else.
Read and understand the instructions on the can, which will provide important safety information and tell you which solvent to use. Don't use any old paint thinner that you find lying around; use only the solvent recommended by the manufacturer.
Never use varnish straight from the can. Decant the amount you'll use in about 15 minutes into a paper cup or other clean container, pouring it through a fine-mesh paint strainer.
A deep gloss finish is achieved by filling the pores of the wood, so the initial coats need to penetrate and seal the wood. The recommended method is to thin the first coat to a 50/50 ratio with thinner. Add thinner to your decanted varnish and stir very gently with a clean stick. Allow the varnish to rest for a few minutes to allow any bubbles to disperse. Dip your brush about a third of the way into the varnish, then tap it lightly on the inside of the container to knock off the excess before brushing onto the wood. Keep the brush moving, and don't overbrush the varnish, a mistake known as "worrying." Three or four stokes should be all that's needed before you move onto the next section. Make sure the wood is coated fully but not dripping wet; the extra solvent you added will ensure that it's absorbed into the wood. Leave it overnight. The next day, sand the surface lightly with 120 grit paper, then repeat the varnishing procedure, but this time, thin the varnish by 25 percent. Now it will be noticeably thicker, and less will absorb into the wood.
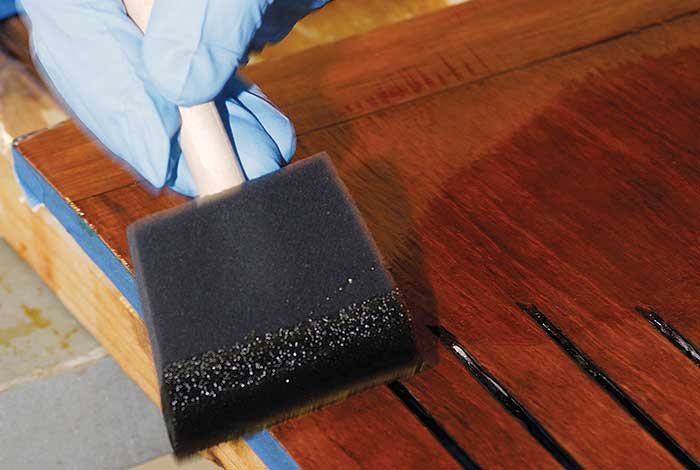
An increasing number of varnishers now use foam brushes and appear to achieve spectacular results.
Leave these two initial coats to sit at least 48 hours before laying on the first full-strength coat. This gives the solvents time to evaporate and the varnish a chance to harden. Although you can apply additional coats without sanding, I don't recommend it. Any imperfections will be magnified by each subsequent coat. Sanding knocks off any rough spots, smooths raised grain, and allows the third coat to go on without a hitch. Sand lightly with 120-grit paper. Don't rub too hard or you'll go right back to bare wood. If the varnish balls up into a gummy mess, it needs longer to harden.
Tip
After sanding, it's essential to remove all of the sanding residue, dust, and dirt. Use a vacuum cleaner with a brush attachment on the woodwork and adjacent areas to remove as much dirt as possible, then wipe down all woodwork with a rag lightly dampened with solvent. Turn the rag often to avoid spreading dirt from one area to the next. Decant some fresh varnish into a clean pot through a strainer, but before starting to apply the varnish, lightly wipe the surface with a tack rag to remove the last remaining traces of dirt. Wipe an area just ahead of where you'll be varnishing. For example, I'll wipe about three feet of toerail, then leave my tack rag at the point that I stopped wiping. Working toward the tack rag, it's easy for me to pick it up and give the next three feet a quick wipe as I make progress along the boat.
Brush Technique
Think of laying on the varnish rather than brushing it on. We're not painting a fence here — we're on a journey to a smooth, mirror-like gloss. Varnish should be applied with a slow, deliberate stoke. Grip the brush like a pen and draw it across the wood, laying down a uniform coat. If needed, you can use two or three extra sweeps of the brush to distribute the varnish. Finish by drawing the brush from the wet area to the dry along the length of the grain. Reload the brush and apply varnish to the next section of wood, "landing" the brush just into the end of the wet edge. Repeat the process until you reach the end of whatever you're varnishing. Occasionally sight along the work with your head almost touching the surface. If you spot any areas that you've missed, or you see runs, make a note of them for touch-up with the next coat. Don't try to fix things now, because varnish starts to skin up remarkably quickly — trying to touch up at this stage will only make things worse. Five or six full-strength coats is the minimum to provide UV and wear protection, though eight or nine is better for that deep, luxurious gloss.
Tip
Sanding And More Sanding
For the ultimate finish, you must sand between each coat. Sanding between coats improves the glossiness of the finish. If you omit the sanding, each coat gets progressively rougher in both look and feel. Sand between coats with 320-grit paper backed with a cork or proprietary sanding block for large flat surfaces, changing the paper as soon as it start to lose its cut or become clogged. After sanding, remember to dust, wipe with solvent, then go over with the tack rag before the next coat is applied.
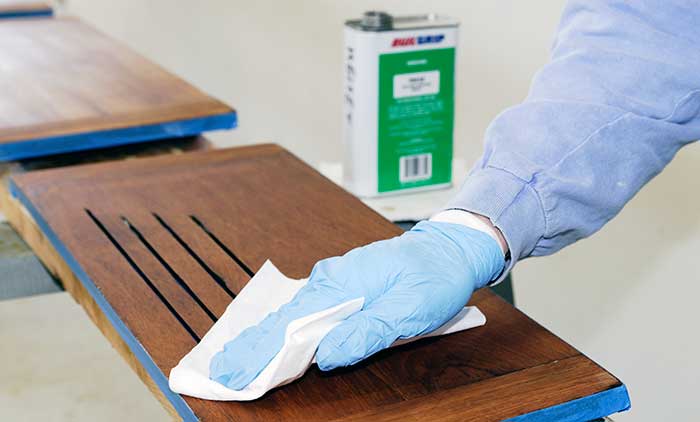
Before varnishing, wipe down the surface with the solvent or thinners recommended by the manufacturer. Use a clean, lint-free rag and fold it often to avoid dragging dirt from one area to another.
All your hard work will be rewarded with gleaming brightwork, but to keep it in tip-top condition, touch up any areas that get damaged as soon as possible. Many owners keep a small jar of varnish and a disposable brush aboard for this purpose. This is one time when you can get away with just slapping a bit of varnish on; the idea is to prevent water from getting under the finish and lifting it off. You can always do a proper repair job later.
The greater threat to varnish comes from the sun's harmful UV rays, so consider making covers for large areas of brightwork, such as hatches. These will keep your brightwork looking great for many years and lessen the amount of time you spend recoating.