Advertisement
Make sure none of these rusty relics are lurking aboard your boat.
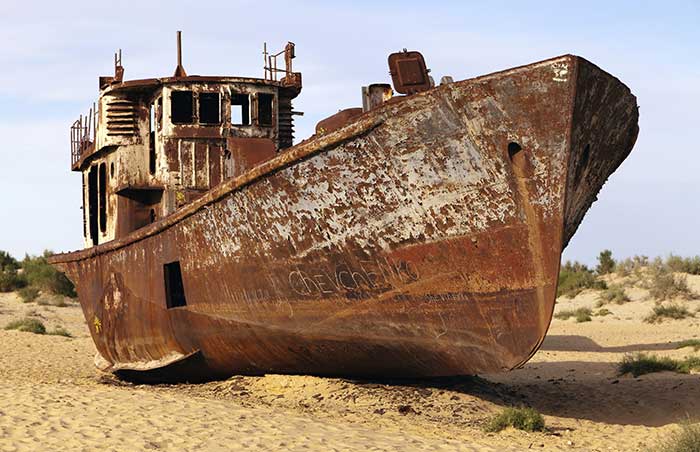
Most boaters are aware that corrosion can be a problem on their boats. If you keep your boat in the water, you've probably changed your anodes when corrosion got the better of them. But did you know that corrosion is an issue throughout the boat? That it can gradually weaken and destroy metal in the mast and rigging, in wires, in valves, and in steering systems? That it can bring your boating season to a halt not just by destroying your sterndrive but by causing a fire or bringing down your mast? Here are six spots on your boat where corrosion can be prevented through proper maintenance and regular inspections. Take the time to crawl through the dim recesses of your boat to make sure none of these surprises are lurking there.
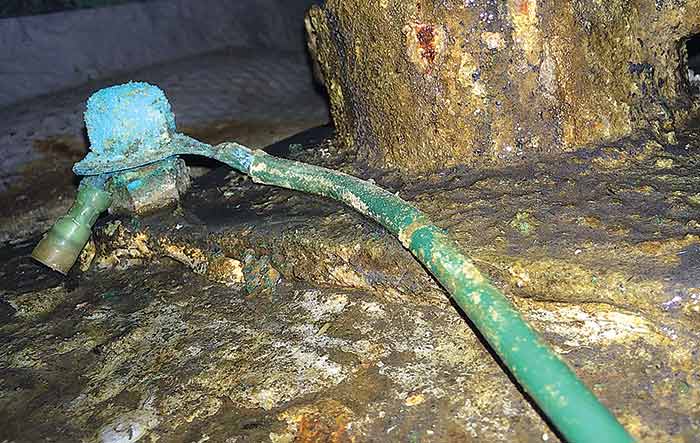
Fuel Shut-Off Valve
Do you know where on the boat yours is? If it's like the one pictured, it's in a place where very few humans ever visit. And if it looks like this one, it's one step away from allowing gasoline to get into your bilge, creating a serious risk of explosion. Gasoline-powered boats must have a shut-off valve installed in the fuel line at the fuel-tank connection, and diesel-powered boats must be equipped with a fuel shut-off valve if the fuel may siphon from the fuel tank or in gravity-feed setups. It's OK if the valve is behind an access plate or panel, but here's an important note: The valve must be arranged so it's easily operated from outside the compartment.
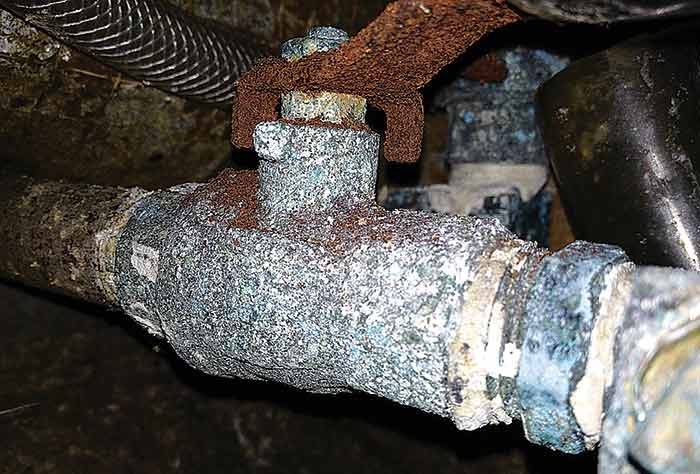
The handle on the valve in this picture has corroded to the point where it's broken off. What's left of the handle appears to have been snowing rust on the fitting for some time. Assuming that the handle doesn't deteriorate in your hand, what do you think the chances are of this valve stopping a fuel leak? If you see a valve in this condition, it's time to replace it. The best advice to keep valves working is exercise. Work the valve back and forth occasionally. It looks like this valve is well on its way to becoming the SOURCE of the leak instead of the cure.
Shift And Throttle Cables
Have you noticed that it's getting harder and harder to shift in and out of gear? Maybe the throttle levers are a bit stiff? If your boat is equipped with plastic-jacketed push/pull cables like those in the picture, corrosion may be at work. You don't want to find out that your shift cables are corroded when you can't shift into or out of gear — and end up crashing into another boat or a pier.
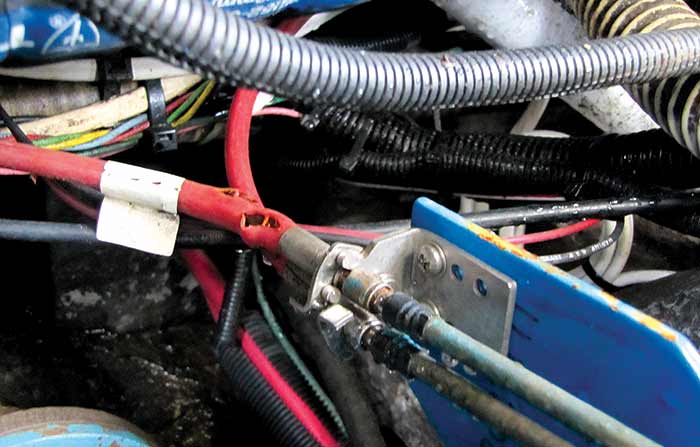
Corrosion of the metal cable inside the plastic jacket of the shift cable shown here is causing the red jacket to split. That will allow more moisture to enter, which leads to more corrosion of the cable and more splitting of the jacket; you get the idea. Lubrication at both ends of cables can help head off water intrusion to the cable and keep them operating smoothly. But when you find it's getting harder to shift or the throttle lever seems to be fighting back, it's time to lubricate and inspect those cables. If you find split jackets like the one pictured, it's time to replace them all together.
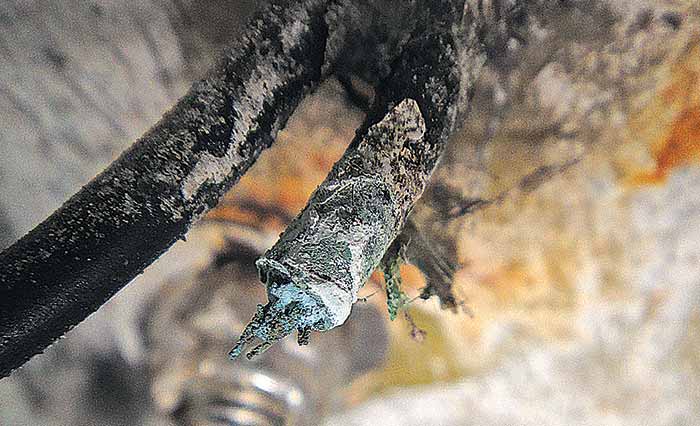
Navigation-Light Connector
Yes, this tiny little connector can ruin your day or, in this case, night on the water. Water has entered this connector by way of a leaky deck and caused the copper wire to corrode. Before it corroded in half, this wire led to a lightbulb, but not just to any lightbulb. This was the lightbulb for the combination red and green bow light. Since bow lights are required to shine only 22.5 degrees abaft the beam, you at the helm may not even be aware that you're cruising through the night in unintended stealth mode. Other boats may not be aware of your presence until it's too late.
It's worth taking a few minutes each season — or more often — to peer into your forward locker or anchor well to check wire connections. Also, take off the cover of your running lights, remove the bulbs, use some sandpaper to clean the lightbulb base and a pencil eraser to clean the socket connection, and squirt a little anti-corrosive spray on the fitting. Then test all of your lights at night to make sure they're operational. Let everyone in your path know you're out there, and leave the cloaking device to the Klingons.
Green Wire
The green wire on your boat is called the bonding or grounding wire, and it's meant both to protect the crew from an accidental electrical shock, should there be a short circuit in the electrical system, and to prevent corrosion by keeping all of the metal underwater fittings of your boat at the same electrical potential. Unfortunately, this green wire has green where it shouldn't: All around the wire's connection. You can be sure that all that corrosion will render this safety ground wire useless, which could mean a nasty electrical shock if something goes wrong in the electrical system or serious corrosion damage to the rudder that it's supposed to be protecting.
You'll see the green wire connected to thru-hull fittings, the engine, the generator, and other appliances and fittings on board. Unfortunately, some of the green-wire connections are in out-of-the-way places, run through wet bilges, or, as the one pictured here is, installed at the rudder's packing gland. There aren't too many visitors in this dark place below the cockpit. To prevent corrosion from getting the best of your wiring connections, make sure the wire isn't energized by turning off the master switch at the battery box, remove the wire from the stud, and clean both. After a shot of anti-corrosive, reconnect them, and you're all set.
Chainplates
Sailboat shrouds are connected to chainplates at deck level. Typically made of stainless steel, the top of the chainplate — really a stout stainless-steel bar — extends above the deck and provides an attachment point for the shrouds that support the mast. A failed chainplate can easily bring the mast crashing down, and if it's like this one shown, you'll have had very little warning before the fact.
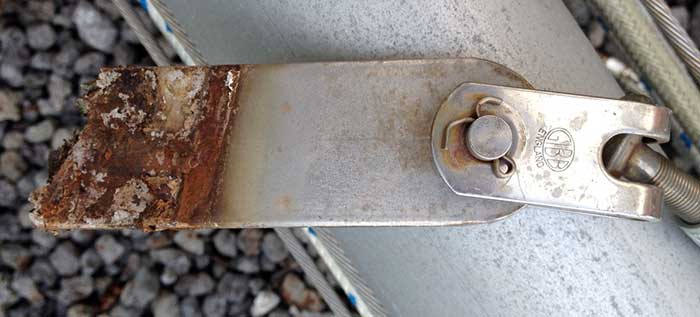
Many think that stainless steel is impervious to corrosion. But there's a kryptonite for stainless steel, and that's lack of oxygen. The anti-corrosion properties of stainless steel rely on oxygen to maintain the exterior oxide coating that prevents corrosion from forming. Without oxygen, and in the presence of saltwater, even stainless steel can't maintain its strength and corrosion resistance. Chainplates are often bolted to interior sections of the boat hull in areas that are oxygen deprived. Some chainplates are even installed within the hull's fiberglass layup. Without a fresh supply of oxygen, stainless steel moves way down on the galvanic scale. That is to say, it will rust. And, eventually, the chainplate will fail.
Look for signs of rust or water intrusion at the chainplates wherever access can be gained, and do it at least once a year. Be sure the deck is well sealed to prevent water from entering around the chainplate. If your boat's more than 20 years old, you should really do a thorough inspection. Remove the chainplates and have them examined by a pro.
Rigging Toggle
While we're on the topic of rigging, you'll find this little fellow just above the chainplate. It's a toggle at the lower end of a sailboat shroud, and in this case, it's the weak link that's being called upon to keep the sailboat mast from toppling over.
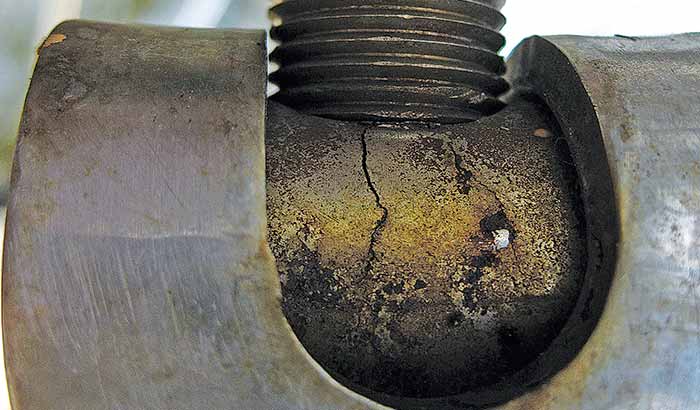
This picture again brings home the point that no metal on a boat lasts forever. The crack in this fitting is very evident, and should this fitting fail under a heavy load, it would spell disaster. Corrosion and cracking this dramatic screams, "Inspect the rig! All of it!" Rigging has a finite life — perhaps a longer life span in colder freshwater environments, but finite nonetheless. There's not much to prevent corrosion on fittings like this one. You just have to be vigilant. Get out your magnifying glass and spend some time on your hands and knees taking a close look at your deck fittings, and if one is bad, odds are that other similar fittings on board aren't far behind. Use your camera and its zoom lens to get at least a cursory look at rigging above deck level. If anything suspicious is spotted, make arrangements for an up-close inspection.