Advertisement
This annual exercise is essential for keeping your trailer on the road.
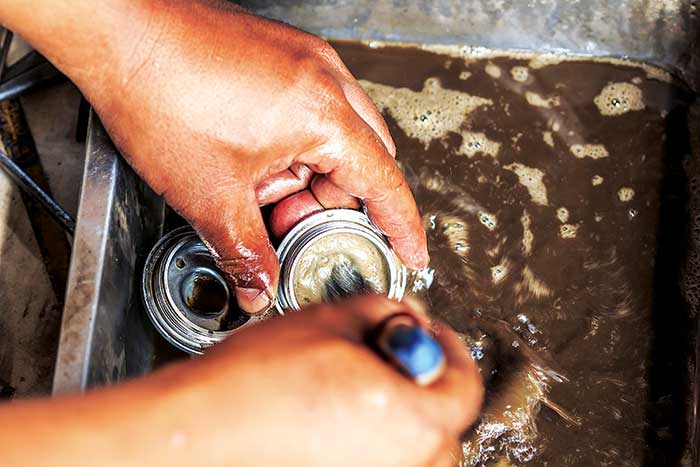
It's a dirty job, but you've got to do it — and annually is best. (Photo: Thinkstock)
A bearing grease packer, available for about $20 at auto-parts stores or online, can make this task a little less messy.
Prepare yourself for a messy afternoon. But even for first-timers, an afternoon is all it takes. Plan to spend about an hour per wheel. The tools needed are few and simple: pliers (side-cutting pliers work well when removing stubborn cotter pins); a lug wrench to fit the lug nuts on your trailer; a jack; a jackstand; a hammer; a large, flat-bladed screwdriver; and a six-inch length of scrap 2x4. If your wheels have bearing protectors installed, you'll need a grease gun with Zerk end fitting, which feeds lubricant into a bearing that's under pressure. You may also need a large pair of pliers (water-pump pliers, or as they're sometimes called, Channel Locks) if the large nut holding the hub on has been tightened too much.
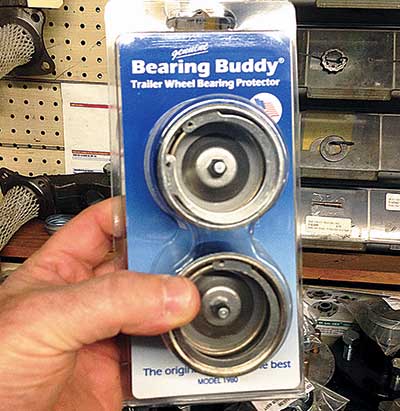
If your trailer lacks bearing protectors and you want them, buy them now. Be sure to bring your hub dust cap with you when you head to the trailer-parts store; there are a few sizes, so be sure you buy the correct model. A tub of wheel bearing grease and a $20 bearing packer (available at any auto-parts store) will make filling the bearings with grease an easier job — and much easier to clean up. Without one, you'll have to pack the bearings by hand. The packer allows you to capture a wheel bearing between its two plastic disks and pack it with grease using a grease gun. That's a lot neater and quicker than filling your palm with a blob of grease and wiping it into the bearing cage.
Getting Started
Jack up the trailer's axle, one side at a time, to service the wheel bearings. A jackstand is also needed to secure the trailer in the raised position and ensure that it won't come crashing down. Before raising the trailer, loosen the lug nuts. Jack the trailer up until the wheel can spin freely. Remove the lug nuts and the wheel, exposing the hub assembly. Now you can remove the hub. The dust cap or bearing protector must come off first. A dust cap has a small lip that can be pried off by carefully using a flat-bladed screwdriver; lightly tap the screwdriver blade under the lip with the hammer, rotating the hub as you pry off the cap. Dust cap pliers can help with this process. Bearing protectors have no lip to pry under, so you'll have to carefully tap the outer diameter of the protector as you rotate the hub. If you use a plastic mallet instead of a hammer, you won't mar or dent the protector.
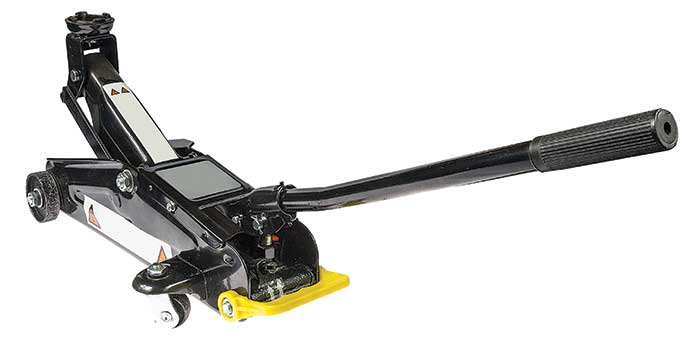
A good floor jack makes short work of lifting the trailer so you can get the wheels off. (Photo: John Tiger)
After you remove the protector/cap, rotate the hub slowly as you listen closely for irregular noises. You should hear nothing as the hub spins; if you hear grinding, scratching, or rattling noises, or if the hub moves excessively on the axle shaft, you probably have bearing problems. A cotter pin keeps the castle nut from loosening; bend it out straight and remove it with pliers. If it's been bent too many times, replace it with a new one. Remove the castle nut and washer, then remove the outer bearing. Keep plenty of rags handy to catch loose globs of grease that may fall out as you remove the hub assembly from the axle.
Clean And Inspect
A parts washer makes cleaning much easier, but if you don't have one, you can improvise with an old wash pan and half a gallon of parts-cleaning fluid or gasoline. If you opt for the gasoline, make sure to take safety precautions and keep away from open flame. Remove as much loose grease as possible from the outer bearing, hub, and inner bearing. If the rear seal is damaged or you detect problems with the inner bearing, pry out the seal with the flat screwdriver and discard it. Remove the inner bearing. Often, if the grease is still in decent condition and you can inspect the inner bearing by feel and with a flashlight, you might be able to get away with cleaning it and regreasing without removing it (and the seal). You can leave it in place along with the rear seal; just be sure to wash out all the old grease and dirt using the solvent. However, I'd recommend replacing the seal and cleaning/regreasing the inner bearing every time.
Wash all the parts, including the nut, washer, and cotter pin as well as the dust cap/bearing protector, as thoroughly as possible in the solvent. If possible, blow-dry them with compressed air to remove all remnants of old grease, dirt, and washing fluid. Don't spin the bearings at high speed with compressed air: Spinning a bearing at high RPM with no lubricant can make it explode in your hand, causing severe injury.
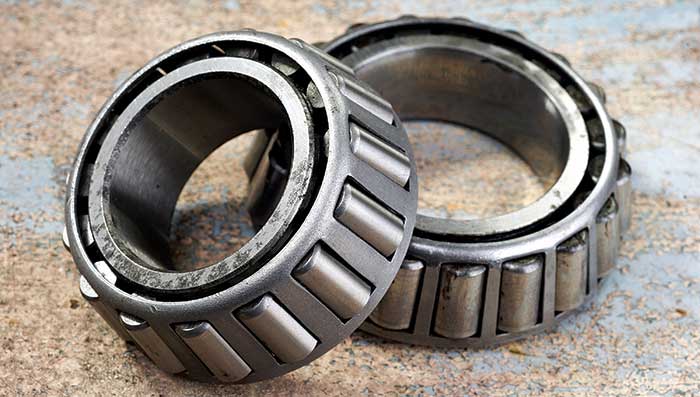
Bearings come in pairs. There's an inner and outer bearing for each wheel. (Photo: Thinkstock)
After cleaning and drying, inspect all the parts closely. If the roller bearings appear pitted, scored, galled, or rusted, replace them. If you're in doubt, take them to a trailer dealer for an expert opinion; replacing them with new ones is far easier now than when you're stuck on the roadside. If you replace them, replace the bearing races as well; these are press-fitted into the hub.
You should never replace the bearings without also replacing the races; they're matched together. They can be removed with a hammer and screwdriver, but have the dealer do it while you're there buying the new bearings; it's easier for him to do it with a shop press, and you won't risk damaging the hub with the hammer and screwdriver.
Bearing Protectors
While greasing the bearings through an outside fitting can keep the water and potential corrosion at bay for a while, the most effective way to ensure that the bearings are full of fresh lubricant is to change the grease on a regular schedule. The only advantages that bearing protectors give today's trailer-boaters are reduced grease change intervals and the ability to "top off" the grease between changes. While this is handy, it's not a substitute for changing the grease and seals; the grease should be changed at least once per season, and more often if you trailer long distances or trailer frequently. There are two big problems regarding the use of bearing protectors, however.
First, they offer false security; in other words, their use leads boaters to become more lax regarding bearing maintenance.
Second, their use promotes over-greasing, which leads to seal failure and loss of grease. Unfortunately, it's all too easy to add just one more pump of grease from the grease gun, when the hub and protector are already full of grease. That extra grease has to go somewhere; typically, as the wheel turns, it pushes past the seal lip and spatters all over the inside of the wheel. This makes a mess, and as the grease continues to leak out past the now-compromised seal lip, it creates an atmosphere for bearing failure due to — you guessed it — lack of grease.
Some newer bearing protectors have an indicator that tells you when the hub is full; it pops outward as the grease is pumped in. Without that indicator, watch the protector carefully as you fill; when the inner disc fully compresses outward against the spring and hub, stop pumping grease.
Reassembly
Packing the bearings with grease goes quickly with the bearing packer. Place the bearing on the bottom cup, screw the top cup down snugly over the bearing, attach a grease gun, and pump grease into the bearing until it just begins to flow out the sides of the rollers. If you elect to do it by hand, place a gumball-sized dollop of grease in the middle of your palm; taking the bearing in your other hand, firmly wipe the edge of the bearing through the grease. Do this repeatedly until grease begins to appear on the other side of the bearing. Rotate the bearing as you go, ensuring that it's filled completely around. This is why the bearing packer is highly recommended; it ensures a fully greased bearing, makes the job easier and cleaner, and the cost is low in relation to the value the tool gives. Set both bearings aside on a clean, dry cloth.
If you removed the inner bearing and seal, now is the time to reinstall them. Check one more time to ensure that the inner bore of the hub is completely clean and dry. Place the greased inner bearing into the hub, seating it in the race securely; the grease will hold it there. Now replace the rear seal. Clean the hub bore where it seats with solvent, making sure there's no grease, old sealant, or dirt there. Select a short socket matching the seal's outer diameter to use when pressing it into the hub bore. Coat the outer edge of the seal with liquid sealant, then gently tap it into the hub with a rubber mallet, using the socket as an installing tool. Seat the seal flush with the end of the hub bore; don't tap it any deeper.
Tip
Clean the axle shaft and inspect it for damage. If there's deep scoring, pitting, or rust where the bearings ride, it may be time for a new axle stub. This can be an involved job, best left to a good trailer mechanic. If the area where the seal rides is scored or pitted, you can easily solve the grease-leakage problem this causes by fitting the axle with a Spindo Seal, a stainless-steel seal and O-ring kit that fits over the inside of the axle stub, forming a smooth sealing surface for the hub seal to ride on. Spindo Seals by Bearing Buddy are available at most marine and trailer dealers.
Coating the axle shaft with grease before installing the hub will help ensure that enough grease is in the hub before it turns its first revolution. Put a healthy dollop of grease inside the hub, then slide it on the axle shaft. Next, install the outer bearing, making sure it's seated in its race. The outer washer fits in next, then the castle nut.

Dust cap pliers will remove your bearing covers without damaging them. (Photo: Thinkstock)
Tighten the nut down as you spin the hub; don't tighten it so far that it slows the hub or stops it from turning. Grasp the hub's outer diameter and try to move it back and forth; if you can, the nut isn't tight enough. Tighten the nut to the point that it slows the hub from turning, then back off a quarter turn and check for side-to-side movement again. If you try this step a few times, you'll get a good feel for how tight the nut should be. It can be tricky; too tight and the bearings will wear prematurely, too loose and the wheel will wobble. After you've found that sweet spot, turn the nut slightly to expose the cotter-pin hole and insert the cotter pin; bend the ends out and around the nut. Make sure the ends don't get in the way when you install the dust cap or bearing protector.
Finishing The Job
Clean the hub bore using solvent and a clean rag. Then, using the short length of 2x4 as a shield to avoid damaging the bearing protector, tap the protector into the hub with a hammer. Make sure it seats fully; you'll notice a different tone in the sound of the hammer blows when it does. Using the grease gun, pump grease into the bearing protector as you spin the hub to distribute the grease inside. This is another tricky part; don't overfill the hub, or you'll blow grease right out the back of the rear seal. Wipe any excess away, reinstall the wheel and tire, and you're done — with that wheel. Now you can repeat the process for the other wheels on your trailer.