Advertisement
First, let's rehab your outboard. It may need grease, a deep cleaning, and your skeg and prop should be checked, too. It's easy!
In our outboard service business, we see a lot of different engines, some maintained well, many not. It's usually pretty easy to see how difficult an engine will be to service by taking a quick look at its exterior. While sometimes there are surprises, usually if an engine doesn't look sharp, it also doesn't run well and can be difficult to service. Typically, this means that there's considerable corrosion, and therefore it can be tough to remove parts to perform routine services like replacing a water pump impeller.
Outboards are pretty small, so maintaining a good appearance and keeping the finish looking nice is not so difficult a task. Like any maintenance job, it takes some dedication and drive, a few tools and supplies, and some time and elbow grease. Let's get started.
Start At The Top
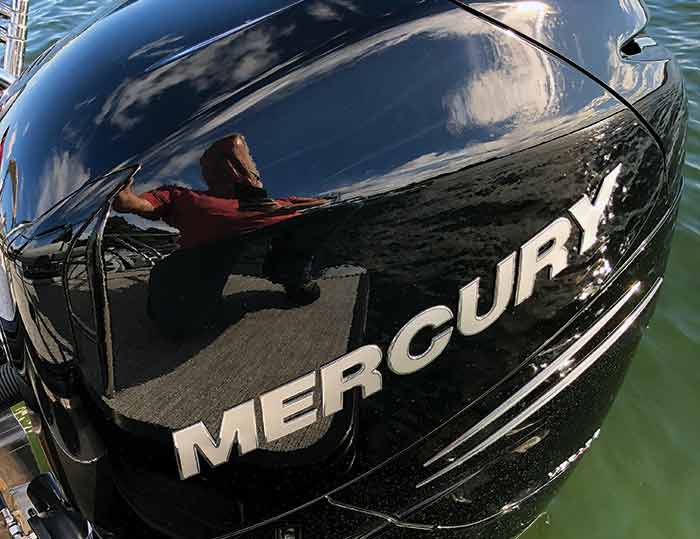
The cowling (shroud, hood, cover, and so on) is what most people see first. It protects the powerhead from the environment and protects people from moving parts. It also keeps things quieter. Typically, cowls are made from fiberglass, plastic, sheet molded compound, and/or aluminum. They're usually painted with automotive enamel and decorated with decals and appliques. Maintaining the cowl is easy; the following are steps and tips to keep yours looking clean and new:
Wash with automotive soap and water. This is important if you boat in saltwater; keep those salt deposits from drying on the surface, especially on any aluminum parts like trim and latches.
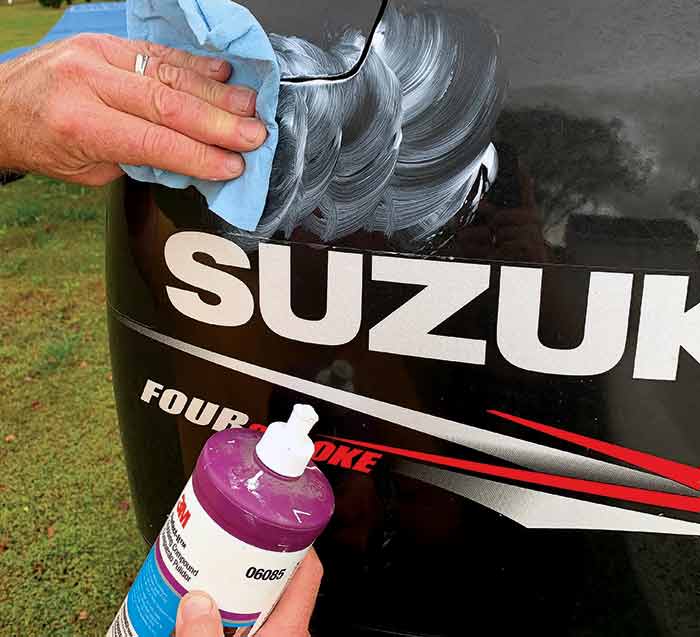
A slightly faded cowl can be brought back successfully with some polishing compound and elbow grease.
Protect the cowl with automotive wax. Apply the wax in a circular motion with a clean, soft cloth. Let it dry to a haze, then polish it off with a different clean, soft cloth.
Keep it covered. Outboard covers are available from many sources including your local marine dealer, marine supply store, or online resources. Just search "outboard motor cover" in your web browser and you'll be inundated with results. Buy one that fits your engine properly, is ventilated, and can be secured with ties or shock cord.
The rubber seal around the bottom of the cowl often gets dirty, with mildew and grease. Keep it clean and soft so it can continue to do its job, sealing the upper cowl to the lower pan. A protectant like 3M 303 or Armor All will help keep it from getting stiff with age, cracking, and peeling apart. New hood seals are getting harder to find; if you need one, visit your local dealer or one of the online resellers.
Usually there are grease fittings for each of the cowl latches. It's important to remove old, hardened grease from around the latches and inject a pump or two of fresh marine waterproof synthetic grease using a grease gun so the latches rotate freely and close snugly. If the cowl is too tight or too loose when latched down, now is the time to adjust the latches so the hood fits properly. Typically, the cowl latch "hooks" are inside the cowl and can be adjusted simply by loosening the attachment bolts and moving them up or down slightly, then retightening. Be careful; often the bolts are corroded tight and can break off. If this is the case, try tapping on the bolt head with a hammer first and squirting some penetrating oil in to loosen up the corrosion in the threads.
If possible, clean the lower cowl pan. Excess grease, fuel and oil, and debris often gathers here. Get rid of leaves, bugs, grass, dust bunnies, and other flotsam inside the engine cowl and wipe it clean with paper towels. All that junk can hurt the engine if it finds its way into the intake air silencer.
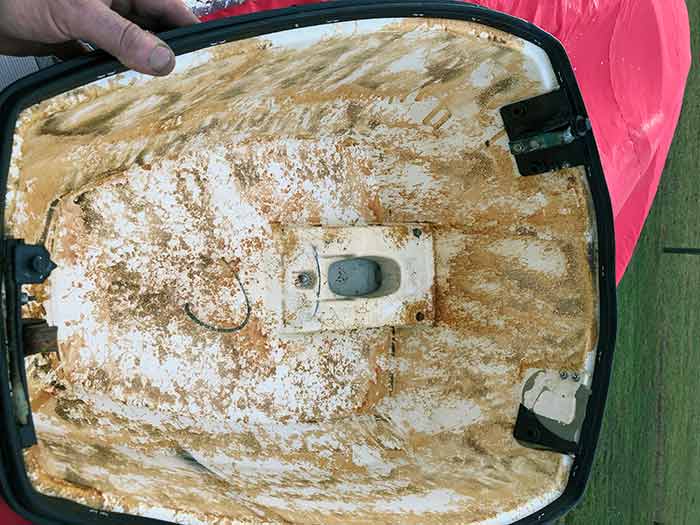
Often the sound blanket is deteriorated and crumbling. If so, it’s best to just remove it.
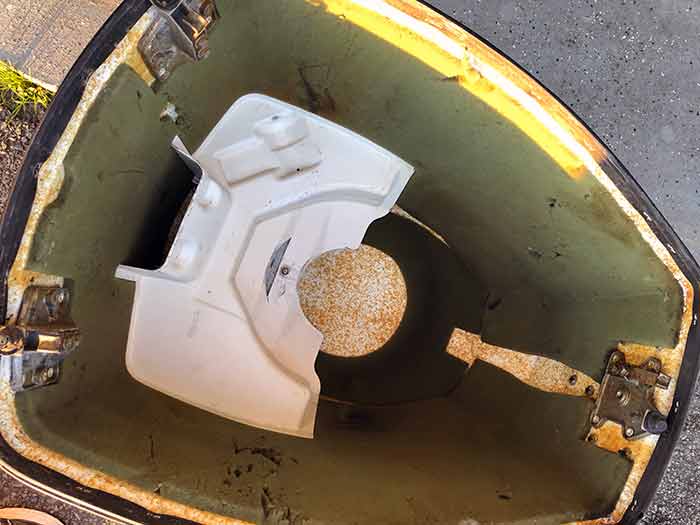
You can easily peel it off with a razor scraper. Apply a new sound blanket, obtained from a car audio store.
Lastly, if your foam sound blanket inside the engine cowl is getting old and crumbly, peel it off and throw it away. Again, you don't want this foam finding its way into the engine via the air silencer. To replace it, visit your local car audio store or go online to find sound deadening foam liner by the roll. Custom fit this inside your cowl and secure it with spray contact cement available from your local hardware or big box home store.
Midsection
The engine's center section, often called the exhaust housing assembly, consists of the swivel bracket, steering arm, tilt/steering tube, clamp brackets, and power trim/tilt assembly. These often get the worst neglect. Here the paint can peel and flake off, corrode away, and generally just end up looking terrible. Keeping these parts clean and coated with wax or protectant — even WD-40 works well in a pinch — will keep the engine looking and working well. Here are some areas to pay attention to:
Keep corrosion away from the trim unit, clamp brackets, exhaust housing, and swivel bracket. Watch for peeling and chipping paint here, and be sure to sand, prep, and touch up any bad areas.
The steering arm is made from high-strength steel, so it is heavily powder coated. It can, however, peel and rust, and replacing it is time consuming and expensive. If the original powder coating is peeling off, it could be time for a repaint to keep rust from creeping in.
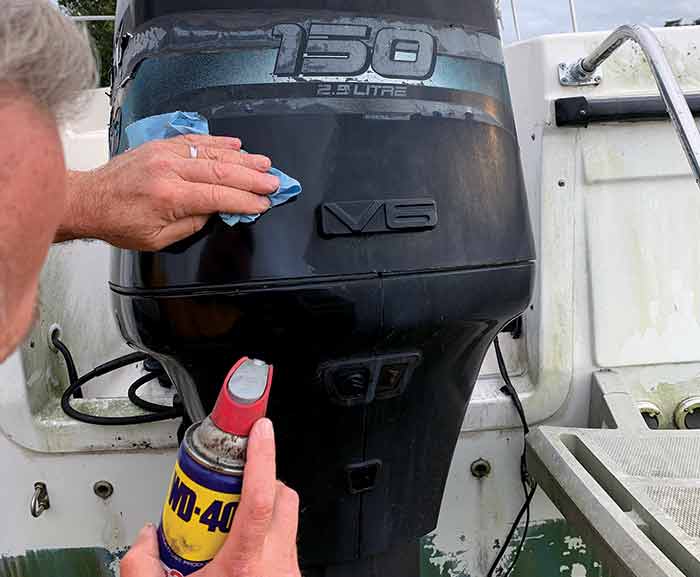
Sometimes the engine is too far gone for traditional cleaning, compounding, and wax. Wiping it down with WD-40 works well to keep it shiny for a few weeks.
Wipe all the old caked-on grease away from the engine swivel bracket. Both the swivel bracket and steering/tilt tube have grease fittings. Keep them thoroughly greased with marine waterproof synthetic grease. This is important; if left ungreased, eventually you will not be able to steer or tilt the outboard, and these parts will need to be replaced.
The power trim/tilt electric motor is often the part that corrodes and needs replacement first. If this is the case, assess it carefully and decide if wire brushing and painting will suffice, or if it's time to replace the motor.
Lower Unit
The lower unit has a tough job. It's often left in the water and subject to corrosion, it takes the brunt of underwater obstructions, and generally gets the most abuse. Here's where to focus your attention to keep your gear case looking and performing well:
If your skeg has been bent, chipped or broken, replace the gear case housing or have a competent welder repair the unit. IMPORTANT NOTE: If you have a high-performance rig capable of speeds in excess of 60 mph, DO NOT repair the skeg by welding; you must replace the housing. The skeg is under too much side loading stress at elevated engine heights and higher speeds, so welding it will produce a potentially dangerous situation if it breaks off at high speed.
Sand and prep any scrapes or abrasions before applying touch-up paint. As with other parts that require painting, use zinc chromate primer applied to the bare metal before the actual color paint is applied.
If your engine has replaceable anodes, remove them and replace with new if they are more than half eroded. Don't paint them if you're painting the engine; they're designed to be left unpainted so they can do their job.
Have your prop reconditioned by a reputable propeller shop if it's been damaged. Be sure to check the prop shaft for straightness when you remove the prop, and clean and grease the shaft before reinstalling it.