Advertisement
Key lessons learned when our esteemed contributing editor and fishing guru dives in to give his old boat a new lease on life.
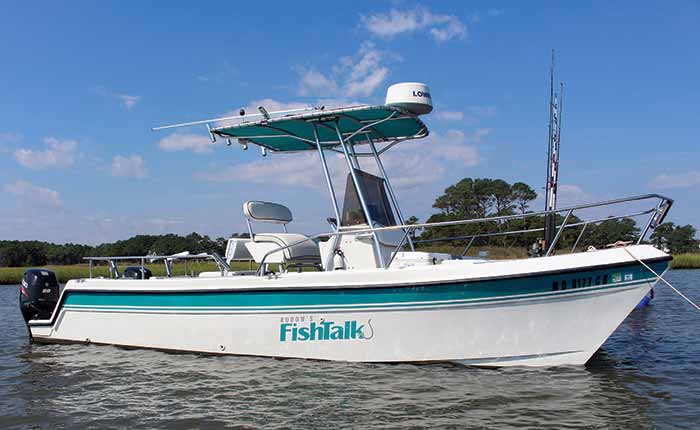
Lenny's 1997 Glacier Bay looks nearly new after its recent refit.
They say that good things come in threes, but in this case, it was the number three that presented a problem. The price tag for a new boat of the same size and capabilities had three digits in front of the comma. Ouch! I had three kids in college with three tuition bills to pay. And there were three years left on my truck payments. Buying a new boat simply wasn't in the cards. A little number crunching, however, provided the solution: For about a fifth of the cost of a new boat, I could have the Glacier Bay completely refit (excepting the power plants). The pair of 90-horse Suzuki four-strokes on the transom had run virtually flawlessly since the repower and showed no signs of slowing down, so this would be my move.
When the first refit had taken place, I was younger and more willing to scrape my knuckles, so I'd done that job on my own. A decade later, however, I had neither the time nor the inclination. So I called Pasadena Boat Works in Pasadena, Maryland, a shop that specializes in refitting and repairing outboard-powered boats, and made a list for them — a very, very long list.
Approximately five months later, I took the first sea trial on my "new" old boat. Since then I've fished it on the Chesapeake and the open Atlantic dozens of times. Here's what I learned, what I wish I had known, and what you should know if you ever decide to consider giving your old boat a new lease on life.
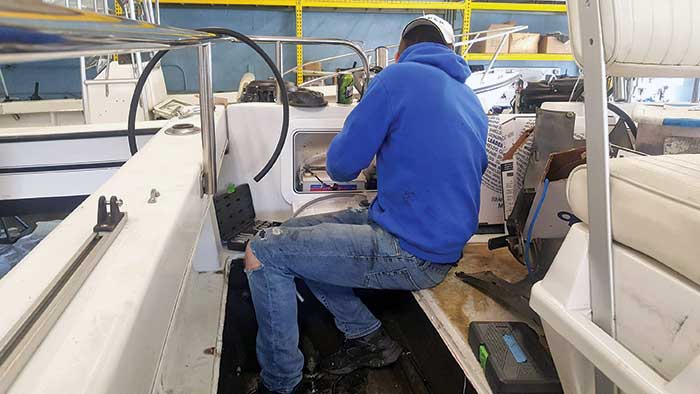
The boat was stripped down, and all pumps, plumbing, wiring, and switches were replaced.
Pumps, Plumbing, Wires, And Switches
Approximate hit: $4,500
What was replaced: Every pump, every hose, every inch of wire, and every switch. As part of the job, the six-switch toggle panel with automotive-style fuses was upgraded to a pair of eight-switch panels with lighted rocker switches and breakers. USB charging ports and a 12-volt outlet were also added.
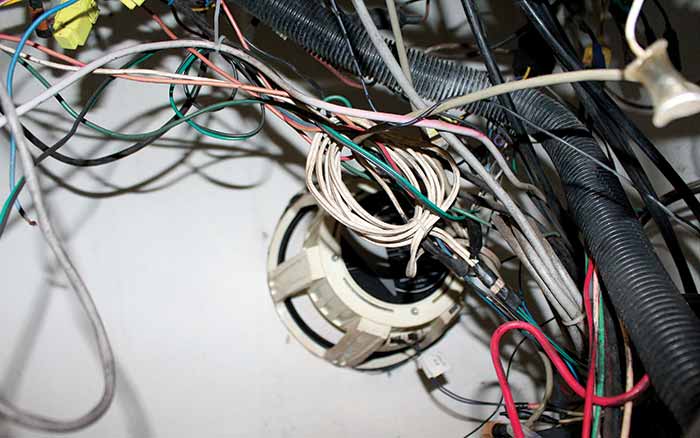
The "before" nightmare under the helm.
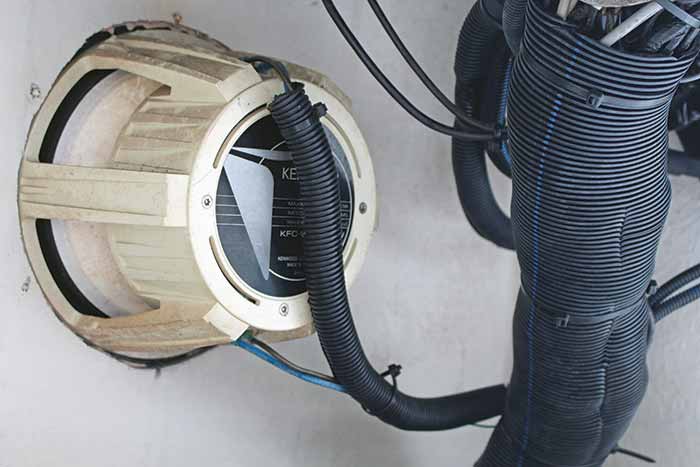
And the much more pleasant "after" view.
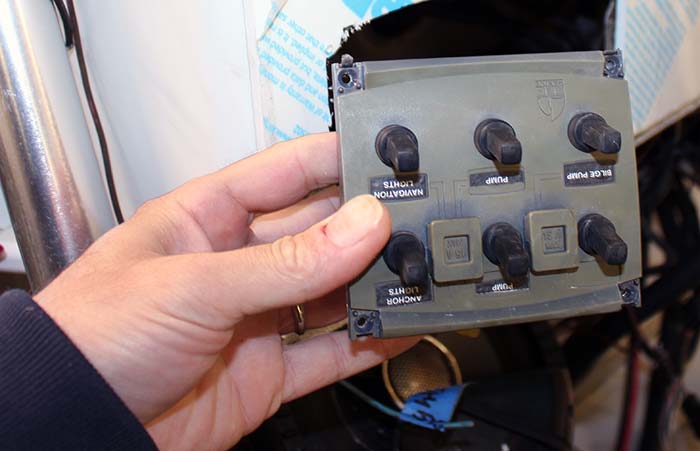

Out with the old (above), in with the new, then in with twice as much new and reposition the entire affair to the other side of the dash.
What I learned: This was one of the most important parts of the project. The wiring and switches are like the boat's nervous system, while the pumps and plumbing are its heart and veins. Fortunately, the wiring guy did magnificent work including touches like waterproof Deutsch and heat-shrink connections. But making weekly visits while the job was being done prevented a number of potential shortfalls. As the work progressed, I realized that the original plan to simply replace the old six-switch panel to an eight-switch panel wouldn't allow for individual power distribution to some of the accessories I wanted to add. Opting for dual panels not only covered all the bases, but left me with several extra switches in case I add accessories in the future. As the number of switches grew, however, relocating the panels to a different part of the helm became necessary. The lesson? Don't plan to turn over your boat and a list to a shop, go home, and forget about it — you need to stay in touch and be willing to modulate the job as it goes on.
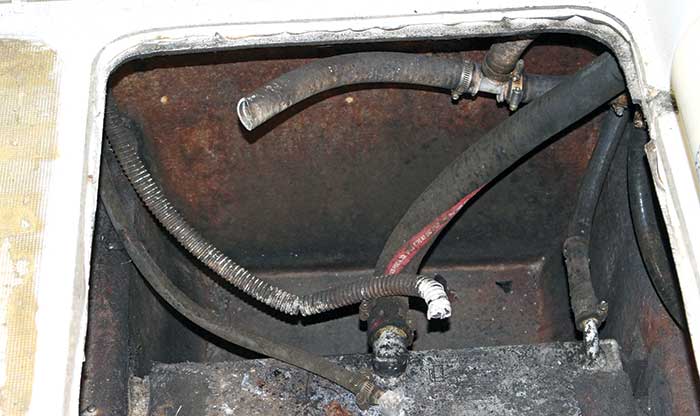
With the fishboxes removed, a visual inspection of the fuel lines exposed the need for additional work.
Another eye-opener came when the fishboxes were removed and it was possible to visually inspect the condition of the fuel lines below deck level. The shop emailed me after seeing some chafing and signs of age, and I agreed that they should be replaced.
What I wish I'd known: I would have spec'd more powerful pumps for the livewell and fishbox. There's nothing more annoying than waiting for your new pump to slowly move water. Never having had a 500-gph pump on the boat before, I didn't realize just how wimpy these bottom-tier models are.
Steering And Controls
Approximate hit: $3,500. (The exact cost can vary quite a bit depending on your specific boat. Kits range from around $800 to $3,000, and labor costs run from about $500 to $2,000 depending on the specific application.)
What was replaced: The old cable steering system was removed and replaced with a front-mount SeaStar hydraulic steering system, and the helm was replaced with a SeaStar Standard Helm Assembly. The cable throttle and shift controls were adjusted and a bushing was replaced, but this system as a whole remained in place.
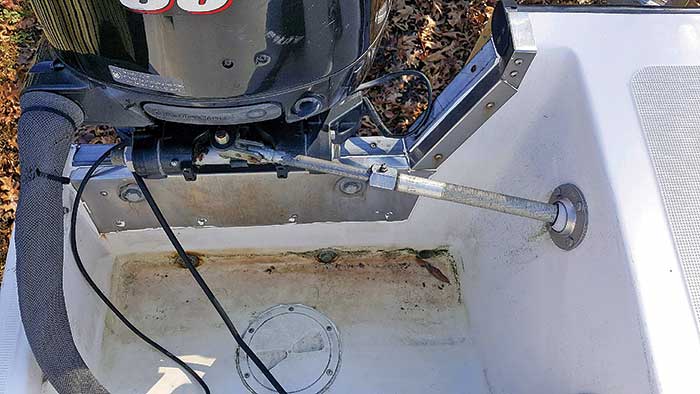
Steering before refit.
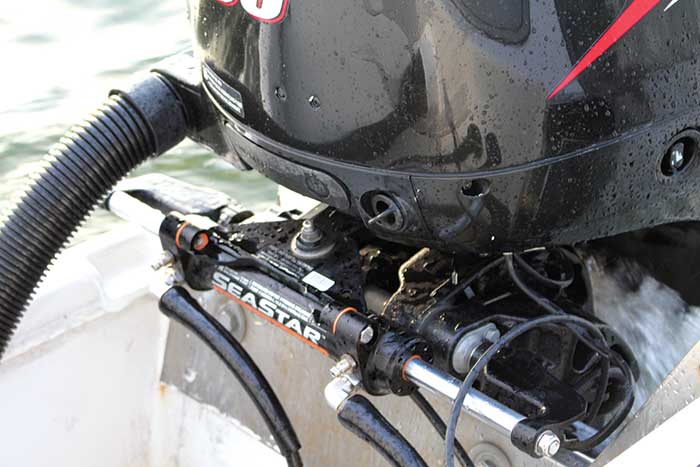
Upgrading from mechanical to hydraulic steering was a key improvement.
What I learned: We sometimes get so used to our boats that we don't even realize just how bad something may have become. My main reason for switching over to hydraulic steering was to allow for the addition of an autopilot (which wasn't possible with twin-cable steering). But before I ever tried the autopilot, I realized that the SeaStar package was a massive upgrade — I had become so accustomed to fighting the stiff steering that I'd forgotten how smooth and easy controlling the boat should be.
As far as the shifter and throttle goes, for many years I'd grown used to advancing the starboard shifter farther than the port one to keep the engines in synch. Again, it was something I'd become accustomed to. No big deal, right? But when anyone other than me took the wheel, shifting and setting the throttles was always problematic. The adjustment and bushing replacement were dirt-cheap in the grand scheme of things (a measly $80 in parts and labor), and now I can let someone else take the wheel without thinking twice.

Notice how mismatched and discolored the old gauges now look — they should have been replaced.
What I wish I'd known: That I should have replaced the engine gauges at the same time. All of them worked fine, so why replace them? Because their whites have yellowed and their blacks have faded. They look old and out of place. And wouldn't you know it, the third trip out, one of the tachs began to stick. These gauges go for $120 or less, and I should have had them all replaced.
Electronics
Approximate hit: $3,250.
What was replaced: The stereo was replaced with a Fusion Apollo MS-RA670 ($500), the VHF was replaced with an Icom M330G ($200), the VHF antenna was replaced ($100), and a Si-Tex SP-110C autopilot ($1,800) was added.
What I learned: Autopilot is a major-league blessing. I had looked forward to cruising in a bit more comfort, but as it turns out, my favorite use for the Si-Tex is actually for trolling. In past years I hated trolling, mostly because I was trapped at the wheel and unable to participate in the action. On the second trip out after the refit, there were just two of us aboard, and when a pack of Spanish mackerel attacked multiple lures at the same time, I merely pressed a button and darted back to the cockpit to join in the frenzy. Sweet!
The old VHF and antenna worked just fine, but having new safety gear adds some peace of mind. Meanwhile, it's my kids who like the Fusion the most. They can Bluetooth their phones and torture me with their own selection of modern "music."
What I wish I'd known: That I'd be jealous whenever I stepped aboard someone else's boat and watched them control the stereo, autopilot, and other gizmos right from the same MFD. Yes, doing a full-blown system replacement and integrating everything with a new MFD would have upped this project by several thousand dollars. And it seemed silly to replace a perfectly good MFD. Still ...
Refit Tips
- No matter how much you trust the shop doing the work, plan to visit often and play an active role in decision-making as the job progresses.
- Research the specific parts and brands you want (e.g., specific pump sizes and/or brands) prior to initiating the job.
- Allow for future expansion; you never know what you might decide to add to the boat next month or next year.
- Don't cut corners to save a buck here and there, which is a recipe for disappointment.
- If repowering, consider the benefits of upgrading associated parts like controls, steering, and engine displays. Modern digital systems are a big step up from refreshed mechanical systems.
- When repowering, be sure to account for changes in weight, which can affect the boat's performance and may make choosing a different size or brand of engine attractive.
Decking
Approximate hit: $2,500
What was replaced: Old, do-it-yourself 5-millimeter-thick SeaDek, with professionally templated, cut, and applied 6-millimeter SeaDek
What I learned: Thicker foam underfoot is better. At the end of a day on the water, I can feel the difference in my back.
What I wish I'd known: That cracks in the deck gelcoat would be visible in the seams between the SeaDek pads. If I'd realized that eyesore would be in plain view, I would have had several areas repaired.
Rubrail
Approximate hit: $1,490.
What was replaced: The entire rubrail from bow to stern
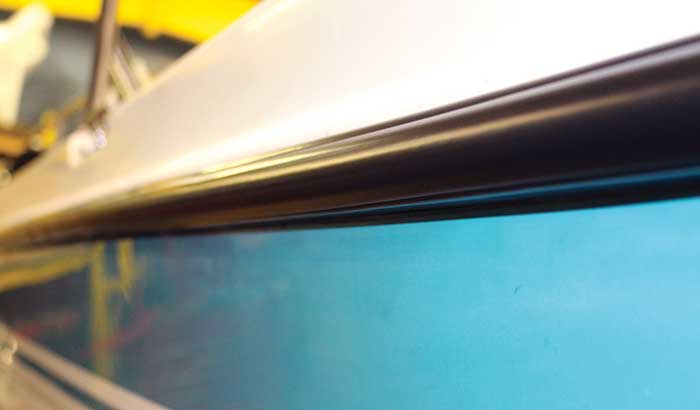
Yes, the new rubrail looks shinier … but that didn't last long.
What I learned: It's shockingly expensive to replace that ring of rubberized material around your boat.
What I wish I'd known: The very first time you pull up to a pier you'll scuff that perfect, unblemished rubberized ring. Of all the things that were replaced, this is the one I might not have done had I known better. A few months later, it's tough to tell that it was even replaced.
Seating And Vinyls
Approximate hit: $850.
What was replaced: The leaning post and backrest cushions, and a swing-back cooler seat.
What I learned: The last time these were replaced, I got six years out of them, and that's tough to complain about. Still, I'll be more careful to keep the cushions clean and remove them from the boat for winter storage this go-round. The canvas shop reminded me that regular, gentle cleaning with soap and water will go a long way in extending their lifespan.
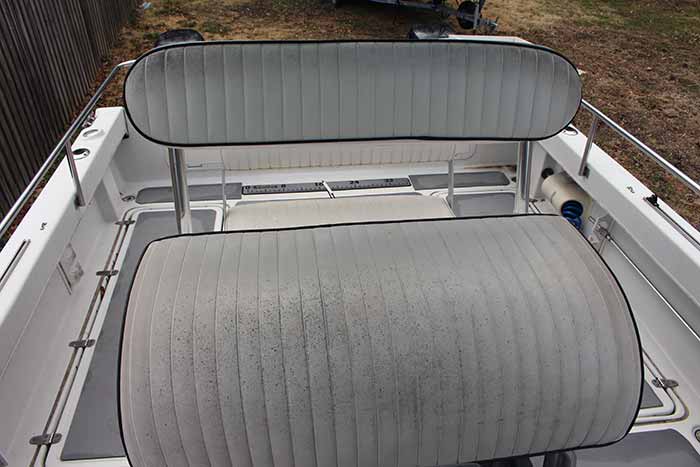
Old vinyl seat cushions.
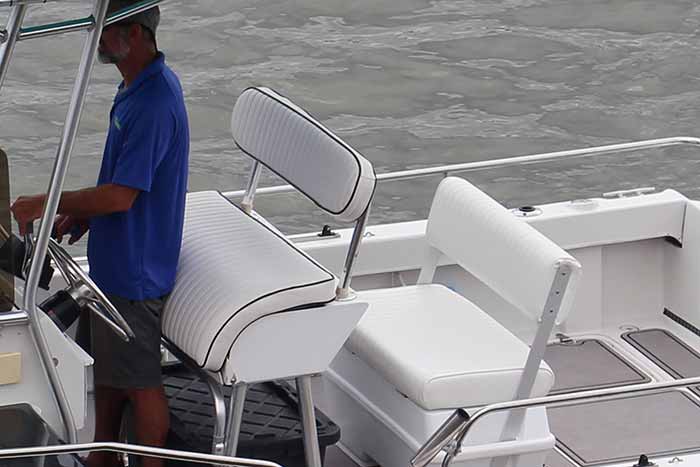
As far as visual improvements go, well, let's just say that the new cushions made quite a difference.
What I wish I'd known: The original cushions had teal piping that matched the rest of the boat's color scheme, which I could have asked for. Being so accustomed to black piping, I didn't even notice the mismatch anymore, so when the new cushions came in, I thought the canvas shop had made a mistake by using black. It wasn't until I looked at the "before" pictures that I realized that the mistake was mine.
T-Top
Approximate hit: $1,485.
What was replaced: A crack in the pipework was rewelded, an Imtra IML Cockpit & Deck Light was added, a masthead light was added, and the entire top was removed, rebedded, rewired, and rebolted.
What I learned: I almost didn't remove and rebed the top because its mounting bolt holes have leaked into the head compartment since day one, and I didn't expect this particular problem to ever be resolved. But I was wrong — it hasn't leaked since the refit, and I'm glad I spent the extra cash on this part of the job.
What I wish I'd known: Just how shabby the canvas top would look. It was replaced three seasons ago and still seemed new to me. But with the rest of the boat now looking so fresh, that slightly aged canvas seems downright shabby. I also wish I'd thought to put a second Imtra Cockpit & Deck Light on the front of the top. These things are shockingly bright, and one illuminates the entire cockpit, but the aft-facing light doesn't do a thing for the bow. The cost of the hardware is minor-league ($89), and if I were taking the boat back to Pasadena Boat Works, that second light would be at the top of the list.
With new bottom paint and a complete wax job added in, the total expenditure was just a hair under $20K. Was it worth the cost? Would I recommend a similar path to others? In both cases, the answer is a resounding yes. But you have to remember that I didn't need to repower the boat. If that had been necessary, the price tag would have almost doubled. That's still substantially less than half the cost of replacing the boat entirely, but it certainly adds some additional considerations into the equation.
What's the single biggest lesson I learned? Think big, and replace everything you possibly can. I wish I'd spent the extra cash on gauges, canvas, and an MFD. The cost wouldn't have gone up prohibitively, and I would have been even happier with the end result.
As to whether this path would be the right one for you, I can't say. But one thing is for sure: Just as soon as I finish typing these words, I'll be grabbing my fishing rods and heading out the door for another trip on my "new" old boat.
Be Like Lenny: A BoatUS Consumer Affairs Perspective
- Lenny found a shop that specializes in refitting and repairing outboard-powered boats. He did his homework, and he didn't bring his boat to the cheapest place. Check reviews and ask around for feedback on any shops you're considering.
- Lenny visited his boat at the shop weekly. Whether your boat is in the shop for a week, a month, or a year, it is your boat, your investment, and your responsibility. By visiting frequently, he headed off potential problems and visualized future needs. Any changes were added to the list before a project was too far along. There was no doubt that he cared for his boat and expected the same care from the shop.
- Lenny did extensive research and made a list of the items he wanted to replace or upgrade. Some unexpected issues were discovered along the way, so his list of upgrades grew as the work proceeded. But the key is that he started with a pretty specific list in mind. And of course, visiting frequently allowed for changes and additions to be made in a timely manner without a lot of added expense.
- Lenny had a budget. Being realistic about the costs of parts and labor is important and involves some time spent with the shop to go over your list. Make sure that the shop draws up a comprehensive work order before the work starts. Visiting often (this cannot be overstated) will allow you and the shop to adjust the work order so that when the work is done, any increase in the final bill will not be a surprise.
- While it wasn't mentioned in the story, Lenny asked what kind of warranty was offered on the work before it started. Most shops will cover the work with a 30-, 60-, or 90-day warranty. Get that in writing, too. When you pick up your newly refurbished boat, get it out on the water as soon as possible. Thoroughly check all systems, and make sure the boat has no issues. If you first use the boat six months after being refurbished and find a problem, that warranty will have long expired.
— Debbie Schaefer