Advertisement
Once you choose a fishing rod and reel, it's time to get rigging. Here's the step-by-step process of rigging a fishing rod.
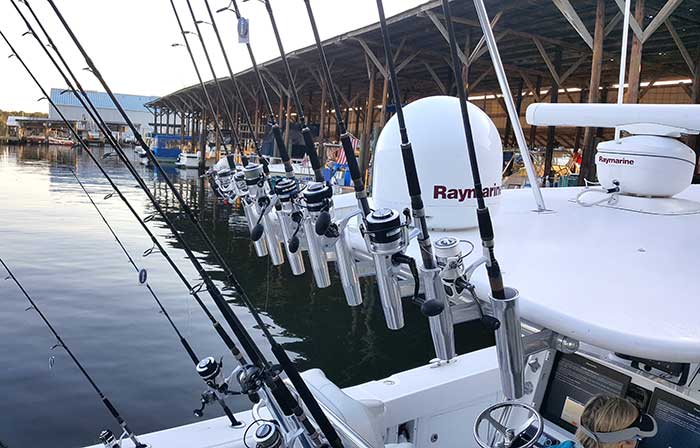
Photo: Lenny Rudow
You've watched a bunch of videos and read all you can find online before visiting the local tackle shop and making your final choices. You're getting close to filling the cooler with those fresh-caught fish, but before you can wet a line, you'll have to rig up your gear. No worries, anglers, this isn't a terribly complex process. Just stick to these six main tasks, and you'll be hauling in the big one before you know it.
Tip
Always refer to the instructions that came with your equipment. These will often have specific recommendations on which oil and grease should be used.
- Choose the right type of fishing line for the fishing techniques you plan to try. There are two main types: braid and monofilament. As a general rule of thumb, braid is preferred for fishing with lures, while monofilament if preferred for fishing with most techniques incorporating live or cut bait.
- Choose the right size line. This is measured in "pound-test" (breaking strength rated by the pound). Your rod and reel will have suggested size ranges printed right on them, often stamped just above the grip on the rod and on the spool of the reel. Beginners commonly choose line sizes in the heavier side of the range, while more advanced anglers may want lighter line that requires more finesse when playing a fish but also casts farther and cuts the water better.
- Have the line wound onto the reel by a professional at your local tackle shop. The store has a machine that can put the line on under tension and will do a much better job than you can at home.
- Once the reel is spooled up and the end of the line has been threaded through the rod guides, it's time to prepare a leader, which is a special section of line between the lure and the main fishing line. This is commonly monofilament or fluorocarbon (a type of monoilament that's less visible in the water but is also more expensive). In areas with clear water, fluorocarbon is considered a must-have by many anglers. The leader is usually two to three times the pound-test of the mainline. For general multipurpose lure fishing, 3 or 4 feet of leader is plenty, although for trolling and some other specific techniques, leaders up to five times that length are utilized.
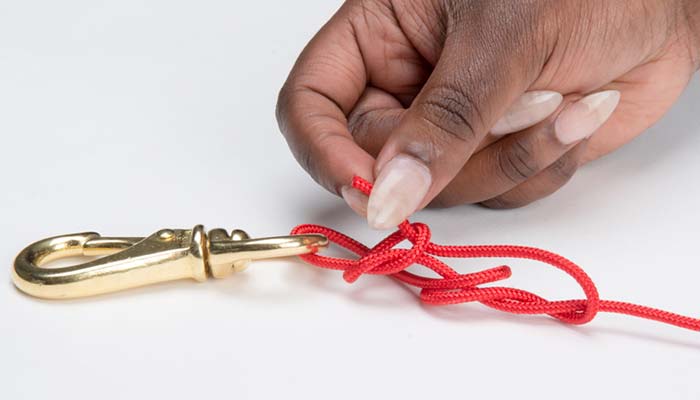
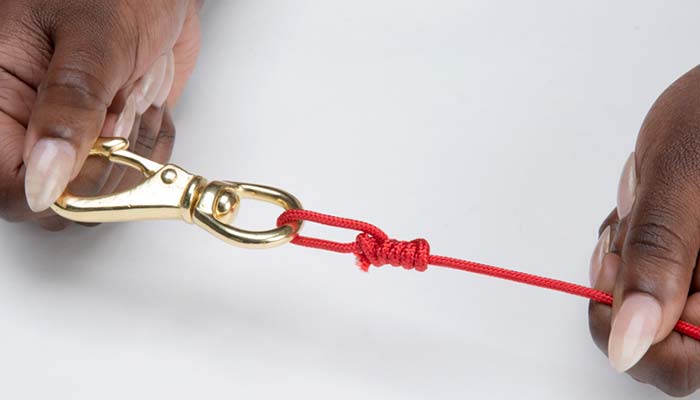
- Tie the leader to the end of the fishing line. There are a number of knots that can be used to make this connection, but the uni-to-uni knot (also called the double-uni) is one of the most widely accepted, and we recommend learning that one. (See "The Double-Uni Knot" below for step-by-step instructions.)
- After the leader is attached, you can either tie directly to your lure using a knot like an improved clinch or a loop-knot, or you may want to tie a snap-swivel or a clip onto the end. On smaller lures, or when chasing fish with excellent eyesight, it's best to avoid hardware like snaps and clips. But if you plan to go bottom fishing with bait or go live-lining (live bait on your hook) or use some other style which incorporates premade rigs, adding a clip will make for quick and easy rig changes.
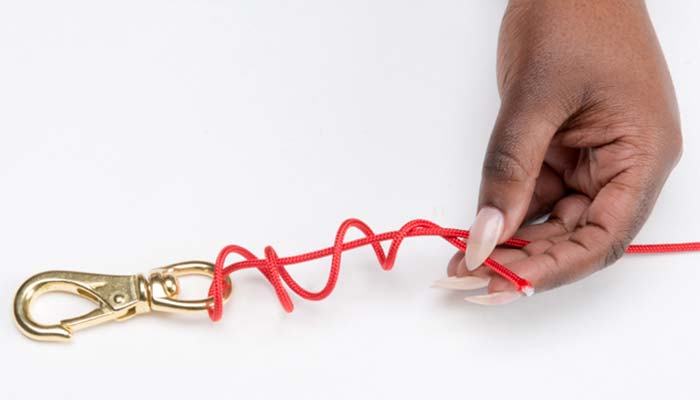
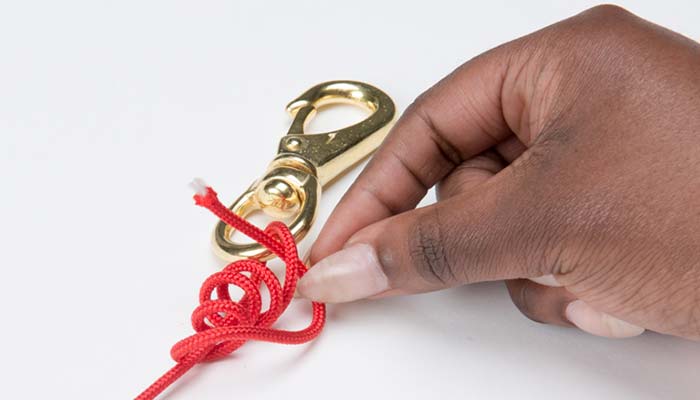
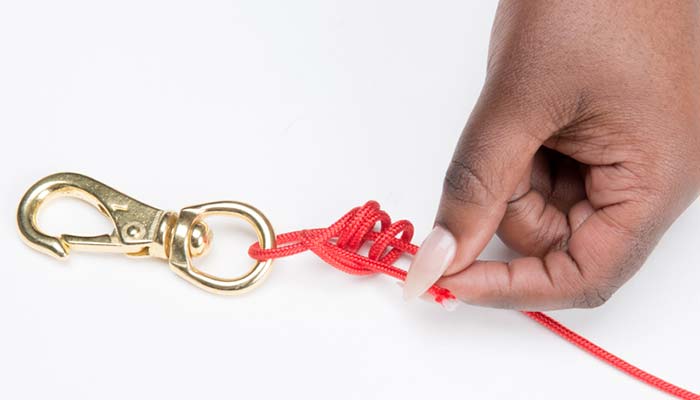
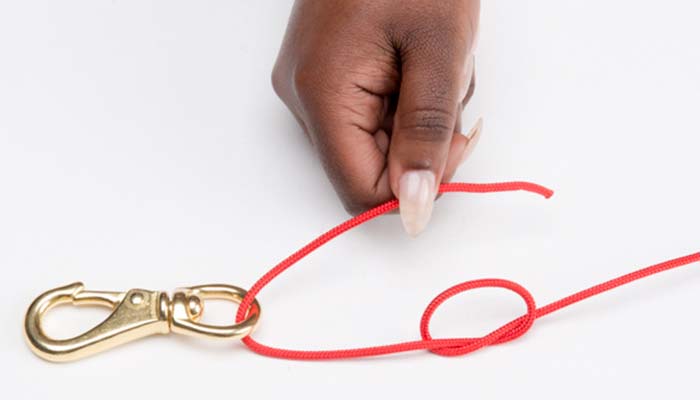
The Double-Uni Knot
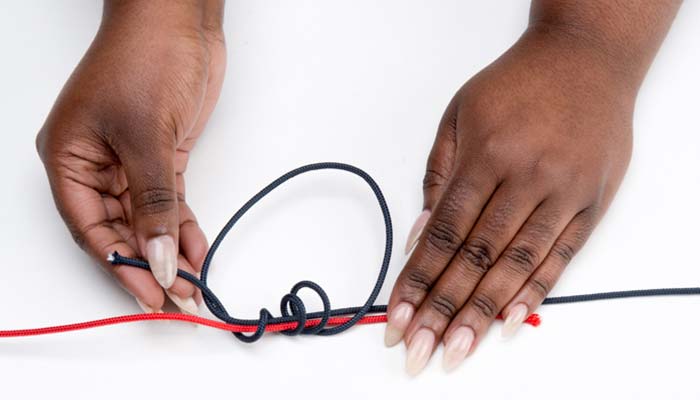
- Overlap the ends of the two lines to be joined. Take the end of the line from the left, double back, and make three to four wraps around both lines and through the loop that was formed. Pull the tag end to tighten. (Note: When tying mono to braided line, make five turns with the mono and eight turns with the braid.)
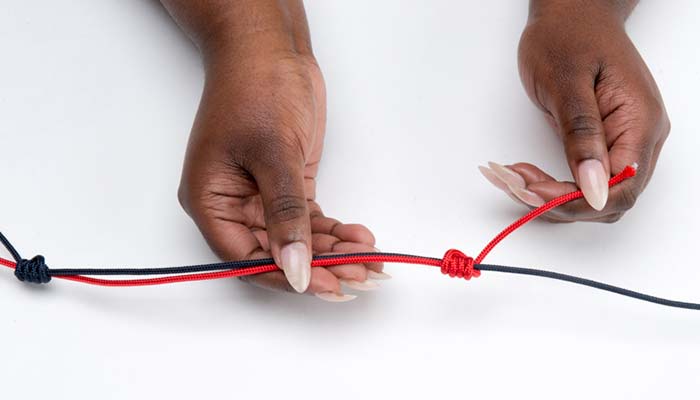
- Repeat with the end of the line on the right, making the same number of wraps unless tying with braided line for which you should double the number of wraps.
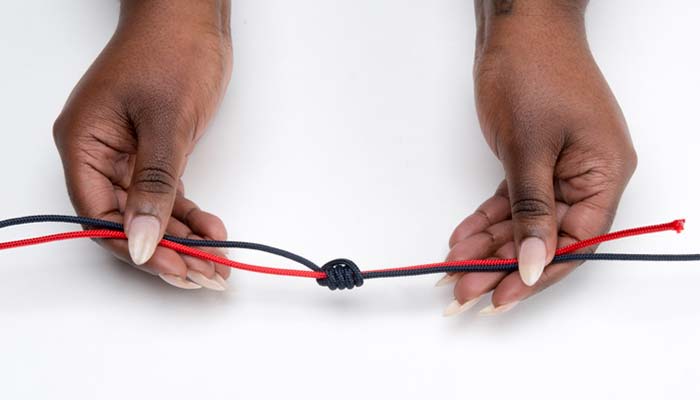
- You have now tied two uni knots, making this a double-uni. Pull the standing lines in opposite directions to slide the two knots together, then trim the ends close to the knot.
The Improved Clinch Knot
The improved clinch is very easy to tie, which is the main reason it's so popular for connecting monofilament to terminal tackle. It's most effective on lines under 20-pound test.
- Pass the line through the eye of the hook, swivel, or lure. Double back and make five turns around the standing line.
- Holding the coils in place, thread the tag end of the first loop above the eye, then through the big loop.
- Hold the tag end and standing line while pulling up the coils. Make sure the coils are in a spiral, not overlapping each other. Slide against the eye before clipping off the end close to the completed knot.
The Nonslip Loop Knot
- Make an overhand knot in the line about 10 inches from the end. Pass the tag end through the hook eye and back through the loop of the overhand knot.
- Wrap the tag end around the standing part five or six times. Bring tag end back through overhand knot, entering from same side it exited from before.
- Moisten he knot then pull slowly on the tag end to cinch the wraps loosely together. Then pull the loop and the standing line in opposite directions to seat the knot before trimming back the end.