Advertisement
Problems in your boats electrical system can destroy your pride and joy. Be especially careful around these common problem areas.
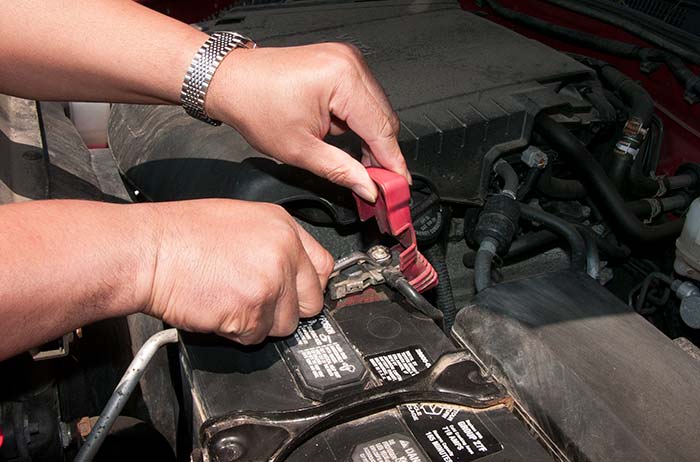
Many electrical problems can be traced to poor battery installations. Make sure that battery cables are well secure and free of corrosion. (Photo: Mark Corke)
In any given year, I inspect quite a few boats. These range from simple tenders to extremely complicated power and sailing yachts. When it comes to electrical systems and their installations, I keep a watchful eye out for not only compliance with American Boat & Yacht Council (ABYC) and international standards but also simple workmanship and the application of best industry practices. Let's get a look at some of the common issues I encounter and consider the outcomes to which these mistakes can often lead.
Motor Circuits And The "Locked Rotor"
Without question, one of the most common issues I run into is the over-fusing of small DC-motor circuits, which happens when someone installs a fuse with a higher amperage rating than what's recommended. The motors you have on board to run your bilge pump, livewell pump, bilge blower fan, or maybe a macerator pump for your head system all have a fuse rating printed on the label. Motor circuits are different from all of the other electrical circuits on your boat because installers need to worry about protecting the device as well as the wire runs supplying power. Here's why.
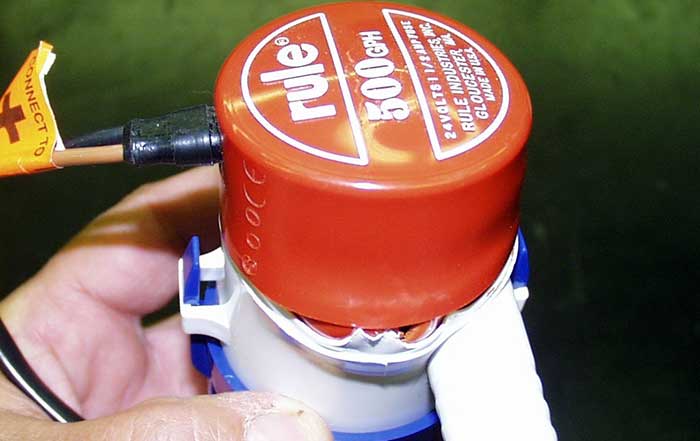
This pump melted when the impeller jammed. Without proper circuit protection, a fire could be the result.
In the case of a jammed pump, the motor is trying to turn but can't due to a piece of debris wedged between the impeller and the housing. If the installed fuse is rated higher than the manufacturer's maximum fuse size, it won't trip and open the circuit. If the fuse doesn't blow, power will continue to flow to the motor and it will begin to overheat, ultimately catching fire. The inevitability of a fire is predicted by applying a fundamental electrical law, Ohm's law. This states that as voltage remains constant and electrical resistance increases, the current decreases. In this case, as the motor heats up, its resistance increases, and the current is quite quickly reduced to below the trip threshold for the fuse. Motors provide a maximum fuse size on the label. Make sure each of your fuses matches the motor recommendation exactly.
Replacing A Battery Charger
When installing a new battery charger on your boat, there's a lot more to consider than just mounting the unit, connecting positive and negative cables to your batteries, and plugging the unit into an outlet. Modern chargers are actually quite sophisticated and, if set up properly, can enhance battery life. The best chargers, in my opinion, allow the installer to calibrate each phase of charging down to within a tenth of a volt. With this level of precision available, you'll need to check with your battery manufacturer to see what it recommends, then set up your charger accordingly.
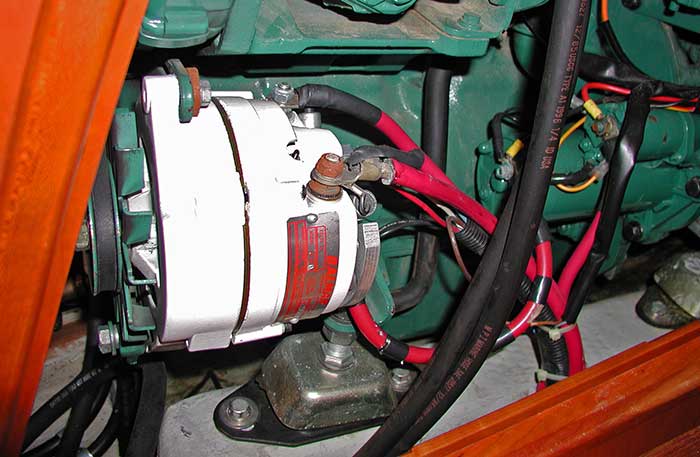
Positive conductors should always have a rubber boot cover to prevent accidental short circuits — they're missing here. (Photo: Ed Sherman)
Overcharging can be the kiss of death for the longevity of the battery and may create a very costly situation for the boat owner. The proper calibration of battery chargers helps ensure you don't end up with a fire or explosion.
Understand that sealed AGM or gel batteries are actually more appropriately described as "sealed valve regulated," or SVR. It the event of an overcharging situation, which can be caused by a shore-powered battery charger that isn't calibrated correctly, they will gas excessively and slowly but surely lose electrolyte through the vent system. In the case of flooded-sealed batteries, they will open a vent at about 3 PSI to release excess pressure inside the battery case. If this all goes unnoticed for an extended period of time, it's quite possible for one or more cells to end up with dangerously low electrolyte. Remember that what's left behind in a partially depleted battery cell is hydrogen gas, which is quite explosive. Excessively low electrolyte can cause an electrical arc to occur inside the battery between two or more cell plates, and batteries can explode as a result. It some cases, even an AGM battery can get so hot internally that it melts the plastic case and continues burning — an extremely expensive and dangerous mess.
How do you mitigate against this possibility? Make sure you follow your battery-charger manufacturer's recommendations to the letter when it comes to initial calibration for the exact type of battery(s) you intend to charge.
Inverter/Charger Installations Gone Bad
Many boat owners want to have the convenience of household-grade electrical power on board, and for a variety of reasons, a DC to AC inverter or inverter/charger is the solution. In my experience, however, DIY inverter installs are frequently done incorrectly, with dangerous situations resulting. You'd think an inverter installation would be pretty straightforward: Hook it up to the batteries, plug something in, and it's ready to go. Not so. A fault I see often is a missing ground connection to the metal case of battery chargers.
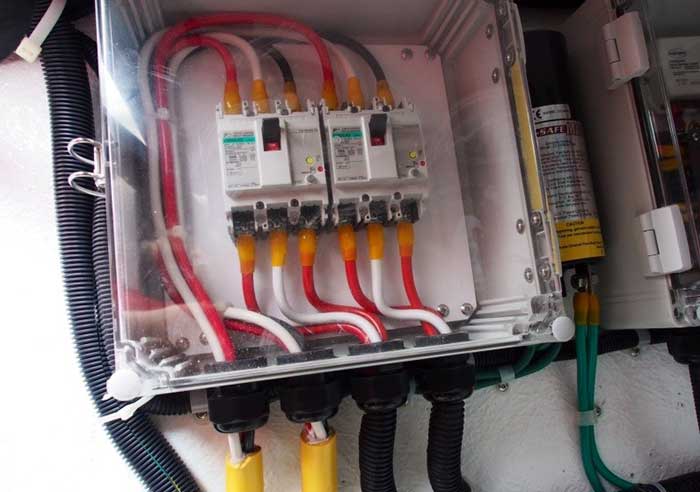
Poor wiring on a brand-new boat! Those yellow insulating jackets should be clamped inside the cable glands.
To begin, you can clearly see one of the most common faults. It actually applies to all inverters, inverter/charger combo units, and simple battery chargers with metal cases. This is the connection point where the DC grounding conductor must be attached. No wire there. If a DC short circuit to the metal case occurs, the really small AC grounding conductor, which is also connected to the metal case of the charger or inverter, will be required to carry all the DC fault current that the connected batteries will discharge. Folks, with thousands of amps of available short-circuit current potential here, that little AC grounding conductor will simply burn up because it simply can't handle the amount of current involved. Depending upon how the AC wiring connected to the inverter is routed through the boat, this could create a significant fire on the boat. In the case of this boat, the particular installation also didn't include any ABYC-required overcurrent protection or a master battery switch in the cable run connecting the inverter to four giant-sized batteries located in an adjacent locker. Imagine what can happen when all the power in those batteries shorts out against something with no way to shut it off.
Don't make the same mistakes. If you're planning on adding an inverter to your boat, make sure your inverter is designed for marine use; cheap, big-box-store units aren't. A marine-rated inverter will have the necessary safety features, such as GFCI-protected outlets, built in. Follow the manufacturer's installation instructions to the letter. If you're not certain, hire an ABYC-certified technician to do it.
Tip
The Stacked Terminal Issue
One of the problems I see all too often has to do with stacking too many wiring terminals onto a single lug. This can create a situation in which the business end of the terminal isn't in full contact with the lug. This creates excessive electrical resistance and focuses it at that point. As I've said, the primary by-product of excessive resistance is heat. Too much heat, and things start to burn. And as with the jammed pump, this scenario won't blow a fuse or trip a circuit breaker either because excess resistance lowers amperage flow below the trip threshold of the fuse or circuit breaker protecting the wiring. You can fix this by using a longer terminal strip so that you don't have to stack connections on the battery post.
Protect Those Hot Terminals!
DC-positive terminals should have insulating boots protecting them against a possible short circuit. In the case of starter-motor terminals, there usually won't be any fuse to blow, either. That means that any short circuit to the engine block is going to cause sparks to fly and possibly start a fire. You can imagine for yourself how such an event can end up.
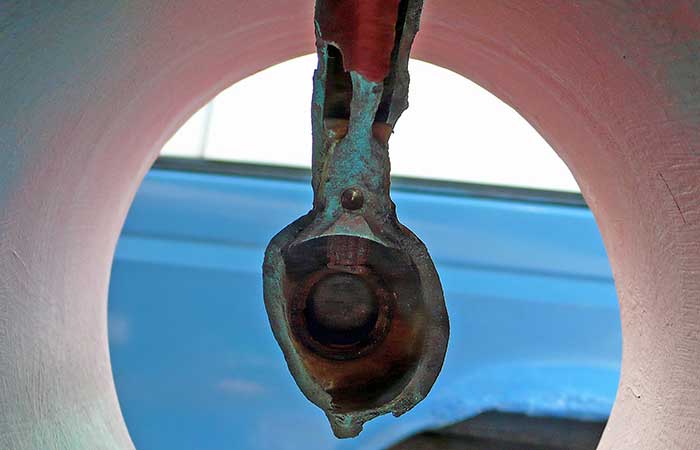
Stray current can cost you plenty. A faulty electrical system caused this bronze bow thruster to be consumed in just over a week!
In the case of the bow thruster (above), gear was stuffed into the same compartment as the thruster wiring, damaging the wire and short circuiting the DC-positive cable lug to the thruster-motor case. The quality of the electrical connection made here will determine if the fuse or circuit breaker will blow. The remains of the bow-thruster lower leg shows the net result of stray current corrosion caused by this event. The damage you see only took about a week to occur. DC stray current emerged from the motor case out through the thruster gear case, turning the lower leg into an anode. This was on a new boat for which the new owner hadn't yet taken delivery. Keep excess gear out of the space immediately surrounding any thruster, and make sure those terminals are insulated!