Advertisement
Deflecting the light, with this handy, fun plexi-bottom bucket, lets you look before you anchor.
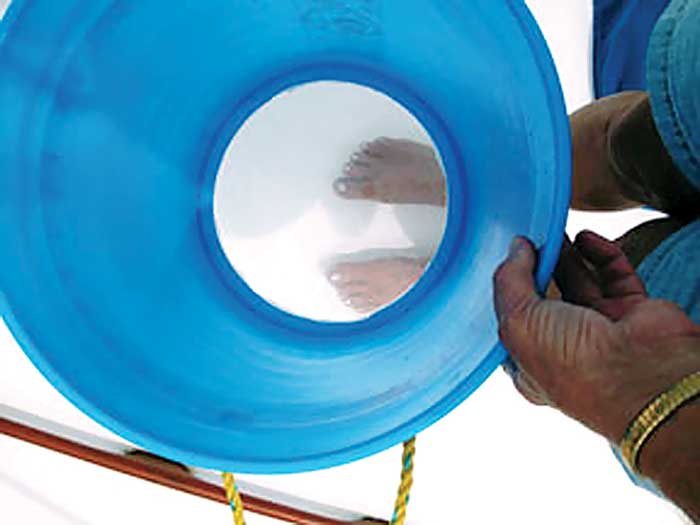
Photo: Tom Neale
If you're boating in clear water, it can be useful to view the bottom. For example, discovering that the seabed under the boat is rock, deep weed, or scoured coral before you try to anchor can avoid a lot of pointless frustration. Unfortunately wind chop and light reflection usually obscure your sight. All that's required to see into the water is a glass panel to "flatten" the surface. A dive mask will serve, but unless you wear it and stick your head in the water, your view is soon compromised by water slopping over the short skirt and onto the top of the glass.
The better tool is a look bucket. For little money, you can make one better than most that are commercially available. All you need is a stiff plastic bucket, a disk of clear plastic, and appropriate adhesive. A five-gallon paint bucket is the usual bucket choice because it's stiff, has a sharp angle between bottom and side, and features a protective lip around the base. However, a smaller bucket (2 1/2-3 gallons) can be easier to handle. The clear plastic can be acrylic or polycarbonate and should be not less than 1/8-inch thick; thicker is better because flexing can make the bond between the bucket and the plastic fail. I use marine or structural glazing silicone for gluing the lens to the bucket, but you can also use polyurethane (3M 5200) if the lens is acrylic (but not polycarbonate). Flexible epoxy can also bond and seal the lens.
1. Cut a disk of clear plastic to the inside diameter at the bottom of the bucket. Using a utility knife or a hot knife (better), cut out the bottom of the bucket, leaving a one-inch rim. So the buoyancy will compress rather than test the seal, some people bond the plastic outside the bucket, but this typically makes it untrustworthy as an actual bucket unless you add mechanical fasteners. I prefer setting the lens into a bed of sealant that extends up the side of the bucket to provide both tensile and sheer strength.
2. Hold the circular lens in place and trace around the cut circle of the bucket with a sharp blade to cut the protective film. Peel away the perimeter piece, leaving the middle. To provide a better gripping surface for your adhesive, use 100-grit paper to sand the exposed plastic around the circumference of the lens, including the edge. Also, sand the mating surfaces of the bucket. For a neater job, mask the bucket wall above the level of the lens.
3. Apply adhesive sealant liberally to the lip and side of the bucket, then set the lens in place. Weight it lightly; you want the lens to make full contact but you don't want to squeeze out all of the adhesive. The seal needs to be thick enough to absorb some flex during use.
4. Allow the adhesive to cure fully, trim away excess sealant, and peel away the remaining film and any masking you did. Your bucket is ready for "look box" duty while still functioning as a bucket for washing or bailing.