Advertisement
From washing off mud to rinsing away fish scales, a raw water washdown could be just the thing your boat needs.
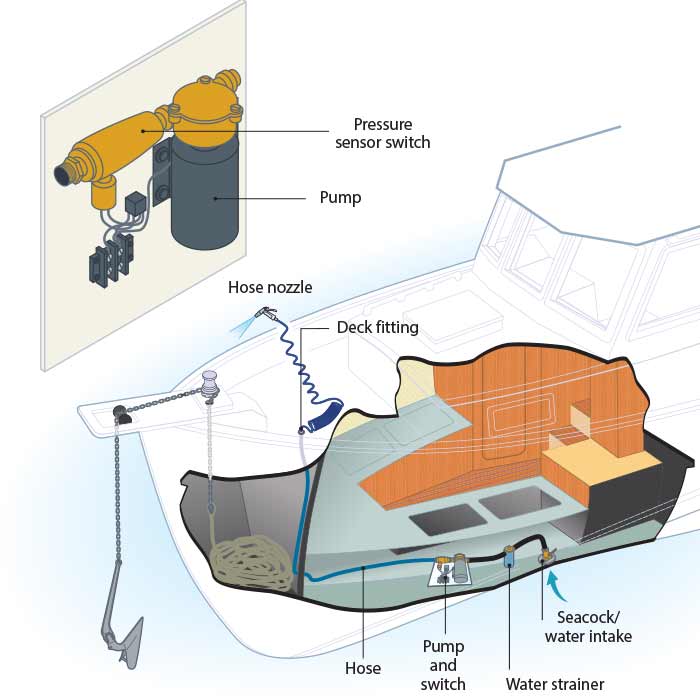
This shows the general arrangement for a saltwater washdown. If this was being used on a fishing boat, the pump would be sited farther aft. (Photo: ©2019 Mirto Art Studio)
On Seaglass, our Grand Banks trawler, my wife Rita and I often like to anchor overnight. Chesapeake Bay, where we presently do most of our cruising, is filled with thick, glutinous mud — great for anchoring, but devilish to remove from anchor and chain. To deal with the mud, I wanted to install a washdown pump and hose to blast off the muck before it ended up all over the boat or down in the anchor locker.
Washdowns aren't just for anchors either. On a small center-console used for fishing, a washdown installed at the rear of the boat is an excellent solution for washing blood and fish guts out of the boat.
Tips For Seacocks And Thru-Hulls
Connecting equipment to an existing thru-hull or installing a new one can make anyone nervous. After all, an analysis of our BoatUS Marine Insurance files shows that about 20 percent of boats sinking at the dock are caused by thru-hull issues. But with some common sense and the right materials, you can rest well knowing your boat is secure.
First, keep in mind that any hole below the waterline has the potential to quickly sink a boat. In our BoatUS study, leaking thru-hulls, included stuffing boxes, baitwell discharges, washdown fittings, transducer plugs, bow thruster hoses, broken scuppers, and failed head discharges were all examples of leaking thru-hulls that sank boats. Your thru-hulls should all have operable seacocks that can turn off the flow of water with a 90-degree turn of the handle.
Clamps (all stainless steel) on hoses should be snug and free of rust. Two clamps are better than one if they can fit over the spud. Hoses at thru-hulls should be the reinforced type, which is usually a heavy black hose. Lighter, unreinforced PVC hoses can (and do) rupture and crack.
Check the entire length of the hose, as excessive heat from the engine or chemicals (bilge cleaners, battery acid, spilled fuel, and so on) can cause isolated failures. Replace hoses that are suspect — mushy, hard, and/or cracked. And should all else fail, it's important to tie on a soft wood plug at every thru-hull in case of emergency.
Prevention Any "opening" in the hull, whether it's protected by a seacock or stuffing box, needs to be inspected periodically. The same is true for openings that are slightly above the waterline. Seacocks should be operable. Any that are "frozen" open or shut should be taken apart and lubricated.
— Charles Fort
Many washdown pumps incorporate some sort of solenoid, or pressure switch. As soon as the trigger is pulled on the end of the hose, the resultant drop in pressure is sensed, which turns on the pump. This serves two purposes: First, the pump only runs when water is required. Second, the pump isn't trying to force water against the dead end of a closed water outlet, which will damage both the pump and the electric motor powering it.
Pumps come in different outputs, and prices vary depending on the construction. I used a Groco C60, which is heavy because of its bronze components, but offers a substantial water flow of around 5 gallons per minute — plenty of power to blast away dirt. This pump may be overkill for a smaller boat or for occasional use, so do some online research to find the pump that best fits your needs and budget. Irrespective of the actual pump chosen, it's likely that any installation will be a compromise between the ideal and possible. If you can, mount the pump inverted, in other words with the pump chamber at a lower level than the motor body, as there's less chance for water to leak past seals and into the motor housing.
Before starting, think about where you want to place the outlet. Aim to keep wiring runs as short as possible. The current draw on a typical washdown pump is fairly high, and longer wiring runs can lead to voltage drop and decreased pump performance. The length of hose is also important; if you're trying to suck the water too far or too high, the rate for flow at the nozzle is likely to be disappointing.
The installation process will vary slightly from boat to boat, but by sticking to the steps outlined here, you should have a successful outcome. Let's get to it.
Tech Support
Degree Of Difficulty: Moderate to Advanced
Tools and Materials:- Drill
- Hole saw, drill bit
- Screw drivers
- Electrical crimpers
- Tape measure
- Wrenches
- Pump
- Hose
- Hose clamps
- Seacock
- Thru-hull
- Cable
- Deck hose outlet
- Bedding compound
- Thread sealant tape
Time: 8 hours.
Cost: $200 to $600, depending on the pump.
1. Install a thru-hull and seacock if you don't have one already. Installing a seacock is outside the scope of this article. It's an advanced project so you may want to leave it to a professional yard if you have any doubts about your skills. In this case, I was able to repurpose a spare that was last used for raw water to flush the head on my boat. (I have since converted it to a freshwater flush.) It's also possible to tee off an existing inlet, like a livewell inlet, to avoid the extra time and expense of installing an extra thru-hull.
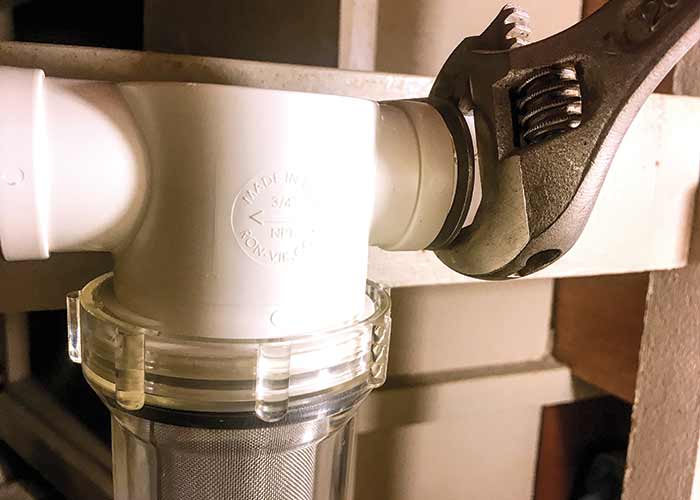
Don't connect into an engine-cooling inlet, or you could starve your engine of water, causing it to overheat. Using other inlets, such as those for an air conditioner, may also cause problems. You'll also want to install a strainer between the water intake and the pump. I mounted mine close to the pump where it is easily accessible for inspection and service. Use thread-sealant tape on any screw-together pipe connections.
2. Mount the pump in a convenient location. Place this out of the way but reasonably close to the water intake. As with everything, there's always an element of compromise between the optimum placement and where you can actually mount the pump. Remember: Pumps push liquids better than they suck. You'll also have to run cabling to the pump, so try to keep it out of the bilge to protect the cable and the pump from corrosion.
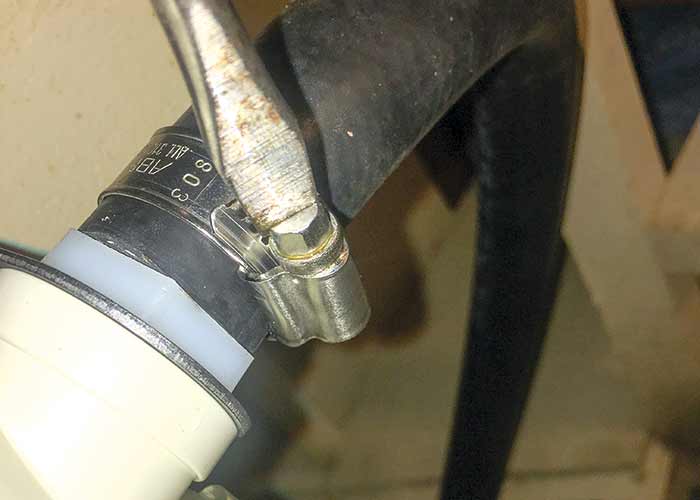
3. Connect the pipe between the seacock and the pump. Use reinforced hose and stainless-steel clamps. Support the hoses with plastic clips. This keeps everything tidy and avoids loops where water might collect and freeze or stagnate in the winter months.
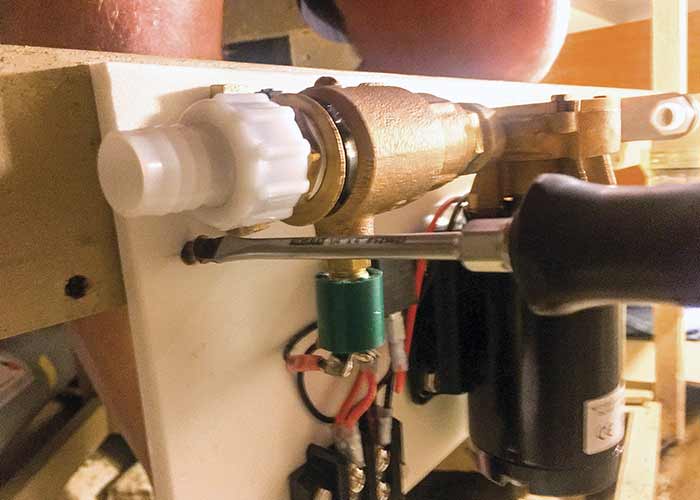
4. The Groco is a vane pump and will lose prime, meaning it's unable to suck, if water runs out of the intake, so I also installed a check valve in the intake line between the strainer and the pump. It's very easy to mount a check valve the wrong way, and if you do, the pump won't operate. Note the arrow showing the water-flow direction.
Tip: Avoid using 3M 5200 as a bedding for the outlet or you'll have a difficult time removing the fitting should you need to. Instead, use a nonadhesive bedding compound like 3M 4200.
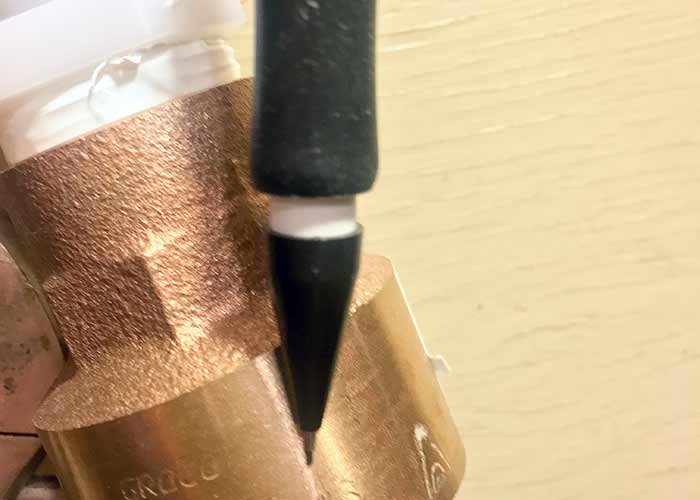
5. Check and double check before drilling any holes; you don't want to catch any cables or other stuff on the backside. I had several holes to drill for my installation. For those through plywood, a spade bit is fast and accurate. But I also had some large-diameter holes to drill through fiberglass for hoses and the outlet. For these, I used a saw-tooth hole saw.
My washdown is primarily used for blasting mud off the anchor and chain, so I chose to install the outlet spigot on the foredeck close to the windlass. Pick an area where the outlet will not get in the way, get stepped on, or cause damage to people or gear.
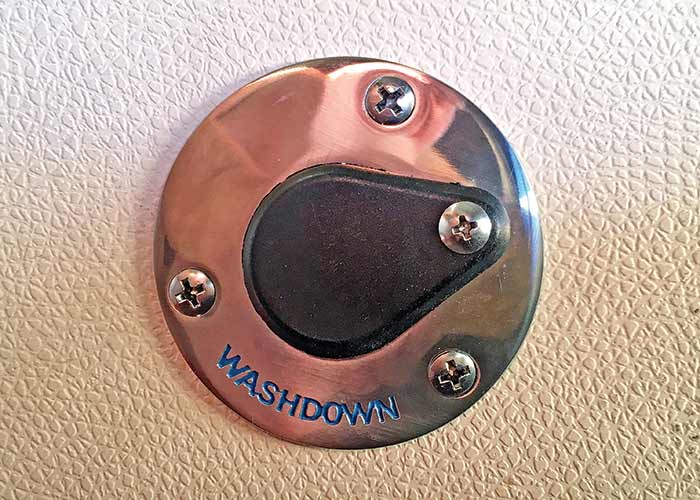
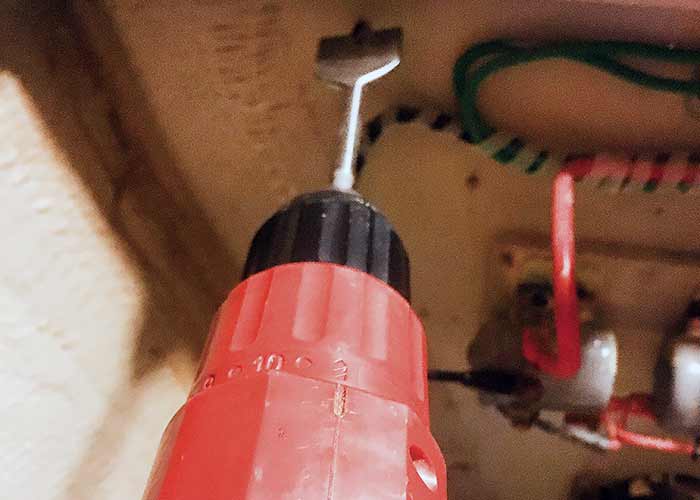
6. There are different varieties of outlets, too — quick disconnects, traditional faucets, and hose connections that hide behind a deck plate for clean installation. Deck connectors rarely come with the pump, so you'll want to choose one that works best for your boat and the particular application. I ultimately chose a quick-disconnect type, which looks neater when not in use. This required a fairly large hole so I carefully checked before drilling so that I didn't damage anything on the back side and that there was room for me to make the necessary connections. If your deck is cored, seal the coring material with epoxy before installing the outlet.
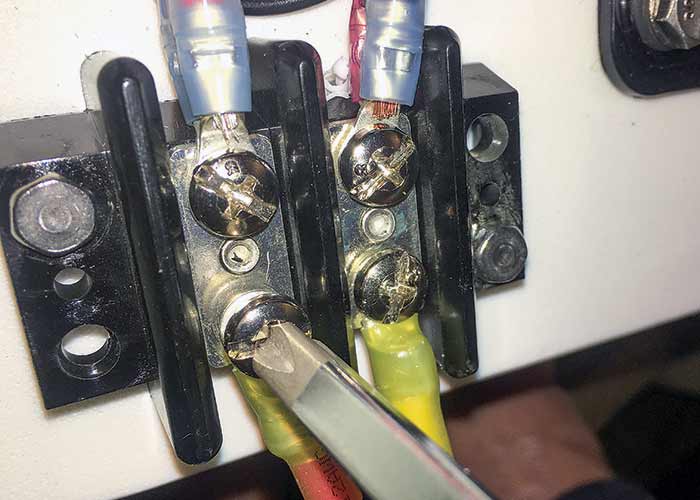
7. Wire the pump using the correct wire gauge as suggested in the instructions. An undersized cable could cause overheating, and the voltage drop may make the pump work at less-than-full capacity. Use proper tinned boat cable, crimped connections, and heat-shrink for any connections. The Groco requires a fairly high current, so I connected my pump to a dedicated 20-amp breaker at the main panel following the manufacturer's instructions with regard to cable size and circuit protection.