Advertisement
Keeping the water out is essential for the safety, comfort, and well being of your boat. Maybe it's time to check those weather seals.
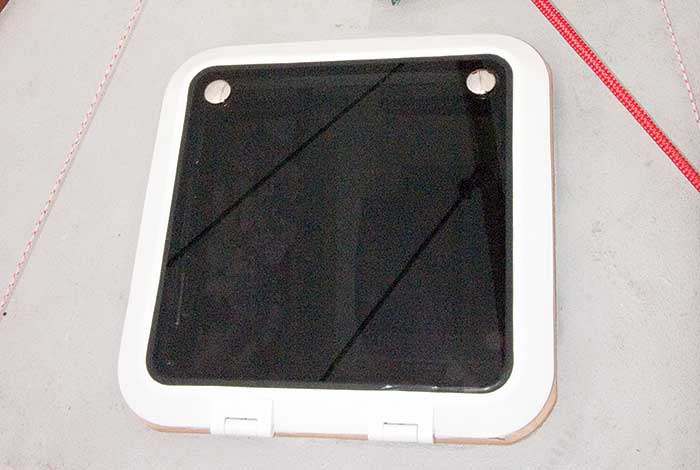
A well-fitting hatch will keep the water out where it belongs, and make life inside a far sweeter experience. (Photo: Mark Corke)
There are lots of openings on your boat where the water can get in. We all know about the ones below the waterline, but what about the ones we seldom think of?
The average boat has at least one or two deck plates, a hatch or two, and maybe even a window or door. All of these penetrations have the potential to allow water into your boat. In many cases leaks at these access points can just be an irritation. But in extreme cases, they can compromise the seaworthiness of your boat. The first indication that a hatch seal may need service or replacement is a drip inside the boat. Don't get this confused with a hatch or window that needs rebedding. That is an issue outside the scope of this article.
Tip
A small drip from a window or hatch can do real damage to your boat over time. Drips ruin internal woodwork, joinery, and finishes. Water in the boat can lead to mold and all the associated problems that go along with it. It's far better for the health of your boat and crew to deal with leaking hatches and ports early on. Things will only get worse over time, and delaying dealing with leaks could cost you dearly. Once you've determined that there's a problem, a little investigation is required. Conduct a visual check of any seals and gaskets. They should have no visible tears, cracks, or other issues. All seals and gaskets should be flexible and pliable to the touch; they may look OK, but over time they may lose their plasticity and not seal as well as they once did. Obviously if there is visible damage, they should be replaced.
Tip
Changing them out is often fairly easy by simply buying new seals and installing them in place after the old ones have been removed. The hardest part is often getting the old ones out, especially if they sit in a recess. I've often found that a flat screwdriver is the best tool for removing the old seals because it can get under and lift it up and it's not as sharp as some other types.
Take your time and be patient. Avoid damaging the surrounding metalwork or trim when you remove the old seal because the replacement could then not fit properly, and the hatch may continue to leak. If the company that made your ports or hatches is still in business, it will often have instructions on its website in addition to links on how to purchase replacement seals.
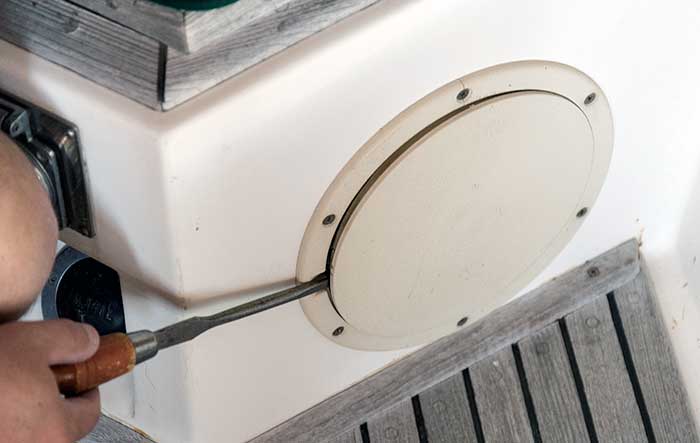
1(a). Deck plates are the easiest to check and may be of the screw-in or pry-out type. Irrespective, the seal is often just an O-ring that sits in a groove. Pry this out with a flat-blade screwdriver.
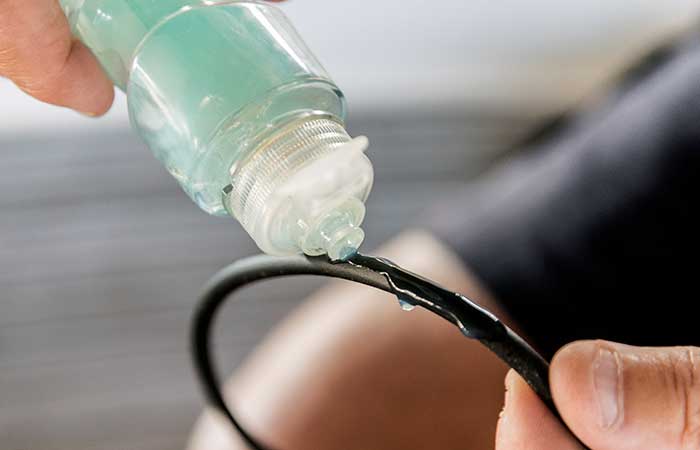
1(b). After thoroughly cleaning the seating groove and underside of the plate, squirt a couple of drops of dishwashing liquid onto the new seal or deck plate edge to help ease the seal into place if it's at all tight.
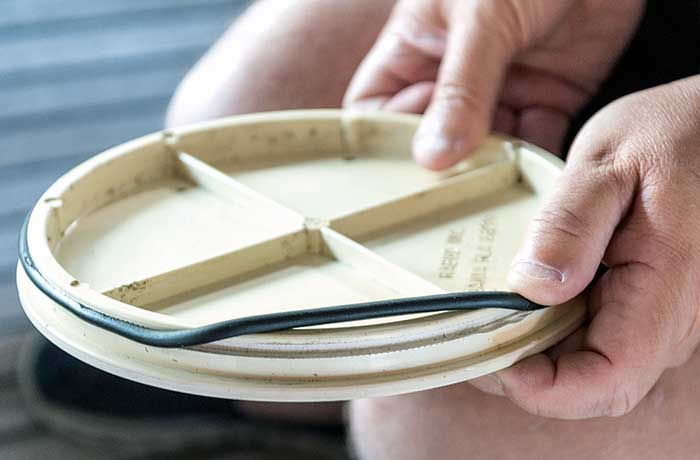
1(c). Roll the new seal into place.
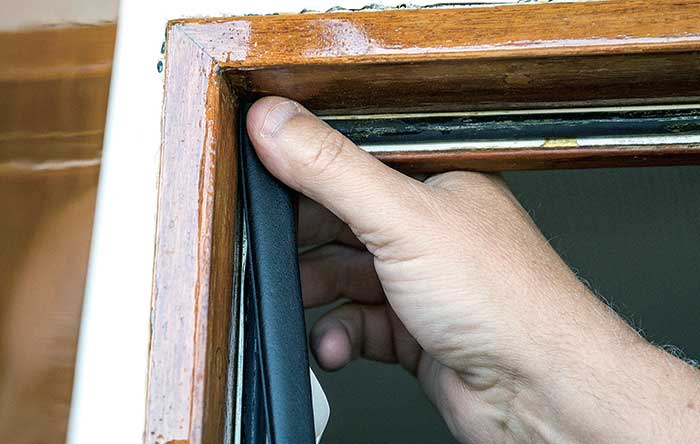
2. Replacing seals on deck hatches is often a straightforward job if the manufacturer is still in business. Each manufacturer's products are different and so are not necessarily interchangeable. Bomar, for instance, uses a D-shaped seal with a self-adhesive backing. Those for Lewmar are a press fit.
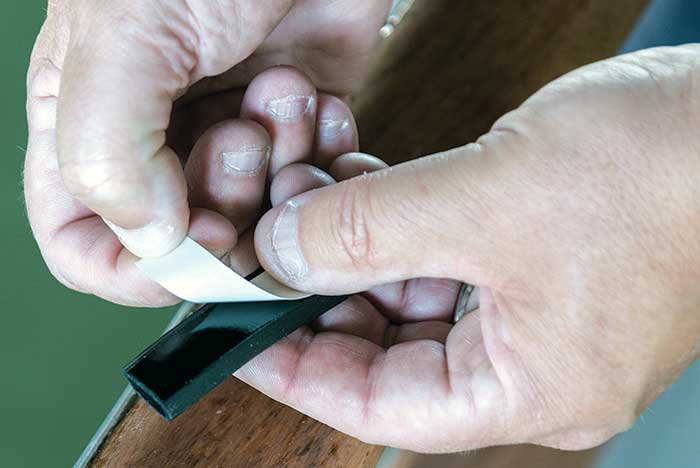
3. The cockpit door on my boat was rattling, so I added a thicker self-adhesive neoprene hatch tape to improve the seal and prevent drips.
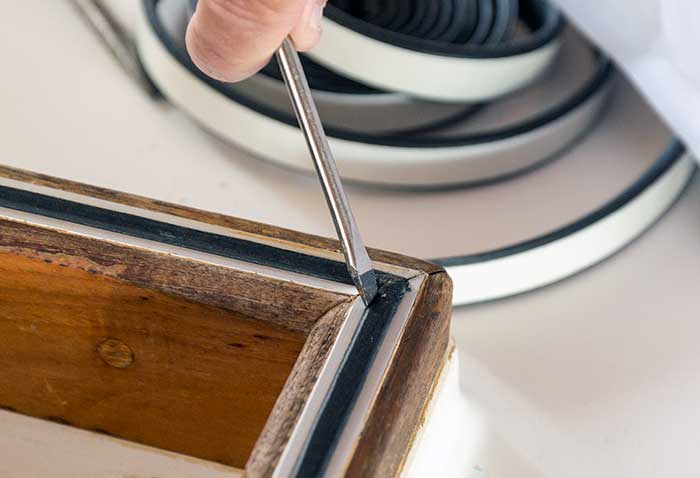
4. Even leaks in custom-built wooden hatches can often easily be fixed. Here, I carefully pry out the old degraded seal before replacing with self-adhesive neoprene hatch tape.
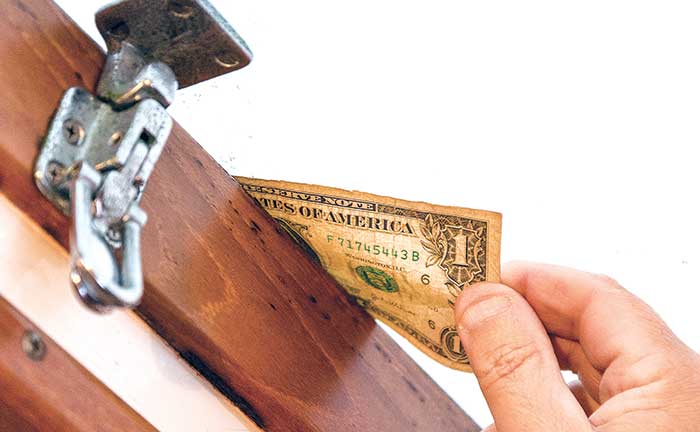
5. Not all leaks are caused by bad seals. One contributing factor is poor adjustment. Many hatches and portlights have adjustable closures and hinges allowing the opening part to close more tightly onto the seal. One way to check is to insert a strip of paper around the edge before closing the hatch. If you can slide the paper out without it tearing, the seal is poor and adjustment may be required.