Advertisement
Here’s what to do and how to troubleshoot if you hear a squeal coming from your alternator belt.
Photos: Mark Corke
You hear what sounds like a squealing noise coming from your engine. Maybe it's been developing slowly. Maybe suddenly. Maybe it's intermittent. Regardless, it may be a warning that your alternator belt is too loose. This usually can be easily diagnosed and should be fixed as soon as possible. You can probably handle the job easily, quickly, and with tools that you have aboard.
First, check the alternator for significant problems. If, for example, the belt is rapidly deteriorating or a mechanical part is interfering with the alternator, shut down the engine if it's safe to do so. Then check for an increase in the DC alternator load. Examples of this could be from 12-volt refrigeration, a 110-volt microwave powered by a battery-fed inverter, or even a wiring short that you'd probably find by seeing "arcing" (sparks or electrical discharge), a burning smell, or even fire. Confirm at the 12-volt panel if possible; if there's excess electrical draw, turn off or fix the device. If the extra loading has occurred before without squealing, or if squealing continues after you turn off the DC load, then it looks like the culprit is a loose alternator belt that needs tightening or replacing.
Keep in mind:
- Fine belt "dust" around or under the belt's path could indicate any of the above or misalignment of pulley wheels, but these particles are normal to a limited extent after lengthy running.
- Misalignment of wheels is usually best determined by removing the belt and putting a straight edge into the center of the grooves. This is beyond the scope of this article and is best dealt with by a qualified mechanic.
Tip
Inspect the belt for cracks on top and inside. If you find them or other signs of excess wear, such as fraying at the edges, replace it.
Belts will often simply stretch over time. The need for periodic belt tightening isn't unusual.
Technical Support
Difficulty: Easy
Tools:- Wrenches
- Pry Device (such as a wooden hammer handle or large screwdriver)
- Digital Multimeter
Time: Approx. 1 hour
Cost: The cost of a new belt, if needed. Around $10–30
Here's how to do it:
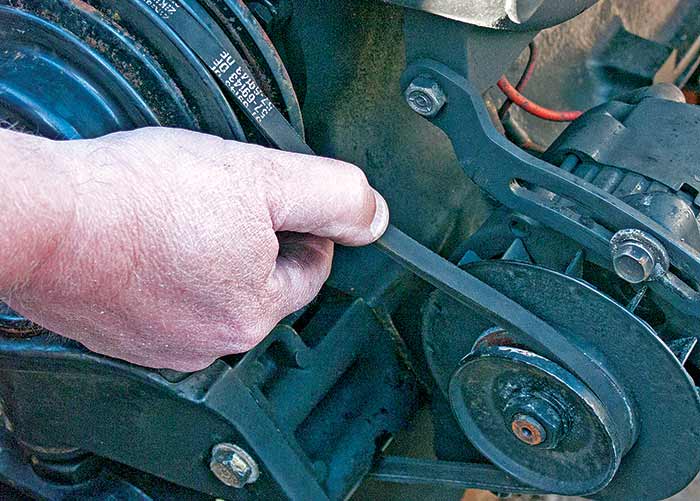
1. With the engine off and cool, use your thumb to depress the top of the belt in the middle of its longest run between the wheels. Typically the belt should depress no more than half an inch; but consult the manual as placement of thumb and distance of deflection may vary. Before beginning, disconnect the battery, and use a volt/ohm meter to confirm that no current is present.
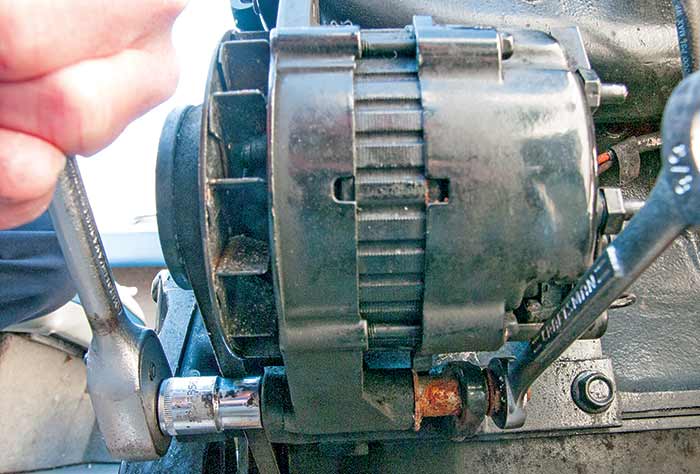
2. Using an appropriately sized box wrench (socket is preferable if there's room), slightly loosen the bolt and nut attaching the alternator to the engine's bracket. A wrench is needed both at the bolt head and its nut end to keep the bolt from turning. Too much play at this fastener will make the next steps a little harder. However, the alternator must still be able to rotate on the bolt.

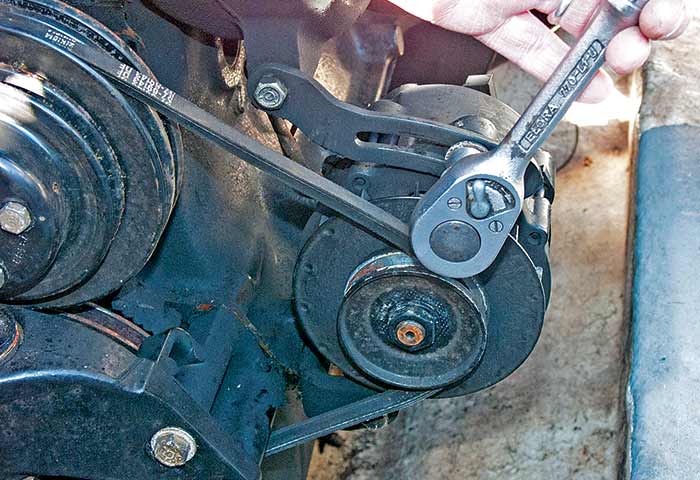
3. Loosen the bolt securing the alternator to the tension-adjusting arm. Some alternators have threads for the bolt in the alternator ear. This requires one wrench.
Others use a bolt and nut and require two wrenches. Loosen just enough so the bolt can move in the adjusting arm's slot, allowing the alternator to move. This slot is typically at the top of the arm. You may also need to loosen the bolt that secures the adjusting arm to the engine to allow the arm to move.
Tip
On some alternators, the adjusting arm slot is at the bottom, and it must move over its loosened engine-attachment bolt. Use a socket wrench and leave it on the adjusting arm bolt (or nut) if you can, and set the socket for clockwise, in order to quickly re-tighten.
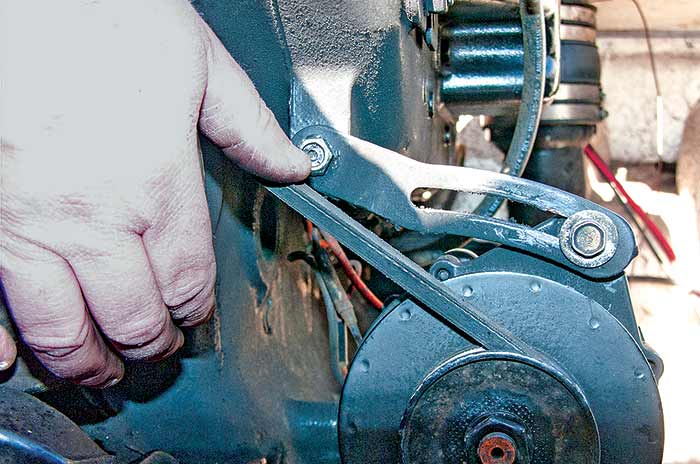
Use a large straight screwdriver, pry bar, or other appropriate tool to tension the alternator against the belt. If you can, use a strong strip of wood or hammer handle if it will fit. Ideal pressure areas will vary with your rig. Don't place the pry on any part of the alternator or engine, which could be damaged by the pressure. It's often best to apply pressure to the alternator's engine mount bracket or the casing of which that bracket is a part.
4. As you pry out until the belt is tight, tighten the bolt through the adjusting arm slot. Then tighten the bolt that secures the alternator to the engine's mounting bracket. Having a helper tighten the bolt while you hold tension on the belt makes this part easier.
5. Check the tension with your thumb; tighten or loosen as needed. As noted, typically a half-inch of play is about right, but check your manual. Snug all bolts and nuts you've loosened. Test run the engine with a load, such as a microwave drawing from an inverter or a DC refrigerator with large compressor. Expect the belt to loosen some with running. A new belt will probably need to be tightened again after several hours of running. If the belt is too loose, it will continue to squeal and cause overheating. If it's too tight, it could damage bearings in the alternator and/ or water pump.
Additional Reading
See our article on Electrical Systems to read more about onboard charging and battery systems.
How To Check Bearings
While the alternator tension is loose, you can remove the belt from the alternator wheel to check for bad bearings if you think this is an issue. These could cause extra strain on the belt and squealing. Spin the alternator and check for rumbling or restricted spinning.
Symptoms also include overheating, burnt belt smell, and excess belt wear. While the engine is running, a good mechanic may determine overheating by touching near the bearings, but the typical boater shouldn't risk getting burned. An infrared heat-sensing gun would help if you know normal operating temperature in that area. Listening with a mechanic's stethoscope would also help if you're familiar with bearing sounds. Bearing issues will probably rapidly worsen and should be dealt with promptly.