Advertisement
Take care of your lifeline to shore to get the most out of it.
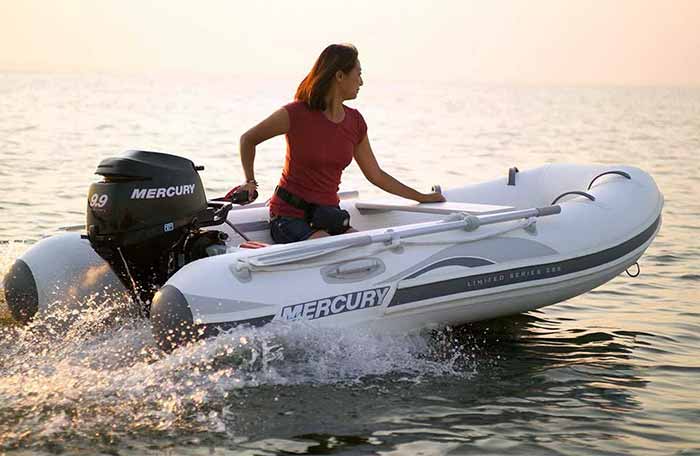
Most boaters prefer inflatables or rigid-bottom inflatables (RIBs), which are often lighter and more stable than hard dinghies and can be deflated for storage or passagemaking. They have the added benefit of being soft, so if you run into anything, like your own big boat, you'll bounce rather than ding. But hard dinghies offer benefits, too. Their keels make them easier to row in a straight line, and you can usually drag them across a beach without damage. Life with a dinghy, whether it's hard or soft, gets easier when you sort out the major issues surrounding the little boats, including towing, guest management, and security.
Tips For Better Dinghy Security
Lock the dinghy and motor while ashore. Ensure that the outboard is secured to the dinghy with a simple lock, with an extended shackle, or, better still, a professional bar lock that covers both outboard screw handles and isn't easy to remove even if someone tries to break the screws. Brass, steel, and Kryptonite bar locks may be purchased at most chandleries.
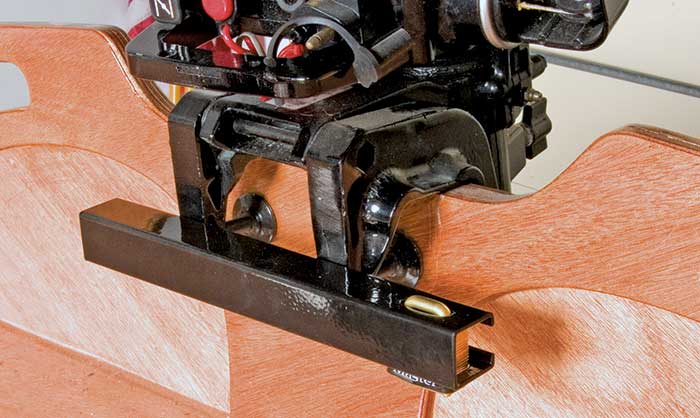
Photo: Mark Corke
Carry a length of cable, with eyes spliced at each end, or chain. Thread this through a hole drilled through the transom, or use some other method to "permanently" attach it to the dinghy. Run it back through an open cleat or some other securing portion of the dock, such as around a beam under the dock. If possible, thread it through the outboard screw handles to secure both boat and engine.
On a boat with davits, always raise the dinghy for the night. On monohull sailboats that don't have davits, lift the dink out of the water with the halyard and tie it to the side at the lifelines. On powerboats, if you must leave it in the water, use a heavy-duty cable and lock to secure the tender and outboard to the mothership. It's safest, though, to hoist the dinghy aboard with a crane or davits. The extra 10 minutes of work at night improves the chances that your dink will still be there in the morning.
Getting Ready To Tow
Much can go wrong when you tow a dinghy. Lines can get fouled, hardware breaks, and the weather may not cooperate. For powerboats with a cradle on the swim platform or, better, a hydraulic platform that lowers below the waterline to scoop up the tender, it's always better to carry the dink. Some motoryachts or sportfishers have a crane to winch the dinghy onto the flybridge or bow; sailboats often have davits, which make quick work of lifting the small boat out of the water. Use them.
For short hops towing the tender, it isn't just about tying the two together and hitting the throttle. First, make sure the tender is empty. Remove paddles, rags, life jackets, and other equipment; store these on the mothership. Shut off and remove the external fuel tank. Check that the plug is installed securely. Under certain circumstances, some boaters prefer to leave the transom plug out on an inflatable. Inflatables don't sink (unless all the chambers pop), and boarding waves or rain can run out that hole in the transom while the mothership is towing. If the plug is left in, the dinghy can fill with water.
Next, remove the outboard. A 60-pound outboard adds too much drag and increases stress to the dinghy transom, tow line, and attachment points. It will slow your progress significantly. If you can't remove the engine, tilt it up and secure it so the lower unit is out of the water. Go SLOWLY.
Your towing bridle, hardware, and line are key. For very short distances, and with a hard dinghy that tracks well and has a padeye on the stem at least 6 inches below the gunwale so the bow rides high, you may be able to get away with attaching a single line directly between the tow and the big boat. For all other tows, especially with an inflatable, rig a bridle. (See Figure 1.)

Figure 1: How To Rig A Bridle For A Safe Tow (Illustration: ©2016 Mirto Art Studios)
The inflatable dinghy should have two glued or welded on stainless-steel D-rings on either side of the bow. Connect the ends of a line to each of the rings so you form a triangle that clears the bow by a few feet. Make sure to first pass this bridle through a bowline on the end of the towing line itself so the bridle can slide side-to-side and keep the weight better distributed between the rings. Now, attach the bridle to deck cleats. Slip a float on each end to keep the bridles out of the water, especially near the big boat's prop.
Bridles to D-rings chafe as they rub against the inflatable's fabric, even if the rings are positioned so that each line is clear of the fabric. Wind abeam can cause the dinghy to ride to the side, and wave action does the same, causing the dinghy to jump about, so rig good chafing gear on the port and starboard bows of the inflatable where line may make contact. You can glue spare cloth from inflatable repair kits in this area. It may also be necessary to secure very soft chafing gear to the actual bridle lines. Two bridles often aren't necessary if there's a cleat located in the middle of the stern on the mothership.
For light dinghies, use at least a 3/8-inch floating line, such as polypropylene, or you can use Spectra or Dynema webbing. In case you forget the tow and back up, a floating line should lessen the risk of wrapping the prop. Though, even with this precaution, prop wash may suck the line down.
To help the dinghy track better, attach the bridle as far down on the bow as possible, although this may be limited by the position of the D-rings. Sometimes a dinghy being towed will overtake the mothership as it surfs down a following sea, particularly in a strong following wind. This can cause sharp jerking on the tow line, collisions with the mothership (a serious problem with hard dinghies), the sinking of the dinghy, or situations in which the tow line passes under the mothership, possibly to snag in the rudder or in the prop(s). (See Figure 2.)
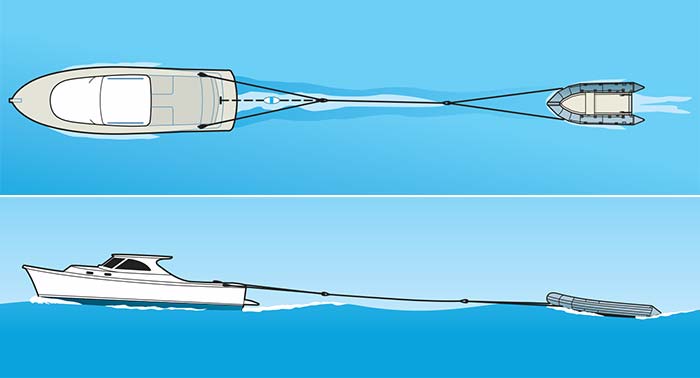
Figure 2: Tow At The Center Of Mothership's Wake. The big and little boats should be in sync, riding the crests and troughs of waves at the same time. In open water, longer lines will create a catenary to lessen shocks when the two boats come out of sync. (Illustration: ©2016 Mirto Art Studios)
5 Basics For Guest In Dinghies
1. Loading And Unloading
Don't assume everyone knows how to get in and out of a dinghy. You may be carrying children, older folks, or people who've just never done it. First, secure the dinghy painter to the mothership. Next, when people are boarding, stress the importance of stepping down all the way into the floor of the dinghy, toward the middle, and sitting pronto; don't have them step on the inflatable tubes or on the gunwales of a rigid dink. Everyone's center of gravity should be kept low from the second they board; keep people seated underway.
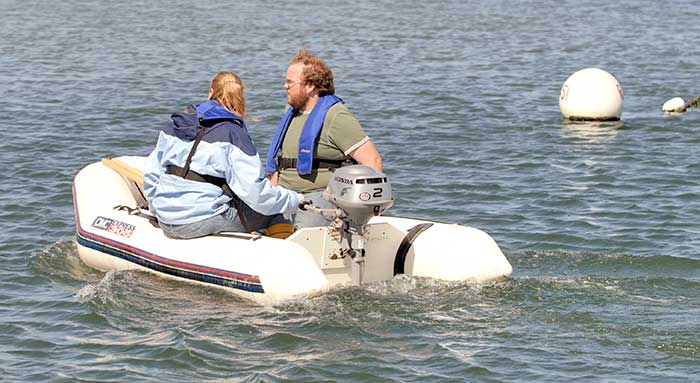
Photo: Mark Corke
2. Beach Landings
If beach landings are the only way to come ashore, explain beforehand what will happen. Time your ride to surf in with a wave, and pull the motor up before it grounds. Have your strongest passenger jump out first and pull the dink into shallow water, then everyone can hop out, grab a handhold, and pull the dinghy onto the beach quickly. Proper water footwear with straps is important.
3. Night Moves
Finding your boat in the dark can be a challenge. Ask everyone to keep the flashlights off to preserve your night vision until you get near the boat and are ready to tie up and unload. A solar garden light tied to a stanchion provides an inexpensive nighttime marker low on the mothership at the height where people in a dinghy are usually looking. Also, battery-powered LED lights in various colors, such as blue, can be suspended from dodgers or towers and won't drain your onboard energy reserves. Make sure lights such as these don't conflict with lighting required by the Navigation Rules.
4. Nav Lights
Most tenders require only a 360-degree white transom light when running at night. If your dinghy exceeds a speed of 7 knots or is more than 23 feet long, you’ll need red and green bow lights along with a white stern light.
5. Davit Dilemma
Although dealing with davits may be second nature to you, for guests, it's all new. If you ask others to help you raise or power the tender, caution them to keep fingers and long hair away from any blocks or pinch points that could cause injury. Wrap davit lines around a winch or cleat to help hold the dinghy's weight. Dinghies, especially with outboards, are heavy, and too often guests lose control of the line and drop the boat abruptly. Advise that both ends should be raised or lowered evenly and that the drain plug needs to be in before the boat goes in the water. It also must be taken out after the boat is up. If the boat were to fill with rain, the weight could be far too much for the davits. If the big boat has its exhaust aft above the waterline, turn the engine off before lowering the dink and filling it with hot water. Stress the importance of loosely tying the painter to the mothership before unclipping the davit lines.
Ready For Arrival
Just before you arrive at the harbor, marina, or anchorage, pull the dinghy in close before conducting any backing or docking maneuvers. First, bring the mothership to a slow stop, lessening the strain on the line and protecting your hands. Then hand-over-hand the tow line into the boat. It's a good idea to wrap the line around a winch or cleat to lessen the strain on your hands. Bring the tender up close — on the transom, if you're going into a two-finger slip, or up on the hip of the mothership, if you're anchoring or side-tying. Tie it on a short tether.
It's usually best to tie it bow and stern to the hip of the mothership to maintain better control. Towing through a harbor should never involve a long line like what you'd use in open water; it creates a hazard for other boats as well as for your tender.
Towing a dinghy is not a "set it and forget it" procedure. Make sure to look back regularly to check on it, especially if the wind picks up or sea state deteriorates. If the dink ships water from waves or rain, it will increase drag quickly. A 4-foot by 8-foot dinghy with only a few inches of water covering the bottom translates to hundreds of pounds of weight/drag/stress on dinghy D-rings, slow progress, and fuel inefficiency. It's also possible for a dinghy to flip over and submerge the motor or engine or even break loose, so keep a watchful eye on your tow at all times.
Finally, consider your towing speed. Don't tow a dinghy so quickly that it becomes airborne. Never tow in questionable conditions. If you absolutely must tow, start slow. Powerboaters may be tempted to get a planing hull up to speed; this will put extra pressure on every piece of this puzzle. Don't do it. Never tow a dinghy on long passages.
Critical Equipment And Advice
Never overload your dinghy, or you'll swamp it. Check your dinghy's capacity plate, and stay below the weight limit.
Put together a bag of essentials to take with you in the dinghy. An open-mesh bag works, and it can be secured under the middle seat with bungees, where it's easily accessed but not underfoot. Include:
- Bailer to offload rainwater or seepage from a slow leak. A cut-off plastic bleach or gallon water bottle with the lid screwed on works and provides a built-in handle.
- Hand pump for ejecting more water more quickly
- Mirror to signal for help in an emergency
- Extra drain plug
- Spare outboard key
- Baseball cap, sunscreen, and spare drinking water
- Life jackets for the number of people using the dinghy. Add extras for guests and properly sized ones for kids, and wear them.
Everyone in the dinghy should be wearing a life jacket while the boat is underway. Many dinghies move at a fast clip, and guests especially are vulnerable to falling overboard.
Every dinghy needs to be equipped with paddles, which are essential backup.
It's a good idea to bring the following, because even a short trip to a nearby boat can go wrong if the motor dies and the tide and/or wind sweeps you away:
- Waterproof flashlight, in case you return in the dark or need to read your combination lock. Check these batteries at least once a month.
- VHF and/or a cellphone, all in a drybag
- Extra set of boat keys
- Personal location beacon
- Extra length of line to extend the painter and tie to a tree or rock ashore.
- Two rags: one for wiping down, one for keeping gas spills contained when refilling the outboard.