Advertisement
Bringing a new look to an outdated dash makes for an interesting off season project.
It was a fairly complicated project but the end result looks fantastic and adds functionality and an air of sophistication to the dashboard.
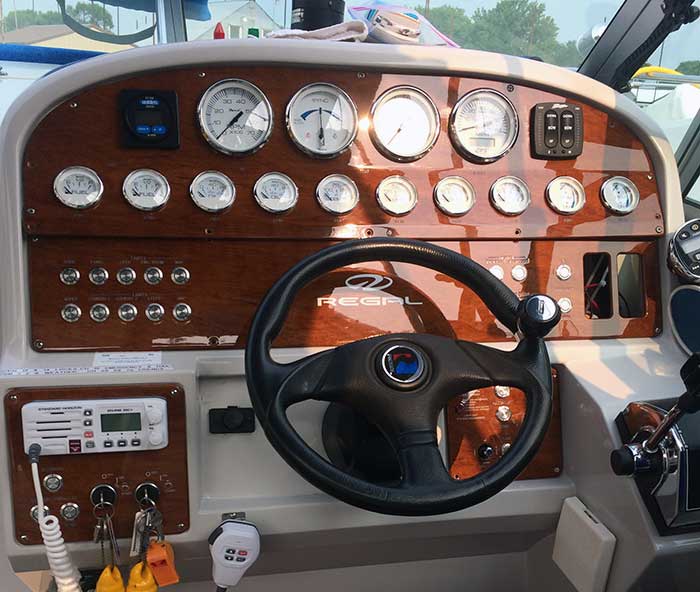
I own a Regal 320 that was built in 1993 and although the boat is in great shape, the dashboard at the helm looked a little dated. I wanted to update the look of the dash and at the same time reorganize the switches into a more logical arrangement, so I decided to replace the existing aluminum dashboard with something a little more stylish.
It was about this time that I went to one of the fall boat shows and came across the BocaTech booth. This company manufactures and sells resettable illuminated push-button switches, the perfect compliment to the modern look that I was after. I also needed new dash panels to mount everything in so I ordered mine from a company in Florida who cut mine from faux woodgrain material using a CNC machine.
I estimate that I spent about 30 hours in total on the project — not only does the dash look more modern, but time spent in the planning stage paid off with placement of vital equipment located to best advantage.
Technical Support
Degree Of Difficulty: Moderate to difficult
Tools:- Screwdrivers
- Pliers
- Crimpers
- Wire Strippers
- Multimeter
- Camera
- Notepad
Time: Depends on the complexity of the panel. Mine took about 30 hours in total
Cost: Approximately $400
Plan Ahead
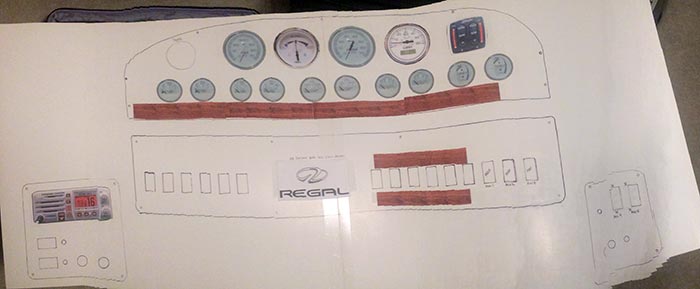
The first thing before I did before taking anything apart was to take several pictures of the dashboard. Although all the switches and dials would be getting replaced, taking note of where everything was on the original dashboard helped immeasurably later on. There was no logical layout to the original, plus equipment had been added over the years so I made a full size drawing of exactly how I wanted the new panels to look. Sending this off to the panel manufacturer along with very accurate measurements meant no surprises later.
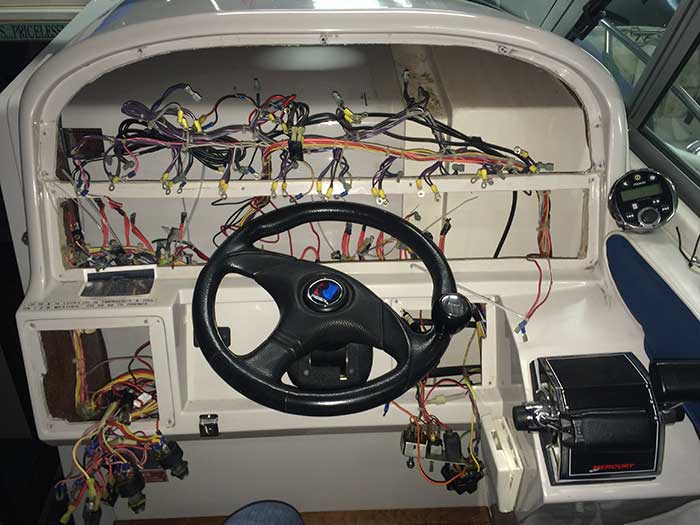
After removing the old dash I made certain to take lots of pictures, make sketches and label every wire very clearly so that I could put it all back together when the new panels arrived.
With the trial fitting out of the way, I got stuck into the rewiring. Using mini resettable push button switches that incorporate a circuit breaker simplified the wiring. All connections were made using proper crimped connectors covered with a length of heat shrink tubing to keep moisture at bay.