Advertisement
How to Splice Three Strand Rope
Today you can buy dock lines and anchor lines with an eye already spliced into one end, but this is more expensive than buying the same line off a spool. It also forces you to buy your line in one of the available lengths. Putting in your own eye splice can be a better option. A splice you put in yourself will be just as strong as one done by a professional rigger, and splicing an eye into three-strand rope is really very easy.
All dock lines should have an eye splice in one end. The dock lines for your home slip should have an eye in the boat end of the line just large enough to fit over the horns of the boat's mooring cleats. For transient dock lines you carry aboard, the eye is in the shore end. This is so you can adjust the lie of the boat from on board. Twelve inches is a good eye size for transient dock lines, making it easy to pull the line through the eye to form a loop.
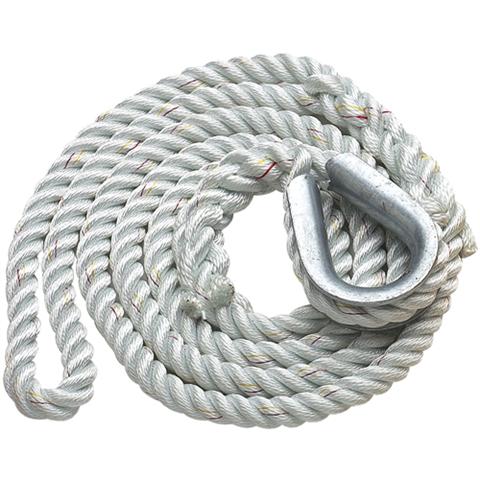
Anchor lines also require an eye splice, in this case around a metal thimble so the line can be shackled to the chain lead on the anchor. The thimble protects the line from chafe. When the "business end" of an anchor line begins to show the effects of rubbing on the bow chocks and across the bottom, you can extend its life by reversing it end-for-end — yet another reason for knowing how to make an eye splice. A knot is a poor substitute for a proper splice. A bowline, for example, reduces the breaking strength of a line by about 40% while a splice retains 95% of the rope's strength.
Step 1: Tape the ends
Cut rope will have been sealed with a hot knife to prevent the ends from unraveling. To make a splice, you need to unravel a short length of one end, but you do not want the individual strands to unravel. Put a couple of wraps of masking tape around one end of the rope and slice through it with a sharp knife to cut off the melted end. Untape the rope and tightly tape the ends of the three individual strands.
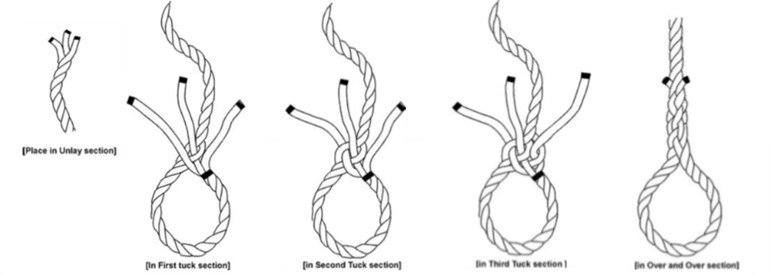
Step 2: Unlay the strands
Pick one strand — it doesn't matter which — and unwind it, making eight revolutions around the other two. Tape the rope tightly just below where this "loose" strand joins the others. Now untwist the other two strands.
Step 3: The first tuck
How to Braid a Rope
Form a loop in the rope the size you want the eye. The splice begins at the wrap of tape on the rope, so this marks the closing point of the eye. If you are doing an anchor line, make the loop tightly around the thimble. I generally secure the thimble in position with a wrap of tape on each leg.
With the loop formed and the unlayed end on top of the standing part and pointing away from you, fan the unlayed strands naturally, i.e., with the center strand leading directly away from you, the right strand spread to the right, and the left strand spread to the left. Commit to memory that the first tuck is always the center strand and you will avoid confusion in the future about the start of splice. Lift a strand on the standing part of the rope at the point where you want the eye to close and tuck the center strand under it. On smaller and/or soft-lay rope you will be able to make the tucks just using your fingers. Large, stiff, or old line may require use of a fid or marlinespike to open the strands in the standing part of the rope.
Pull this first tucked strand all the way through so that the eye is closed, but don't pull so hard that you distort the lay of the line.
Step 4: The second tuck
The second tuck is always the left-hand strand. The strand on the standing part it goes under is the one above the one you just tucked the center strand under. I remember "left-above" to keep me straight. Again, pull all of the loose strands through.
Step 5: The third tuck
This is where you are most likely to go wrong, so be careful. If the left strand goes under the "above" strand, then the right strand must go under the below strand. The confusion is not which strand, it is which direction. All tucks go right to left. The easy way to avoid doing this wrong is to flip the eye over to tuck the third strand.
Once this third tuck is made, pull on all three strands in turn to snug the closure of the eye evenly.
Step 6: Over and under
The rest is easy. Pick one strand and tuck it under the strand on the standing part that is two above the one it is already under. In other words, each strand goes under one strand, over the next one above it, then under the next above that. Tuck each loose strand in turn, one tuck at a time. Turning the rope counterclockwise about a third of a turn after each tuck will help you keep the sequence and the strands straight.
Give each strand a total of six tucks. Once all of the tucks are completed, place the splice on the floor and roll it back and forth under your foot to smooth it. Then loop the eye over something and put a strain on the line. Cut off the projecting "tails' of the strands and the splice is finished.
Tapering is optional
Some boaters prefer to end the splice with a taper. This is accomplished by cutting out about a third of the yarns in each strand before their final tuck. When the remaining tails are clipped after the final tuck, the result is a splice with a somewhat nicer appearance. Tapering is a strictly cosmetic practice, having no impact on the strength of the splice.