Advertisement
Everyone can use a refresher on how to tie a line, and how to coil a line — so that everything stays secure and neat.
Through most of the age of sail, ships and their spars were made of wood and all rigging, running and standing alike, was made of rope. To connect it all together, riggers and seamen devised hundreds of knots, bends, hitches, and splices. Because dock lines and most of the sail-control lines on sailboats are made of rope, you still need to know a few basic but versatile knots. A common characteristic of the knots we present here is that they are easy to tie and relatively easy to untie (some more so than others) even after they have been under load. Knowing these knots will make life afloat easier and safer.
A Few Simple Boaters' Knots
A whole subset of language has developed around rope and the countless ways in which it can be tied. Knots, bends, and hitches are used to tie rope to itself, to other ropes, and to solid objects; splices involve using the component parts of the rope itself to similar ends. Any serious boater should have a book of knots in his or her library, but here we'll stick with a few common terms that aid in describing how to make the basic boaters' knots.
When you're making a knot, the length of rope you hold in your hand is called the working part. The end of the rope you're working with is called the bitter end. The rest of the rope, between the working part and its other end, whether it's faked at your feet or tied to something on the boat, is called the standing part.
Bowline
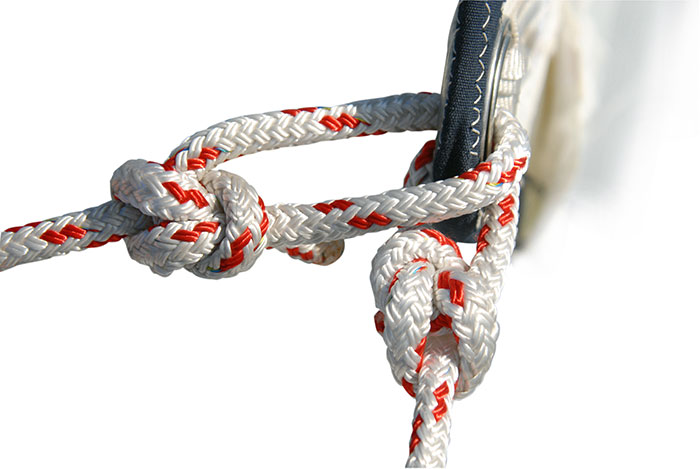
One of the most beautiful and useful boaters' knots is the bowline (pronounced BO'lin). The bowline forms a temporary eye, or loop, in the end of a line.
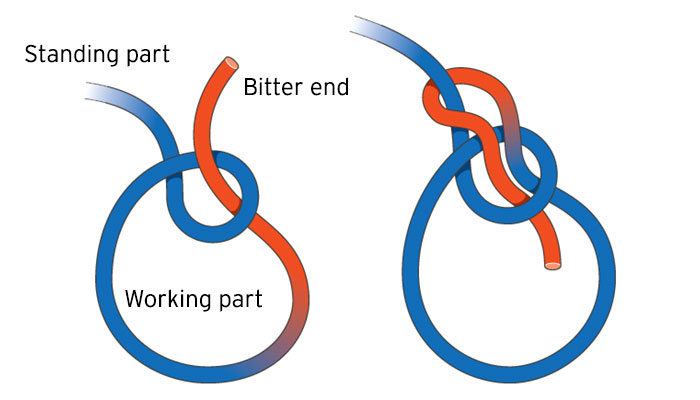
1. Make a small hole with a twist of the line so that the working part lies on top of the standing part. (In a popular method of teaching a bowline, this is the rabbit hole.") How far from the bitter end you make this hole dictates how big the finished knot's loop will be.
2. Pass the end up through the loop, under and around the standing part, and back down through the loop. (The rabbit comes up the hole, around the tree, and back down the hole again.)
3. When attaching a jib sheet to the clew of a jib, between stage 1 and stage 2, pass the bitter end through the clew ring.
Figure Eight
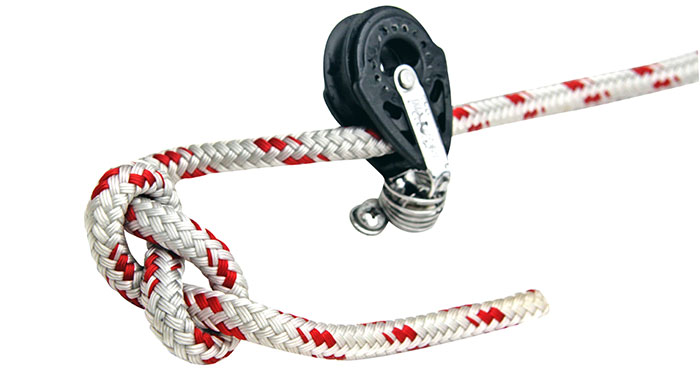
This knot is fun to tie and can save you a lot of hassle. It's commonly tied at the bitter end of halyards and sheets to prevent them from getting inadvertently pulled out of the blocks, fairleads, and jammers they've been led through. Like its cousin, the common overhand knot, the figure eight is bulky, and serves well as a stopper knot. Unlike its cousin, it is easily untied.
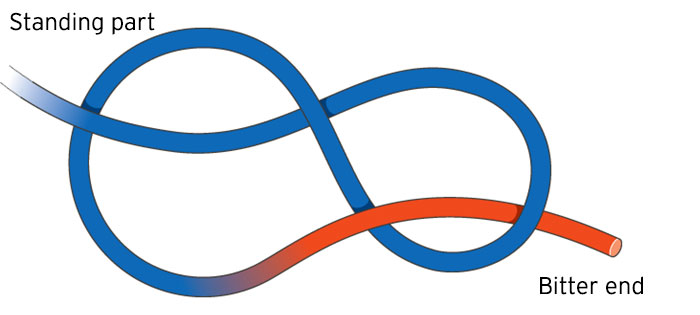
1. Make a small loop near the end of the line. (Once the knot is complete, it's nice to have about six inches between it and the bitter end. This extra line gives you something to grab onto and ensures the knot won't come undone accidentally.)
2. Pass the end of the line around the standing part and then back up and through the loop.
3. Pull both ends tight to firm up the knot.
This is a very easy knot to tie and once you've done it a few times, you'll figure out your own way of doing it.
Cleat Hitch
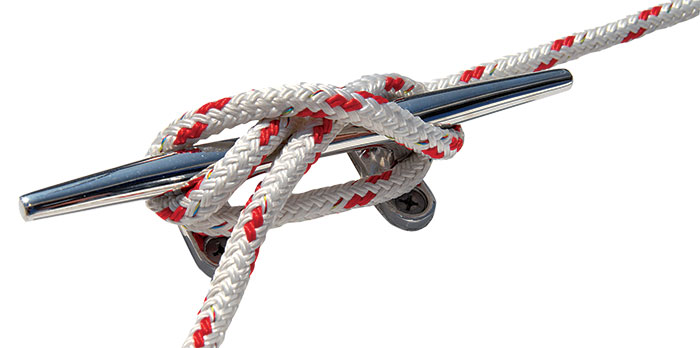
Many working lines on a boat are secured on a horn or T cleat with this hitch. You will also use it to tie mooring lines to dock cleats.Sometimes when tying a cleat hitch,Illustration of how to tie a cleat hitch knot there will already be load on the standing part of the line. The job of the hitch is to transfer that load from your hand to the cleat.
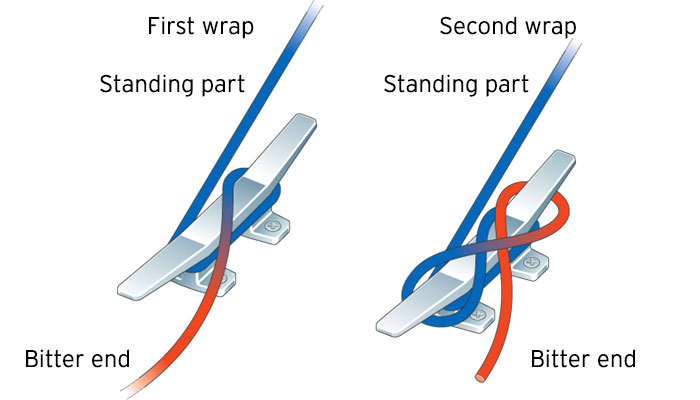
1. Take a full turn around the base of the cleat so that the working part (in your hand) has passed under both horns. (If you expect a lot of load on the line and the cleat is big enough, add another half-turn on the base for good measure.)
2. Wrap the working end up and diagonally across the top of the cleat and under the opposite horn.
3. Bring the end back diagonally across the first wrap (making an "X" over the center of the cleat). You can visualize steps 2 and 3 as making a figure eight around the cleat.
4. Repeat 2, but this time, tuck the working part under itself to make the hitch.
When you become adept, you'll flick the "locking tuck" in with a quick twist. If the line in question is one that will be watched and adjusted frequently (like a jib sheet), you could forgo that final locking tuck and instead simply add another full wrap or two around the base of the cleat.
When the rope is made with materials like natural fibers, a highly loaded cleat hitch could bind so hard the only way to undo it is with a knife. Conversely, some modern synthetic ropes are so slippery that a simple cleat hitch won't hold. The solution to both problems is the same: Take another turn or two before making the locking turn.
Coiling A Line
Start at the working end, near the cleat, and take the line in one hand. You start at this end so any kinks will shake themselves out as you coil toward the bitter end. Move your other hand along the line until your hands are some intended distance apart — the longer and thicker the line, the greater the distance — and grasp the line at that point.
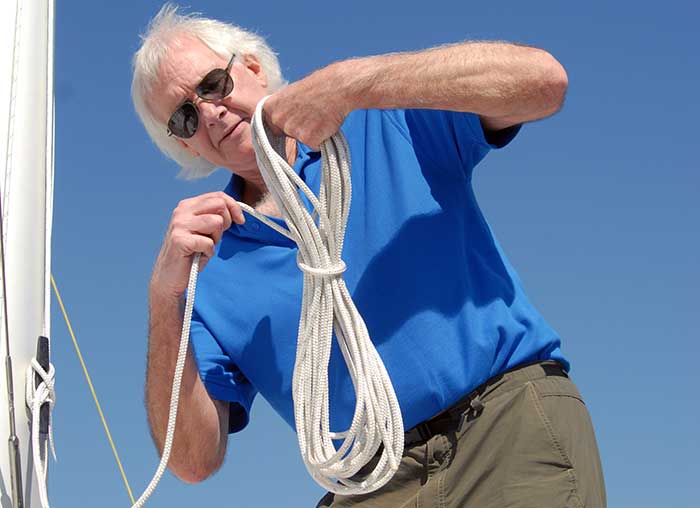
Bring your hands together and transfer the point of the line held in your second hand to your first hand. You will now have a loop of the intended size of the coil.
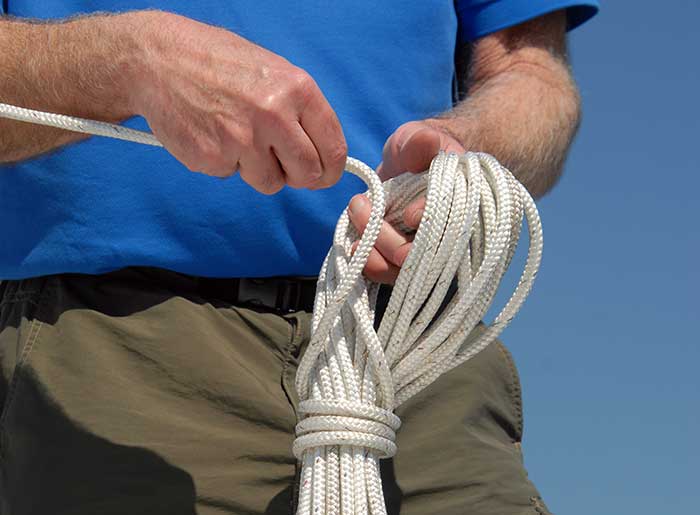
Repeat the process until you have coiled the whole line into loops of equal length and are holding them in your first hand. If you have a sailboat, and this is the jib sheet or mainsheet that is in use, you may simply lay the unfinished coil on deck at this point — making sure the bitter end doesn't go through the center of the coil and turn it all into a big knot!
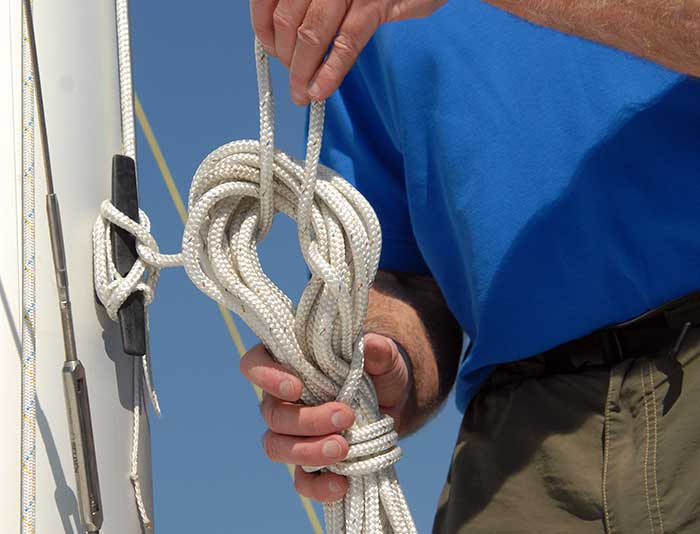
You can tie the coil in a number of ways (and some skippers are particular about this), all of which require you to circle it. An easy way is to take the standing part, between the first loop of the coil and the cleat, and wrap it tightly around the coil, from the bottom toward the top. Three or four wraps should suffice, with the finishing wrap about a quarter of the way down from the top of the coil.
After the last wrap, grab the standing part just below the cleat and pull it through the coil. You now have a coiled line with its own hanger.